 Create a new table area
A table area is used to create a table, registry and combined data entry forms.
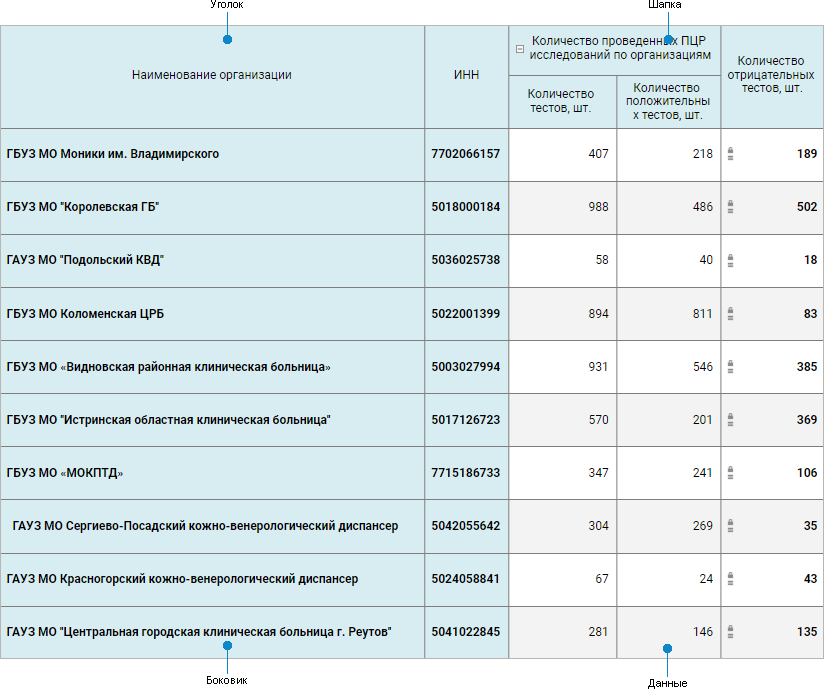
A table area includes the elements:

Creating and editing is executed by means of the table area editor, in which table area structure is set up.
The table area structure of data entry form is built on indicators and dimensions.
Indicators are multidimensional data united by common analytics attributes that are used to collect, store and display information from one subject area. Any of available cube types or time series database can be selected as an indicator.
Dimensions are repository dictionaries, which multidimensional indicator structure consists of.
NOTE. If parametric dictionary with linked attributes is used as a dimension, table area considers parameter settings in link.
All dimensions are divided into the following groups:
Shared dimensions are dimensions, which exist in all indicators added to table area.
Private dimensions are dimensions, which do not exist at least in one of the added indicators.
Dimensions and indicators are used to create sidehead, heading and data area of table, they are also set up by means of the table area editor.
Table area setup consists of the following stages:
If creating a table area does not allow for executing its full setup, then to save already determined settings, execute the primary setup of table area. To do this:
Make sure that:
For a registry form: at least one dimension is added to the Sidehead area, and the same dimension is added to the Indicator area.
For table or combined form: at least one indicator is added to heading and one dimension is added to sidehead, and the number of elements displayed in heading is limited.
Click the Add button to create a table area on a sheet.
The next table area setup is made on its editing.
After the table area is set up, follow the step if required:
To delete table area, select the table area cell and click the  Delete button on the Data toolbar tab.
By default, table area corner does not display header. To display header, use context menu of the corner or set up cell contents formatting:
Do not Show Name. Nothing is displayed.
Custom Text. Text entered by the user is displayed. It is applied to the entire corner.
Name from Heading/Sidehead. Select the header type:
Dimension. Dimension name is displayed.
Attribute. Dimension attribute name is displayed.
Dimension.Attribute. Attribute and dimension names are displayed.
Custom Name. Name edited by the user is displayed. When a custom name is enabled for at least one corner row or column, all corner cells become editable. It is set up for each corner column and row. When toggling to the attribute/dimension name display option, the custom name is reset.
See also:
Building Data Entry Form | Working with Ready Data Entry Form