
To set up data entry appearance:
Set up display type.
Set up formatting.
NOTE. Data entry form formatting setup is related to table area custom settings. When viewing ready data entry form one can save the configured data entry form formatting.
To enhance data visualization capabilities and data entry form functions, in the designer of business applications connect plugins. Plugins can be connected on separate sheets of data entry form.
After the setup is finished, go to the next step if required:
To set up form display type, follow the steps:
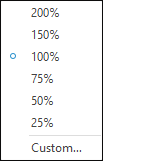
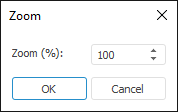
Set up zoom.
Set up layout.
Set up size of rows and columns.
Set up displaying of working area elements.
To set up, use the View ribbon tab:
 Show or hide graphical interface elements
To set up form formatting, follow the steps:
Set up text format.
Set up fill and borders.
Set up number format.
Set up cell formatting.
NOTE. Formatting setup is available only in the desktop application. When viewing a data entry form, tab appearance depends on the IsUserDataEnabled parameter contained in the registry key [HKEY_CURRENT_USER\Software\Foresight\Foresight Analytics Platform\10.0\Reporter\Options].
To set up, use the Format ribbon tab:

To set up format of a specific form area:
Select type in the drop-down list in the Current Fragment group.
Select a cell or a cell range. Depending on the area type to which belongs cell or cell range, the box of the drop-down list in the Current Section group is filled.
Select type in the drop-down menu of the  button by selecting cell or cell range.
Available area types: corner, sidehead, heading, data, selected area, all table, dimension, level, element, indicator, selected columns, numbering by columns, numbering by rows.
The order of applying formatting parameters:
Entire table. The lowest priority.
Data.
Dimension.
Level.
Element.
Indicator.
Selected columns. The highest priority.
For areas: dimension, level, element - one can set up different formatting for headers and data. To do this, use the Headers/Data buttons in the Current Fragment group. Only one button can be hold, on clicking one button, the other is automatically released. The Data button is pressed by default.
NOTE. The formatting setup is unavailable for private dimensions.
On data formatting, heading areas have higher priority than sidehead areas.
If sidehead or heading display several dimensions, formatting settings for data apply only if they are set for:
Rightmost dimension in the sidehead.
Bottom dimension in the heading.
NOTE. On tucking, the area type and formatting of tucked dimension element will change to area type and formatting of dimension element to which tucking is executed.
The order of applying formatting for headers:
Sidehead/heading. The lowest priority.
Dimension header.
Level header.
Element header. The highest priority.
Formatting settings of headers are saved in the same way as all other formatting settings.
Formatting settings of table area are applied after form update.
To cancel the use of selected formatting for an area, click the ![]() Reset Style button of the Formatting group, the button becomes active after formatting setup.
Reset Style button of the Formatting group, the button becomes active after formatting setup.
The <Indicator Name> area is available for heading cells of table area.
The formatting is applied for elements of selected indicator. On adding elements to selection, the formatting will be applied to added elements.
The formatting is available on displaying indicator name. If name is hidden, the formatting setup will be unavailable. If the style is defined previously, it will be applied but note that this style cannot be reset.
The Selected Columns area is available for table area heading cells.
Formatting is applied for columns, to which selected cells belong.
Formatting priority of the Selected Columns area is higher than for all other areas.
If heading has several cells, the formatting priority is higher for the lower row.
The Selected Area area is available for the cells:
of the sheet.
of the table area.
Selected cells are formatted.
When formatting table area, use the Selected Area type only if on building a table area the Use Sheet Formatting checkbox is selected.
See also:
Getting Started with the Interactive Data Entry Forms in the Web Application | Building Data Entry Form | Working with Ready Data Entry Form

 100% button.
 Freeze Areas button.
 Fit Row Height/
 Fit Column Width buttons.
 Process Tree button of the Panels group.
 Fill on the Format ribbon tab. Select fill color in the button's drop-down menu.
 Border button on the Format ribbon tab. Select border type and its color in the button's drop-down menu.
 - conversion to currency format. To select currency, use the drop-down menu of the button.
 - conversion to percentage format.
 - conversion to number format and displaying two decimal places after point.
 - decreasing or increasing the number of decimal places. It is used to display less or more precise values.
 Set Formatting button of the Formatting group. Dialog box tabs include advanced settings presented on the Format ribbon tab.