To set up a pixel-perfect report:
Select report sheet. Page settings are determined on opening regular report for edit for each sheet, except for report title parameters.
After executing the operations the report is ready for printing.
NOTE. Regular reports and data entry forms use equal commands and dialog boxes for setting up pixel-perfect report.
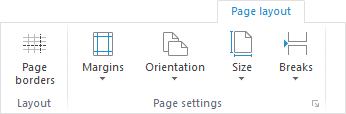
To execute quick setup page parameters of an active report sheet, open the Page Layout tab of the ribbon:
The following can be set up quickly:
Page Borders. Click the ![]() Page Borders button to view sheet page borders output for printing and/or export. After executing the operation, the active report sheet displays page breaks as a dotted line. Page borders are set depending on the orientation, margin width, page size, and breaks.
Page Borders button to view sheet page borders output for printing and/or export. After executing the operation, the active report sheet displays page breaks as a dotted line. Page borders are set depending on the orientation, margin width, page size, and breaks.
Margins. Click the ![]() Margins button to select margin width option in the button's drop-down menu:
Margins button to select margin width option in the button's drop-down menu:
Normal Margins.
Wide Margins.
Narrow Margins.
To execute advanced setup of margins, select the Set Up Margins item in the button's drop-down menu. After executing the operation, the Page Settings dialog box opens on the Margins tab.
Orientation. Click the ![]() Orientation button to change page orientation option in the button's drop-down menu:
Orientation button to change page orientation option in the button's drop-down menu:
Portrait.
Landscape.
Size. Click the ![]() Size button to select page size in the button's drop-down menu. The menu contains predefined paper size options, for example, A4, A5, and so on.
Size button to select page size in the button's drop-down menu. The menu contains predefined paper size options, for example, A4, A5, and so on.
Breaks. Select the cell that will be the upper left cell of a new page border, and select the Insert Break item in the drop-down menu of the ![]() Breaks button to display specific sheet data on one page. After executing the operations, page breaks are displayed as a solid line, and page borders are automatically enabled.
Breaks button to display specific sheet data on one page. After executing the operations, page breaks are displayed as a solid line, and page borders are automatically enabled.
For details about setting up page breaks see the Setting Up Page Breaks section.
To execute advanced setup of active report sheet page parameters, open the Page Settings dialog box using the main menu item:
Report > Print > Page Settings in regular reports.
Data Entry/Output Form > Print > Page Settings in data entry forms.
The Page Settings dialog box opens:
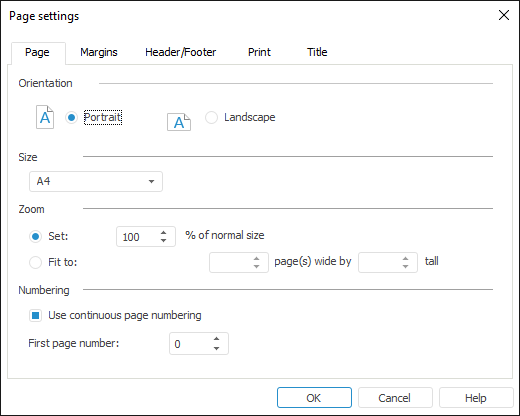
To set up print, use the dialog box tabs:
Page. It is used to determine general page settings.
Margins. It is used to set up page margins.
Header/Footer. It is used to set up page headers and footers.
Print. It is used to set up print options.
Header. It is used to set up report title.
See also:
Getting Started with the Reports Tool in the Web Application | Building Report