Put the cursor to the cell that will be the top left cell of a new page border.
Click the ![]() Breaks button in the Page Settings group on the Page Layout ribbon tab.
Breaks button in the Page Settings group on the Page Layout ribbon tab.
Select the Insert Break item in the drop-down menu of the Breaks button.
Setting up page breaks is available only for table sheets on opening regular reports or data entry forms for edit.
To display particular sheet data on one page, set up vertical and horizontal page breaks:
Put the cursor to the cell that will be the top left cell of a new page border.
Click the ![]() Breaks button in the Page Settings group on the Page Layout ribbon tab.
Breaks button in the Page Settings group on the Page Layout ribbon tab.
Select the Insert Break item in the drop-down menu of the Breaks button.
After executing the operations, page breaks as a solid line are displayed for active report sheet, and page borders are automatically enabled.
NOTE. On adding a custom page break, automatic sheet division into pages is set depending on page settings and page margins.
It is available to add several page breaks to one sheet.
To remove one page break:
Put the cursor to the cell that is the top left cell of the page break.
Click the ![]() Breaks button in the Page Settings group on the Page Layout ribbon tab.
Breaks button in the Page Settings group on the Page Layout ribbon tab.
Select the Remove Break item in the drop-down menu of the Breaks button.
After executing these actions the current page break is removed.
To remove all page breaks:
Click the ![]() Breaks button in the Page Settings group on the Page Layout ribbon tab.
Breaks button in the Page Settings group on the Page Layout ribbon tab.
Select the Reset Page Breaks item in the drop-down menu of the Breaks button.
After executing these actions all page breaks are removed. Automatic page division depending on page settings and page margins is restored for the report sheet.
Consider an example of the report sheet, for which page breaks are displayed:
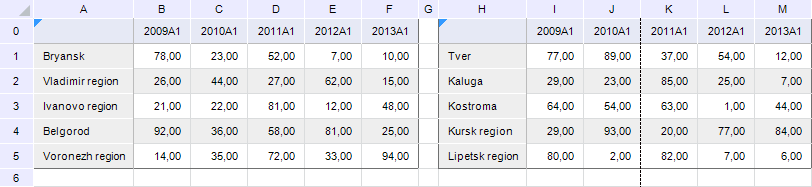
As it is seen from the figure, the automatic vertical border (dotted line) is displayed between the J and K sheet columns.
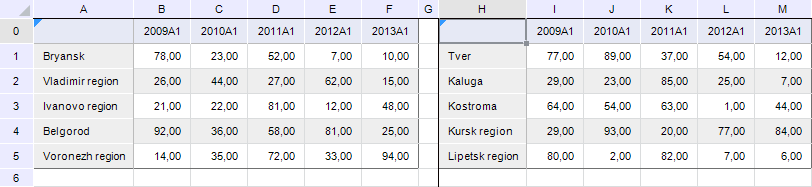
Set page breaks for this sheet in such a way that the second data area is located on a separate page during print or export. To do this:
Put the cursor to the H0 cell that will be the top left cell of page border.
Click the ![]() Breaks button in the Page Settings group on the Page Layout ribbon tab.
Breaks button in the Page Settings group on the Page Layout ribbon tab.
Select the Insert Break item in the drop-down menu of the Breaks button.
The report sheet with set page breaks looks as follows:
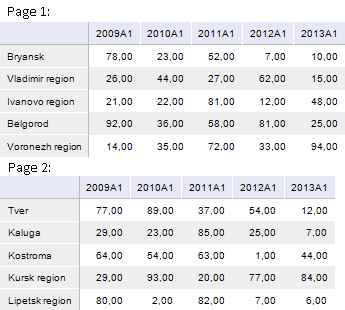
On print and/or export, data areas located on the report sheet are output on separate sheets:
TIP. If data width and/or length is too large to fit one page, set up displaying of through columns and/or rows.
See also:
Getting Started with the Reports Tool in the Web Application | Setting Up Pixel-Perfect Report | Building Report | Working with Ready Report