 Create a new
table area
Create a new
table areaA table area is used to create a table, registry and combined data entry forms.
NOTE. The table area setup cancellation at any stage will lead to reset all executed settings. To save entered settings, made primary setup of table area.
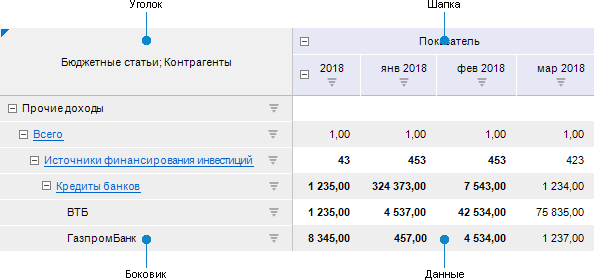
A table area includes the elements:

To create and set up it, use the Table Area Wizard dialog box where basic properties and table area structure are set up.
The table area structure of data entry form is built on indicators and dimensions.
Indicators are multidimensional data sets united by common analytics attributes that are used to collect, store and display information from one subject area. Any of available cube types or time series database can be selected as an indicator.
Dimensions are repository dictionaries, which multidimensional indicator structure consists of.
All dimensions are divided into the following groups:
Shared dimensions are dimensions, which exist in all added indicators to table area.
Private dimensions are dimensions, which do not exist at least in one of the added indicators.
Using dimensions and indicators, sidehead, heading and data area of table are are generated, they are set using the Table Area Wizard dialog box.
Table area setup consists of the following stages:
If on creating a table area it is not possible to execute its full setup, then to save already made settings, make the primary setup of table area. To do this:
Make sure that:
For registry form: at least one dimension is added to the sidehead on the Setting Table Area Structure page and the same dimension on the Setting Up Indicators Structure page.
For table or combined form: at least one indicator is added to heading and one dimension is added to sidehead on the Setting Table Area Structure page and the number of entered to heading elements is limited on the Setting Up Indicators Structure page.
Click the Finish button on the Setting Up Indicators Structure page to build table area on the sheet.
The next table area setup is made on its editing.
After the table area is set up, follow the step if required:
If several table areas built on the same indicators and dimensions must be added to the data entry form, add already existing table area to the sheet. To do it, follow the steps:
Copy table area. To do it, select a cell or a cell range belonging to table area and select the Copy Table context menu item. All specified attribute and formatting settings of table area are copied.
Paste table area. To do it, select a cell or a cell range where table area must be pasted and select the Paste Table context menu item. The item becomes available if the table area was copied.
The added table area is available for edit.
To delete table area, select a cell or a cell range belonging to table area, and:
Click the  Edit button of the Designer
ribbon tab.
Select the Delete context menu item.
A table area of organization registry is created in the example:
See also:
Building Data Entry Form | Working with Ready Data Entry Form