ETL task objects are used to display schemas of data loading and transformation, as well as mechanisms, schemas and object dependency structures in the working area.
Objects are divided into main and additional.
They are used to create visual links between various objects. When a connecting line is created, a link between connector or transformer inputs and outputs is not created. The following connecting lines can be used:
. Straight line.
. Dotted line.
. Arrow.
. Angular line.
. Curved line.
They are used for additional formatting of ETL task working area. The following graphics primitives can be used:
. Rounded rectangle.
. Rectangle.
. Ellipse.
. Triangle.
. Tetragon.
. Pentagon.
. Hexagon.
. Octagon.
They are used to create visual objects. Supported image formats: BMP, JPEG, JPG, JFIF, JPE, GIF, PNG.
To add and set up ETL task formatting objects, see the Setting Up ETL Task Formatting section.
When a new ETL task is created, the working area displays the list of groups of available objects:

Clicking the selected group displays a context menu, on which one can select the required connector, transformer or other object.
To add ETL task formatting objects, see the Setting Up ETL Task Formatting section.
After at least one object is created on the working area, the list of available objects is hidden. To create objects in the future, use context menu items opened by clicking in the working area.
To select an element in the working area:
Click on the element.
Press the TAB key to select element from left to right and from top to bottom.
Press SHIFT+TAB to select element from bottom to top and from right to left.
NOTE. Elements are selected within the visible working area.
To select all elements in the working area, press CTRL+A.
To select several elements in the working area:
Hold down the CTRL key and click each selected element one by one.
Select the
Cursor mode on the toolbar and use a frame to select elements:
Determine a group of elements to be selected.
Click and hold down the mouse button outside the group of selected elements.
Start dragging the mouse cursor. A rectangular frame appears:

Move the cursor until all required elements are within the frame.
Release the cursor. All elements fully or partially located within the frame are selected.
Use the clipboard to move and copy working area objects.
NOTE. Access permissions are taken into account when the user works with the clipboard. The user can execute only operations, for which he has permissions.
To copy an object to the clipboard:
Select the Paste item in the object's context menu.
Select the object and press CTRL+C.
NOTE. The operation is unavailable for the Link object.
To cut selected objects to clipboard:
Select the Cut item in the object's context menu.
Press CTRL+X.
NOTE. The operation is unavailable for the Link object. The links between objects are deleted on object movement.
To paste the copied or cut object from the clipboard, press CTRL+V.
NOTE. The Paste option is available if the clipboard contains some objects.
To delete selected objects:
Select the Delete item in the object's context menu.
Select the object and press the DELETE key.
NOTE. The links between objects are deleted.
To resize an element in the working area:
Using the mouse:
Hover the cursor to the point located at the element border. The cursor will change to a two-headed arrow.
Hold down the mouse button and stretch or shrink the element to the required size.
Using the keyboard:
Press CTRL+SHIFT.
Resize the element by 1 pixel using the UP, DOWN, LEFT, RIGHT keys.
After executing the operations the element is resized.
Additional objects in the working area can be rotated by the angle that is multiple of 90 degrees. To rotate an object, select the
Rotate 90º Clockwise or
Rotate 90º Counterclockwise context menu items.
To set up placement order of selected objects, select the
Bring to Front or
Send to Back context menu items.
To align objects relative to each other:
Select several objects.
Execute one of the operations:
Select the Align item in the object's context menu.
Click the
Image button on the toolbar.
Select an object alignment option in the drop-down menu of the command/button:
Align Left. Selected objects are aligned to the left edge relative to the leftmost object:

Align Center. Selected objects are aligned to the center. The midpoint is calculated from the rightmost and leftmost objects and their dimensions:

Align Right. Selected objects are aligned to the right edge relative to the rightmost object:

Align Top. Selected objects are aligned to the top edge relative to the topmost object:

Align Middle. Selected objects are aligned to the middle. The midpoint is calculated from the topmost and bottommost objects and their dimensions:

Align Bottom. Selected objects are aligned to the bottom edge relative to the bottommost object:


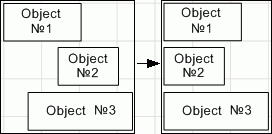
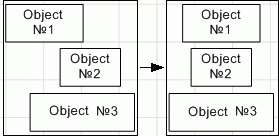
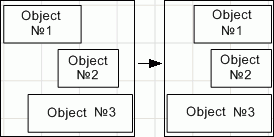
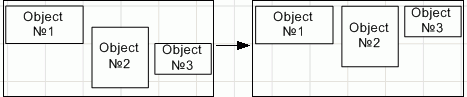
Move objects in the working area
To move one or several selected objects in the working area:
Use the UP, LEFT, DOWN, RIGHT keys to move objects by one pixel.
Press SHIFT+UP, SHIFT+LEFT, SHIFT+DOWN, SHIFT+RIGHT to move objects by 10 pixels.
Press CTRL+UP, CTRL+LEFT, CTRL+DOWN, CTRL+RIGHT to move objects by 100 pixels.
See also: