Click the  Show Borders button on the View toolbar tab.
Select the Page Layout > Show Borders main menu item.
Page breaks and borders can be used to set up displaying of data on a data entry form sheet during its printing and/or export.
To view sheet borders displayed during printing and/or export:
Click the Show Borders button on the View toolbar tab.
Select the Page Layout > Show Borders main menu item.
Page borders will be shown as a dashed line on an active sheet of data entry form.
Borders are set depending on page settings and page margins.
Page breaks can be used to display specific data of data entry form sheet on one page.
Page breaks can be added and deleted only within an active sheet.
 Delete all page breaks on sheet
Consider the example of a data entry form sheet with enabled page borders:
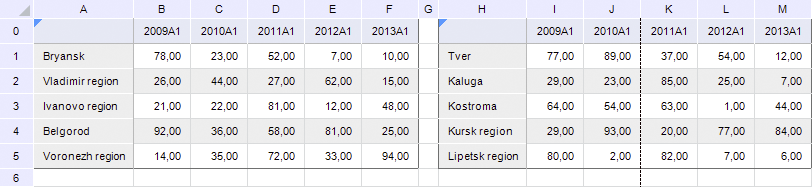
The automatic vertical border shows as a dashed line is displayed between the J and K sheet columns.
Set for this sheet page breaks, so the second data area is located on a separate page during printing and export. To do this:
Put the cursor to the G0 cell that will be the top left cell of page border.
Execute the operation:
Select the Add Break item in the drop-down menu of the  Breaks button on the View toolbar tab.
Select the Page Layout > Breaks >  Add Break main menu item.
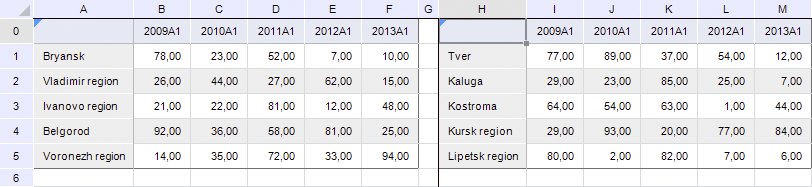
After executing the operations, a page break will be added. The data entry form sheet will look as follows:
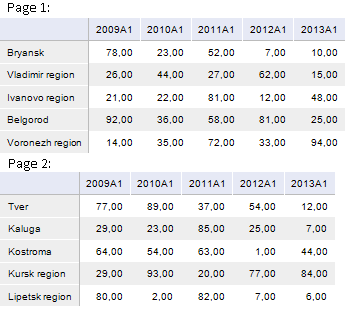
When printed and/or exported, the data areas located on a data entry form sheet will be displayed on separate pages:
See also:
Setting Up Data Entry Form for Printing

 Delete Break item in the drop-down menu of the