In the working area:
Click the
 Add Step button below the selected process stage.
The process stage may consist of an unlimited number of consequent or parallel steps.
To add a process stage step:
In the working area:
Click the Add Step button below the selected process stage.
In the button's drop-down menu select the required step type. The new step will be added to the end of the sequence of stage steps:
On the toolbar select the required step in the drop-down menu of the  Data Entry button for the selected process stage or stage step. The step selection button looks like the last selected step.
Features of adding steps using the toolbar:
If the process stage is selected, the new step will be added to the end of the stage steps sequence.
If the process stage step is selected, the new step will be added after the selected stage step.
To set up the added step, click the  Settings button on the toolbar, after which the side panel opens, for example:
The side panel contents depends on the type of the configured step. Parameters with partially determined settings and with incorrect data are highlighted in red.
To save the intermediate result, one can save the process with incorrect and/or partially determined settings. Such steps are highlighted in red in the working area.
NOTE. Process start is available only for valid processes.
Steps are started manually or automatically after the previous step is executed:
Automatically: Fore method call, ETL task.
Manually: Data Entry, Approval, Manual Action.
The execution option is set by the user during step setup or process editing via the context menu: Calculation and Subprocess Call.
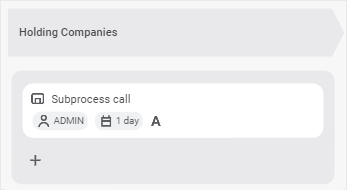
NOTE. The steps of the process with automatic execution method are marked with the  icon in the working area.
Process stage steps have basic settings that are equal for all step types.
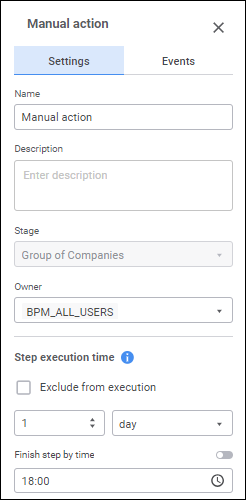
To determine basic settings on the side panel of the selected step, set:
Name. Enter step name.
Description. If required, enter a comment describing the step. It is marked with the  icon. In the process monitoring, on hovering the icon displays a tooltip with description text.
Owner. The box is mandatory. Select the user/user group responsible for step execution in the drop-down list. For the Data Entry and Approval steps the owner should be contained in the data segment or authorization object specified in the Data Segment/Authorization Object drop-down list.
To quickly select the step owner, use subject filtering in the list of security manager subjects. To do this, enter the required text in the Owner box. Search is executed automatically while the searched text is entered into the search string. The list will display only the subjects, which names contain the entered text. To clear the box, press the BACKSPACE key or reopen the list of security manager subjects.
NOTE. When creating a list of users for domain security subjects the system displays description it is available. When description is absent, the system displays domain security subject name. To correctly display description/name, one may require additional setup of interaction with directory services, that is, mapping attribute to get descr description in the settings.xml file.
Step Execution Time. Specify the time, in which a step should be executed on process execution. Execution time is counted from step activation.
Enter a numeric value of step execution time and select a time measurement unit in the list: minute, hour, day (default), week, month, quarter, half-year, or year.
To exclude the step from process execution, select the Exclude from Execution checkbox.
To specify the time, by which the step must be finished, activate the box by selecting the Finish Step by Time radio button. When the Minute or Hour measurement units are selected, the box is disabled.
If the step is not finished by the scheduled execution period, the step status becomes Expired.
Step execution time impacts the whole process execution, which is determined during process start.
Step basic properties are displayed on adding a step in the working area on the process scheme:
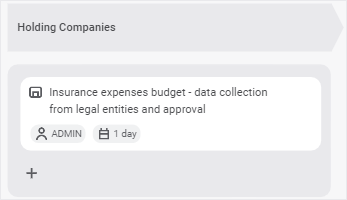
NOTE. Basic properties can be viewed by process owner and administrator when process scheme is displayed in the monitoring mode. The user can view basic information only for the step, for which he is responsible.
The next settings depend on the selected step:
After creating the process steps, set up steps execution conditions.
See also: