In this article:
Indicating Stage and Step Execution Statuses
Executing Steps in Manual Mode
Executing Process Steps
Process steps can be executed in the desktop and web applications in a similar way. Depending on the execution method, steps can be started:
In manual mode. Default mode. The step is executed by user. On executing the step, dependent objects are available for edit and view that are set on creating the step on the Step Description page.
In automatic mode. The step is executed without user actions.
NOTE. The Calculation step is executed in automatic mode.
To start monitoring and process steps execution in the desktop application, use business process setup window, object navigator or business application.
Indicating Stage and Step Execution Statuses
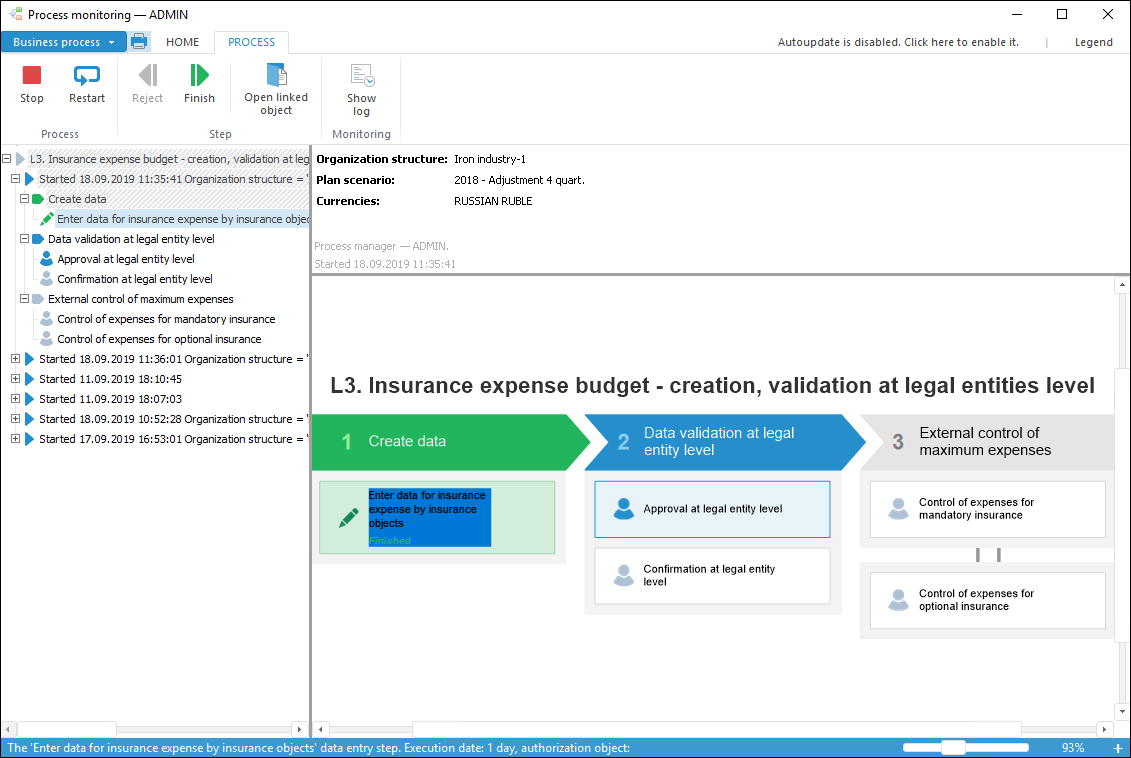
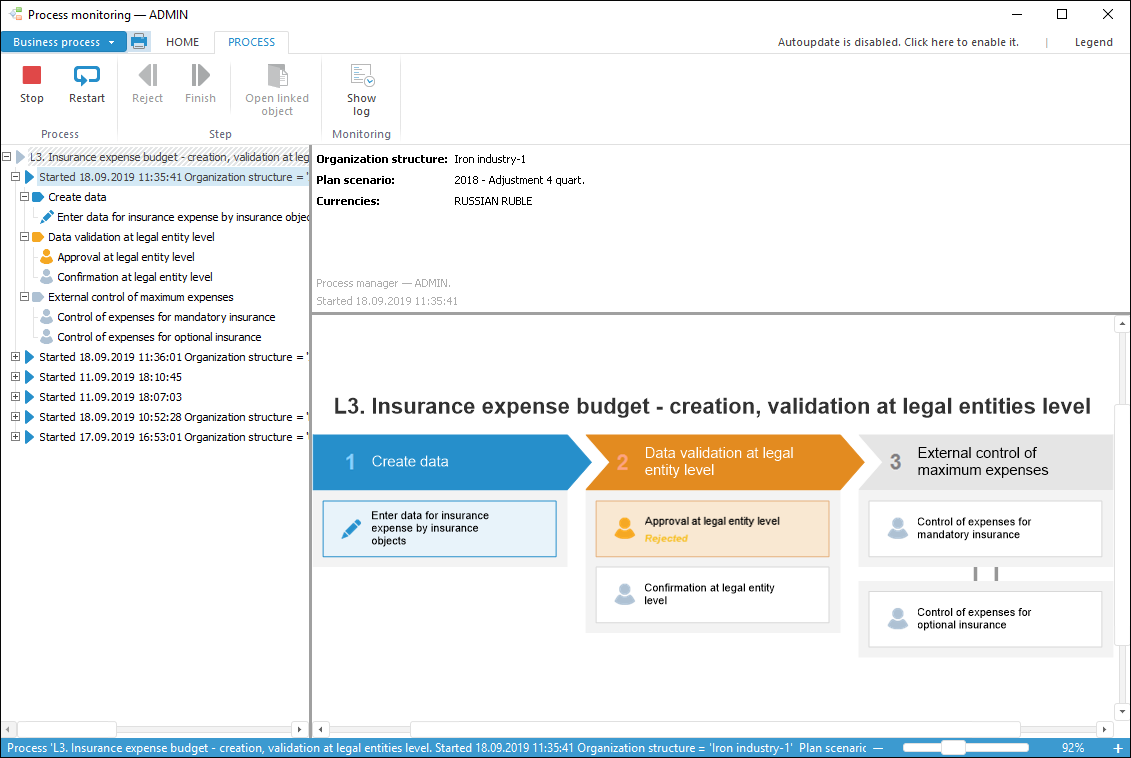
In the working area when the process is executed, each stage or step is marked with color and status.
Available options of execution status indication:
Blue background. Stage or step is being executed at the moment.
Green background. The stage or step is executed on time. Step status - Finished.
Red background. The stage or step is expired. Step status - Expired with specifying planned execution date.
Yellow background. Stage or step:
Rejected and was not expired. Step status - Rejected.
Executed and expired. Step status - Expired with specifying planned execution date. For example, the expired step before process execution (left) and after process execution (right):

White background. The step is not started.
Grey background. The stage is not started or the step is disabled. Step status - Skip. If the step was disabled on process editing, after the current step is executed, the step following the skipped step is started, and the skipped step status is changed for Skipped, and the process icon changes its color for purple. For example, the skipped step before process execution (left) and after process execution (right):

NOTE. To view color indication of process execution statuses, select the Legend main menu item.
Executing Steps in Manual Mode
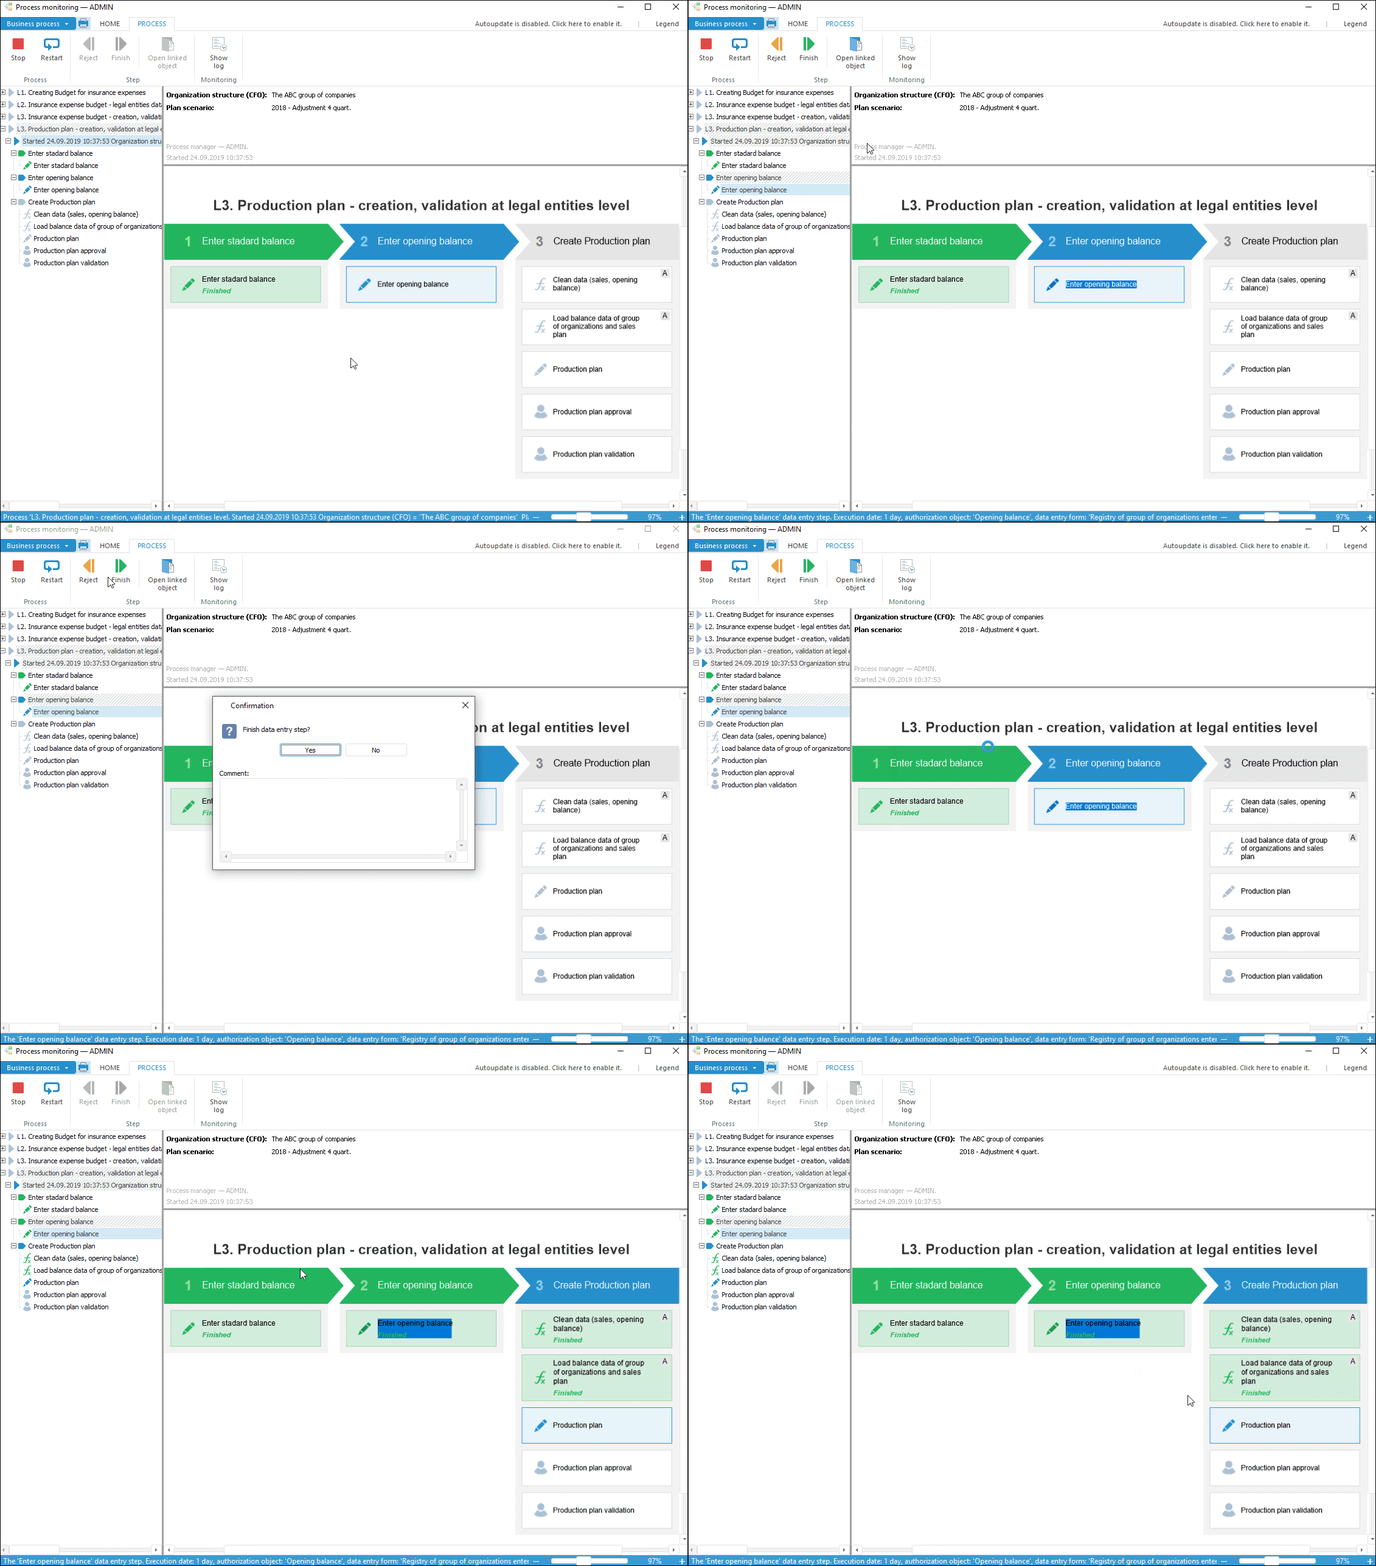
To execute data entry, approval and calculation steps:
Select the instance with required set of parameters in the process tree, then select the step available for execution.
Open the linked object. To do this:
Click the Open Linked Object button in the Step group of the Process ribbon tab.
Select the Open Linked Object item in the step's context menu in the working area or in the process tree. The item is available only in desktop application.
Double-click the selected step.
In the dialog box that opens and that depends on the type of the selected step, execute the required operations:
In data entry form – enter data.
In the data entry form for approval step - approve or confirm data.
In calculation algorithm – execute calculation.
Finish the step. To do this:
Click the
 Finish button
in the Step group on the Process ribbon tab.
Finish button
in the Step group on the Process ribbon tab.Select the Finish item in the step's context menu in the working area or in the process tree. This item is available in the desktop application.
If required, enter comments in the Comment box.
NOTE. The linked object enables the user to finish the step, in which data entry form is used.

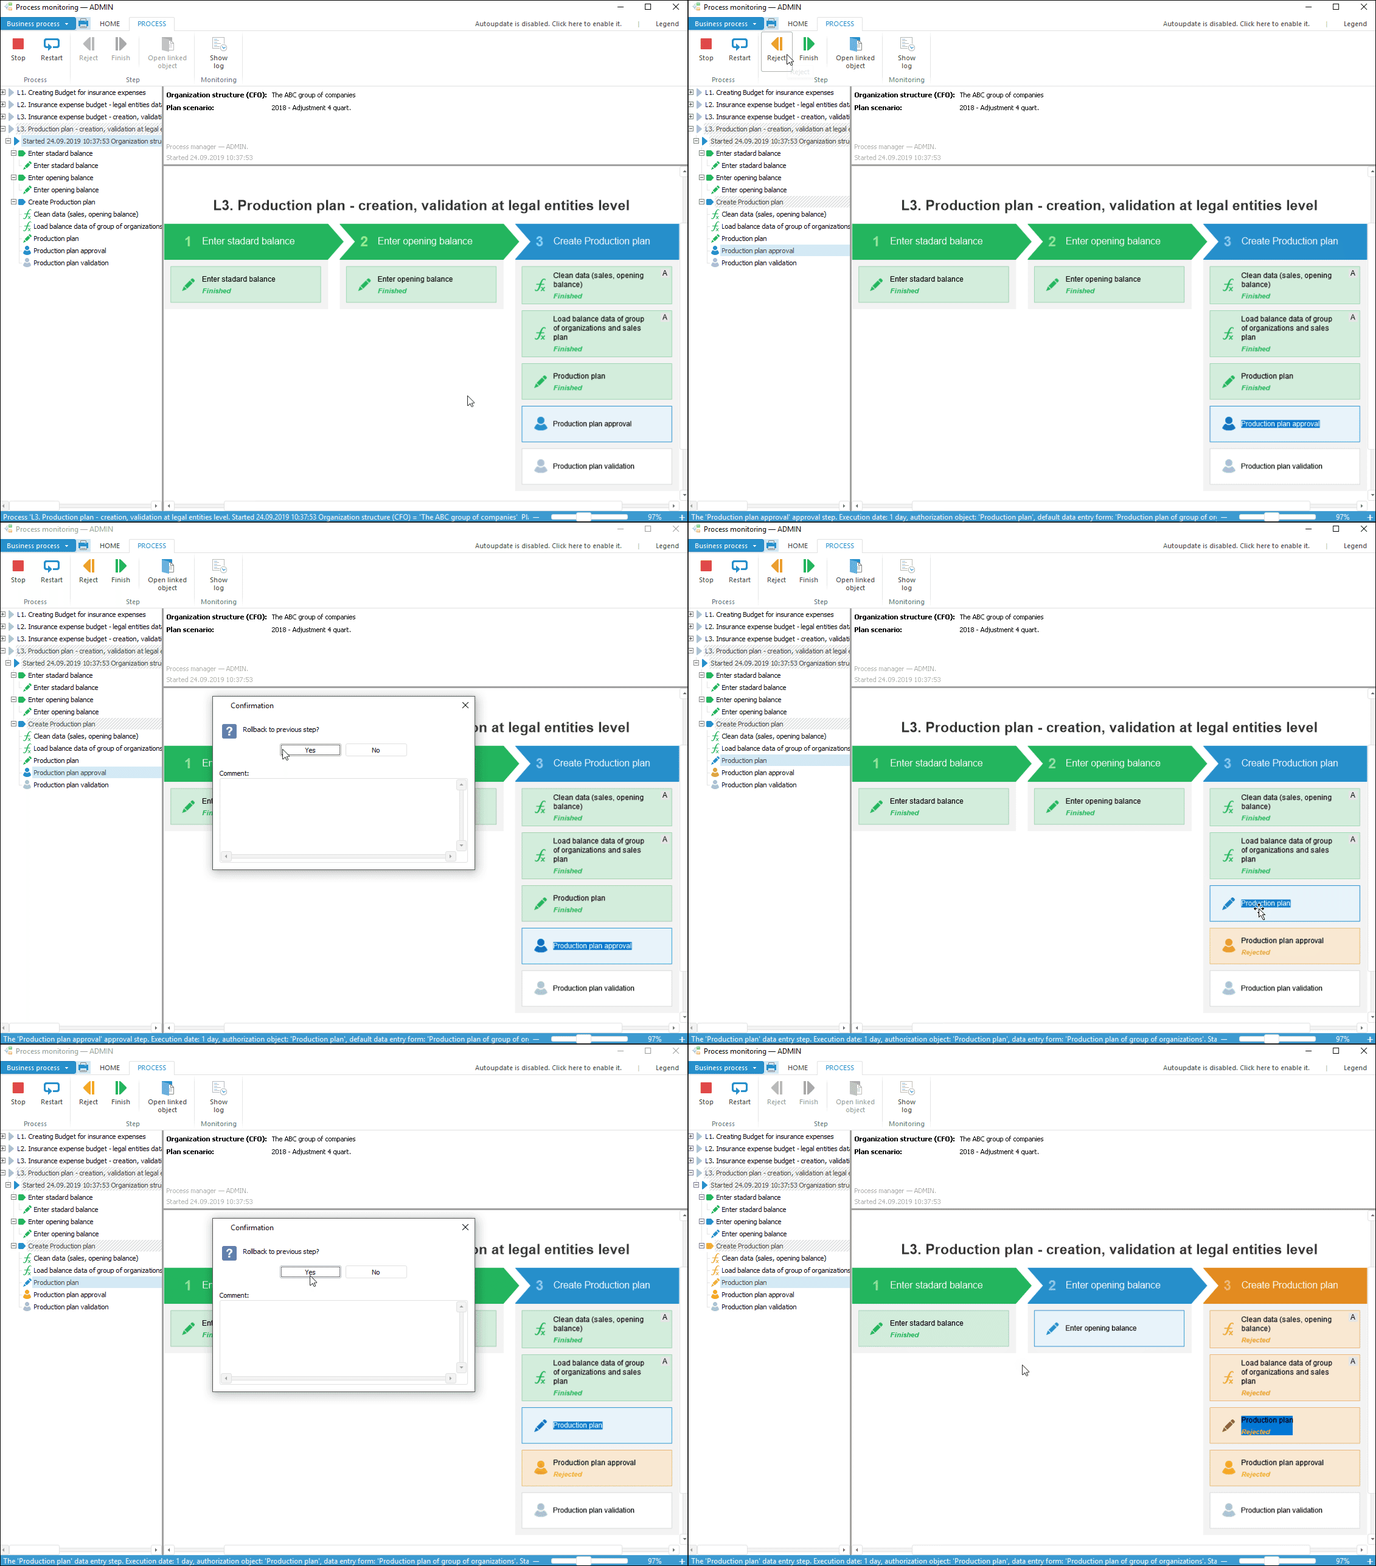
Reject the step with return to the previous step:
Click the
 Reject button in the
Step group of the Process ribbon tab.
Reject button in the
Step group of the Process ribbon tab.Select the Reject item in the step's context menu in the working area or in the process tree. This item is available in the desktop application.
If required, enter comments in the Comment box.
NOTE. The linked object enables the user to reject the step, in which data entry form is used.

NOTE. If all steps of a single process instance are executed, this instance is removed from the process tree.
Executing Steps in Automatic Mode
The step is executed in automatic mode according to the following algorithm:
NOTE. The Calculation step is executed in automatic mode.
If the step is finished in manual mode, and the following step is started in automatic mode, the process is executed up to the step that is started in manual mode:

If the step is rejected in manual mode, and the previous step is executed in automatic mode, the step is rejected before the step that is started in manual mode:

NOTE. To set automatic step execution, specify the Automatic execution method on the Manage Parameters wizard page on creating or editing the step.
Advanced Features
Process manager and administrator, under condition that administrator has a full access to the process, have advanced features:
Restart process step execution using the
 Restart button with option to change process execution term and
to add comments in the Comment to Restart box. In this case, status
of all executed steps, except for the first one will be changed
to rejected and the process execution will start from the first
step.
Restart button with option to change process execution term and
to add comments in the Comment to Restart box. In this case, status
of all executed steps, except for the first one will be changed
to rejected and the process execution will start from the first
step.Stop step execution of all or separate process instance using the
 Stop button. In this case, status of executed steps of all or
separate process instance will be reset, all or separate started
instance will be deleted. When all process instances are stopped,
monitoring window will be cleared.
NOTE.
Before executing all the commands for process steps execution the
dialog box opens to confirm that the step is finished and to add a
comment if required.
The process can be finished by the  Stop
button in case of client process execution on the user local computer.
If server process
execution is set up, then it is required to stop the process using
task scheduler on server.
After executing process steps it is available to view the execution log.

 To
go to monitoring
 Open button on
the Home ribbon tab or select the same context menu item.
 Edit button on
the Home ribbon tab.