To create a more compact view of the table, use merging of dimensions in sidehead by rows and in heading by columns.
The following options of dimension merging are available in the table with several dimensions:
Full. All dimensions of sidehead or heading are merged in one column or row.
Full with Tucking. All dimensions of sidehead or heading are merged in one column or row with specified dimension element, which will be additionally merged with the element of the previous dimension.
NOTE. The full merging with tucking is available for all dimensions except for the first one.
Partial. Only selected dimensions of sidehead or heading in one column or row are merged.
NOTE. Partial merging is available if the table contains three or more dimensions in sidehead or heading.
Partial with Tucking. Only selected dimensions of sidehead or heading are merged in one column or row with specified dimension element which will be additionally merged with the element of previous dimension.
NOTE. Partial merging with tucking is available:
1. If the first from merged dimensions has no previous dimensions.
2. If the dimension that is not used in merging displays only one element towards the element of the last dimension that is used in merging.
Merging or separating of dimensions is set up via the drop-down menu of the ![]() Layout button of the Designer ribbon tab. The menu contains checkboxes:
Layout button of the Designer ribbon tab. The menu contains checkboxes:
All Dimensions. It merges levels of all dimensions. When the All Dimensions checkbox is selected, the Levels in All Dimensions checkbox is selected automatically. The All Dimensions checkbox looks as follows:
 - it is displayed on full merging.
 - it is displayed on partial merging.
NOTE. To apply merging of levels of all dimensions when table or calculated dictionaries are used, make sure that they have levels configured.
Corresponding Names. It merges additional names of dimensions. If several additional names are selected to be displayed for each dimension, on selecting the Corresponding Names checkbox, the first name of the first dimension will be merged with the first name of the second dimension, and so on. If different number of additional names is displayed for dimensions, only corresponding names are merged, the rest remains unchanged.
In One Column/Row with the Previous. The current dimension is merged with the dimension, which is higher in the heading or to the left in the sidehead. It is available for all dimensions except for the top dimension in the heading and the leftmost in the sidehead.
Elements in One Cell with Elements of the Previous. The element of the current dimension is merged in one cell with elements of the dimension, which is higher in the heading or to the left in the sidehead. It is available when the In One Column/Row with the Previous checkbox is selected. When the checkbox is selected, the Merge checkbox is automatically selected on the Parameters tab of the Dimension group of tabs of the side panel. By default, the cell displays the first element of the current dimension. To select an element shown in the cell, use side panel settings. Features of merged cell formatting are given below.
As an example, consider the Accounting Balance Indicators table, which contains three dimensions by rows: Registry of Organizations (elements of the first level), Accounting Balance Indicators (elements of the first and second levels), Accounting Data of Accounting Balance (elements of zero level). Depending on the selected dimension, selected checkboxes of dimension merging and its combination, the table looks as follows:
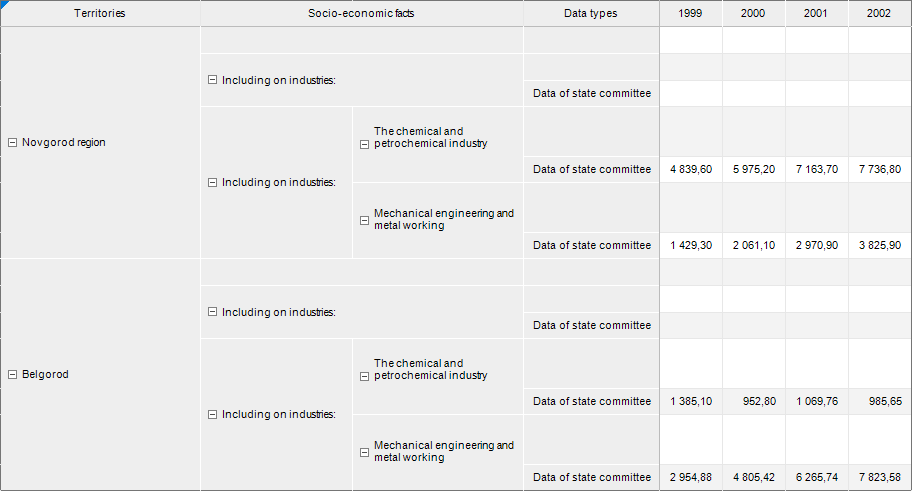
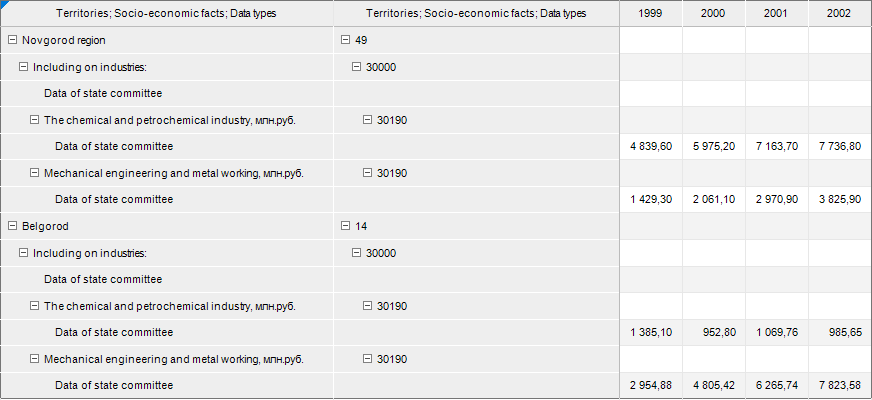
Initial table view. The Levels in All Dimensions checkbox is selected by default:
The table will look like if the following action is executed:
Select any dimension and select the Levels In All Dimensions checkbox.
Select the level of the second dimension and select the In one Column/Row with the Previous checkbox, the levels in All Dimensions checkbox is selected automatically.
All checkboxes of merging drop-down menu of the ![]() Layout button of the Designer ribbon tab are deselected.
Layout button of the Designer ribbon tab are deselected.
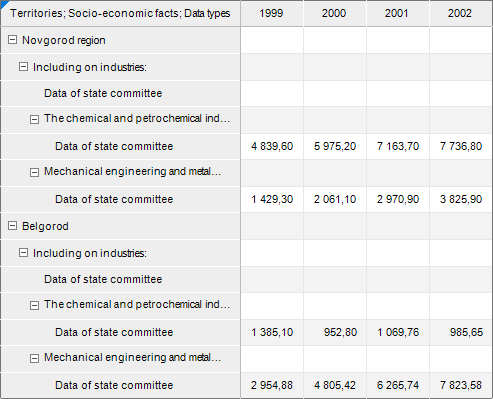
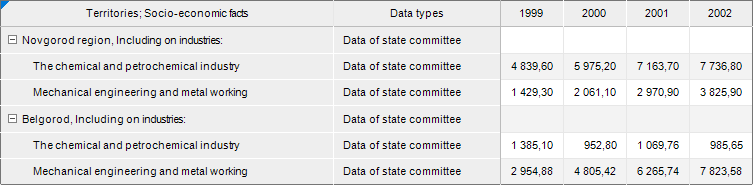
Full merging is executed. To do it, the All Dimensions checkbox is selected, the Levels in All Dimensions and In One Column/Row with the Previous checkboxes will be selected automatically:
The full merging and the following operations are executed:
The third dimension or the third dimension level are selected and the In One Column/Row with the Previous checkbox is deselected.
The second dimension or the second dimension level are selected and the In One Column/Row with the Previous checkbox is deselected.
As a result, the table looks as follows:
The table will look like if the following operations are executed:
Deselect all layout checkboxes.
Select the second dimension and select the In One Column/Row with the Previous checkbox, the All Dimensions checkbox will be selected automatically.
The full merging with tucking is executed. To do this, the full merging is executed, next the third dimension level is selected and the Elements In One Cell with Elements of the Previous checkbox is selected additionally:
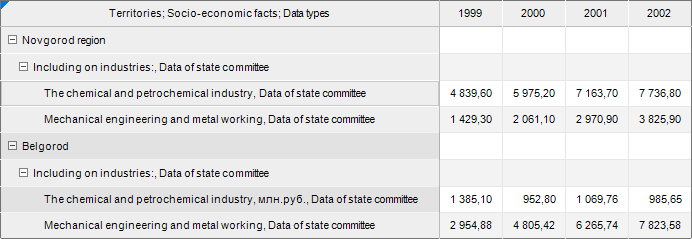
In this example, the Accounting Date of Accounting Balance third dimension is tucked. The To the Accounting Date of Accounting Period element is set as merging element on tucking. The tucking of the second element can be executed in the same way.
After the tucking is executed, set the merging element on the Layout tab in the Merge option. The first list element is selected by default.
NOTE. If after the tucking setup, other layout settings were determined and tucking was not deselected, the tucking setup remains and on the following repeated merging it will be automatically applied.
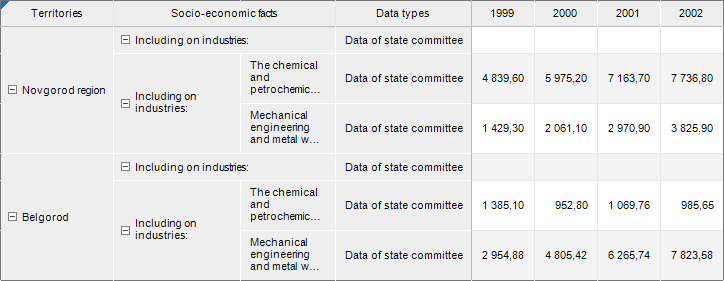
Partial merging is executed. To do it, the full merging and the following operations are executed:
The third dimension or the third dimension level are selected.
The In One Column/Row with the Previous checkbox is deselected.
As a result, the table looks as follows:
In this example, the Registry of Organizations and Accounting Balance Indicators dimensions are merged.
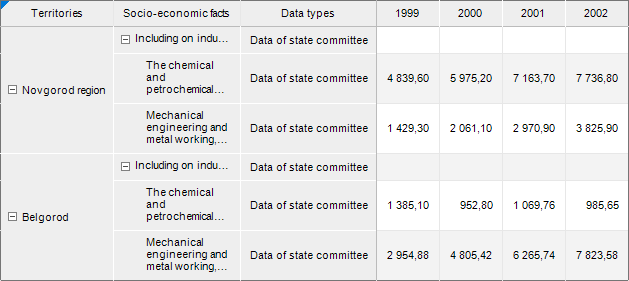
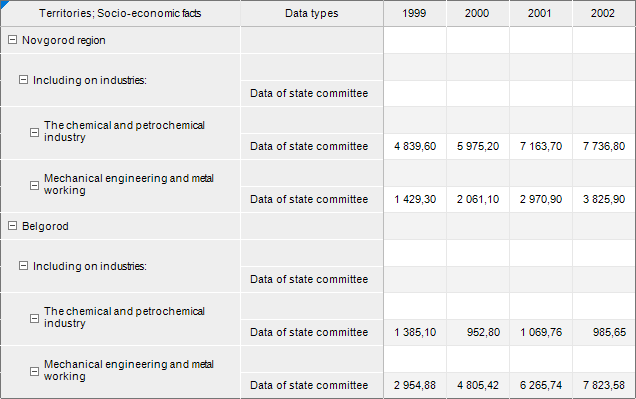
Partial merging of dimensions with tucking is executed. To do it, partial merging and the following operations are executed:
The second dimension or the second dimension level are selected.
The Elements in One Cell with Elements of the Previous checkbox is selected.
As a result, the table looks as follows:
In the example, the Registry of Organizations and Accounting Balance Indicators are merged, the Accounting Balance Indicators dimension is tucked. The ACCOUNTING BALANCE element is set as merging element on tucking.
After the tucking is executed, set the merging element on the Layout tab in the Merge option. The first list element is selected by default.
NOTE. If after the tucking setup, other layout settings were determined and tucking was not deselected, the tucking setup remains and on the following repeated merging it will be automatically applied.
The additional names of dimensions are displayed, the full merging is executed, next the Corresponding Names checkbox is selected:
If dimensions located in the sidehead and the heading have different formatting, when they are merged into one cell, their formatting depends on the displayed name:
If the Initial name type is selected, the formatting specified for the dimension located in these cells before merging is applied.
If the From Merged or the Composite name type is selected, the formatting specified for the dimension to be merged is applied.
See also: