Element Names
One can determine one or several dimension attributes, which values will be used as elements names in a table heading or sidehead. Element name settings are also applied in a chart.
To change displaying of element names, select checkboxes next to attributes in the drop-down list of:
The Names item in the dimension element's context menu in table's heading or sidehead.
The Name item in the dimension element's context menu on the Selection side panel.
The Names item in the  dimension menu on the Selection side panel.
The Names button in the View group on the Hierarchy ribbon tab.
The Name attribute is used by default.
Setting Up Custom Names
To set up custom names for dimension elements:
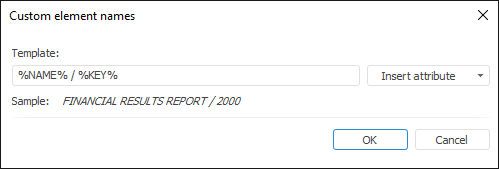
Select the Custom Name radio button in the drop-down menu of the Name button/menu item. The Custom Element Names dialog box opens:

Set name display template using the Insert Attribute button. The drop-down menu of the Insert Attribute button contains dimension attributes.
After executing the operations the specified custom names of dimension elements are displayed.
To disable custom name, select the Dictionary Attributes radio button in the drop-down menu of the Names button/menu item.
Setting Up Attribute Layout
To set up dimension attributes layout in element names:
Select the Dictionary Attributes radio button in the drop-down menu of the Names button/menu item.
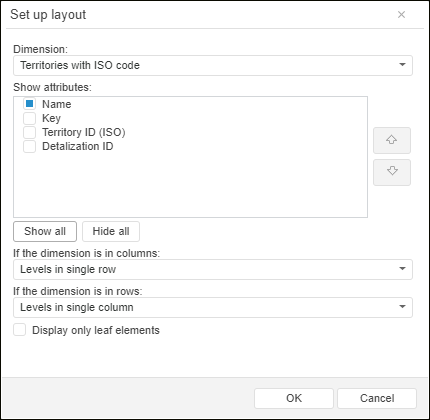
Select the Set Up Layout item in the drop-down menu of the Names button/menu item. The Set Up Layout dialog box opens:
Select displayed dimension attributes and set their order.
If required, set additional parameters in the web application:

 If the dimension is in columns/rows

 Display only leaf elements
After executing the operations the selected attributes are displayed in dimension element names in the specified order.
See also:
Working with Dimension Elements | Setting Up Dimension View
 dimension menu on the Selection side panel.


 If the dimension is in columns/rows