
Tool interfaces in the web application and in the desktop application are identical, and differences in functionality are given in appropriate comments.
The List and the Drop-Down List controls allow for controlling block dimension elements selection.
To insert lists use:
The List/Drop-Down List item in the drop-down list of the Control button on the Home or Insert ribbon tab.
The List or Drop-Down List item in the drop-down list of the New Block > Control item of the dashboard's context menu.
The control will be inserted to the working area.
To insert a control for the particular block:
Select the required block.
The List/Drop-Down List item in the drop-down list of the Control button on the Home or Insert ribbon tab. The menu will appear with all block links, for which a control can be created. The link name is formed by the scheme: Link <link_number> (<controlled_dimension_name>).
Select the required link.
The control will be inserted to the working area and configured to the selected link.
Example of the List control:
Example of the Drop-Down List control:
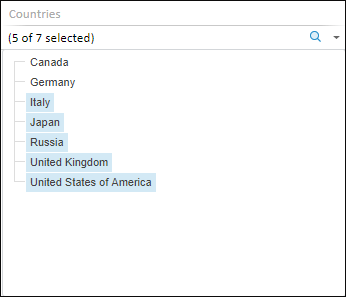
To change selection, view or to edit elements of the selected dimension, use commands in the drop-down menu of the Control item in the context menu of the List and Drop-Down List controls or manually select required dimension elements.
NOTE. The list of dimension elements corresponds with the dictionary of selected block data source.
To set up parameters of the List and Drop-Down List controls, use the Control Settings side panel tab.
To set up list basic parameters, use the Block side panel tab.
Besides the parameters available for all dashboard objects, font options are available for a list:
Font. Select one of the fonts available in the operating system.
Font Size. Set the required font size. The size is set in points, and it can be selected in the drop-down list or entered manually. The range of available values: [1, 72].
Font Style. Click the buttons that determine font style:
B. Bold.
I. Italic.
U. Underline.
When the button is pressed, the corresponding font style is used. Several styles can be used simultaneously, for example, pressed buttons B and I result in bold italic font style.
Font Color. Select font color in the drop-down color palette. To set a new font color, go to the Spectrum tab in the color palette and choose a color in the advanced color palette.
The Set Up Control side panel tab is used to set up the List and Drop-Down List controls.
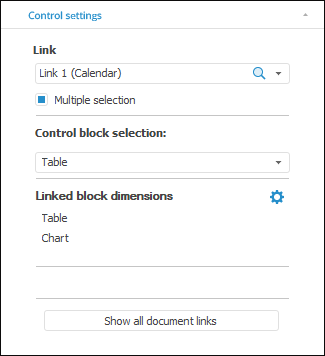
The following control settings are available on the tab:
 Dimension synchronization settings
See also:
Inserting and Setting Up Interactive Controls

 Actions button and in the menu that opens select the Delete Link item. The link will be deleted. The control stops to control any dimensions.