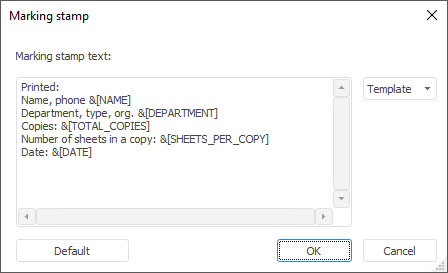
Marking step is used when mandatory access control or level-based access control method is selected, to mark documents during export and printing.
To add a marking stamp:
Select the Mark Objects on Export and Print checkbox on the General Properties tab on the Properties side panel.
Click the Marking Stamp button on the toolbar in the Mandatory Access Control or Security Levels section.
After executing the operation, the Marking Stamp dialog box opens:
Set up marking stamp contents. The stamp may contain arbitrary text.
NOTE. Marking stamp setup will be applied to all repository reports and documents. A unique marking stamp can be set up for a specific report using the IGxDocument.Stamps property.
Click the Default button to reset the stamp text to default appearance:
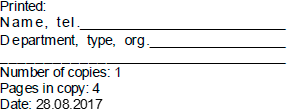
Clicking the Template button opens a list of automatically filled in boxes inserted into marking stamp contents:
&[TOTAL_COPIES]. A number of printed copies. It is filled in automatically. The substitution value is equal to one on export.
&[SHEETS_PER_COPY]. A number of sheets in a copy. It is filled in automatically.
&[DATE]. Print or export date. It is filled in automatically.
&[NAME]. User name.
&[DEPARTMENT]. Department name.
After executing the operations, the marking stamp will be displayed on the marked documents during export and printing.
See also:
Setting Up Mandatory Access Control Method | Setting Up Level-Based Access Control Method | Setting Up Security Level Parameters