Make sure that the repository contains the dictionaries:
Click the  Create button in the main menu and select the Standard Cube item on the New Object side panel.
The example describes creation of the Cube of Socio-Economic Indicators cube.
To create a cube in the object navigator:
Make sure that the repository contains the dictionaries:
Click the Create button in the main menu and select the Standard Cube item on the New Object side panel.
After executing the steps the standard cube wizard opens:
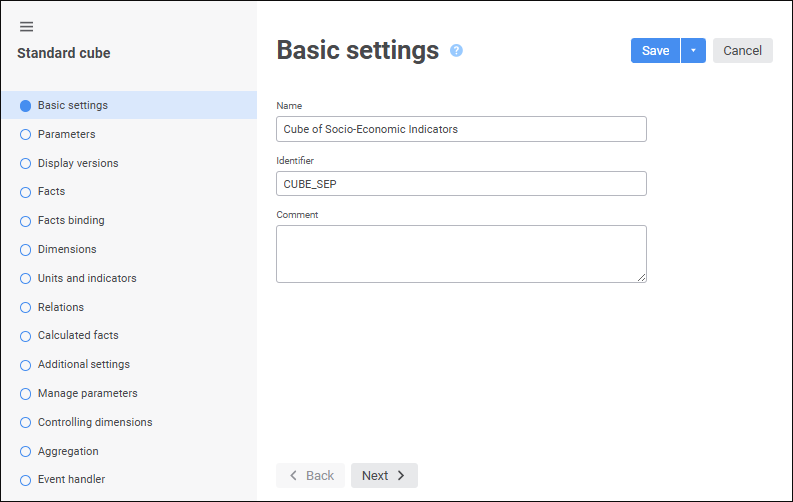
Set cube parameters on the Basic Settings page:
Name: Cube of Socio-Economic Indicators.
Identifier: CUBE_SEI.
Go to the Facts page:
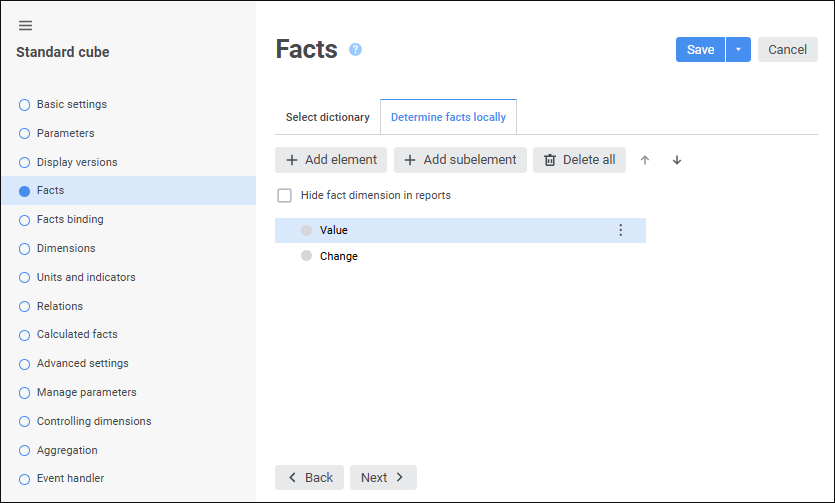
Add two elements named Value and Change using the Add Element button on the Determine Facts Locally tab.
Go to the Facts Binding page:
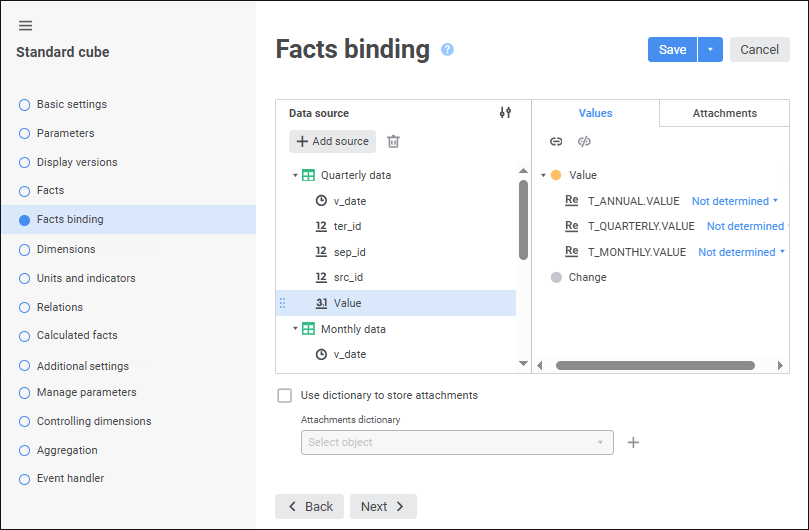
The left part of the wizard shows the hierarchical list containing all tables and their fields. The right part of the wizard contains a list of cube facts.
Bind facts and corresponding data table fields on the Values tab. To do this, in the list on the left select the tables Annual Data, Quarterly Data, and Monthly Data. Then bind the Value field of each table to the Value fact by clicking the Bind button or by dragging the field to the required fact.
Go to the Dimensions page:
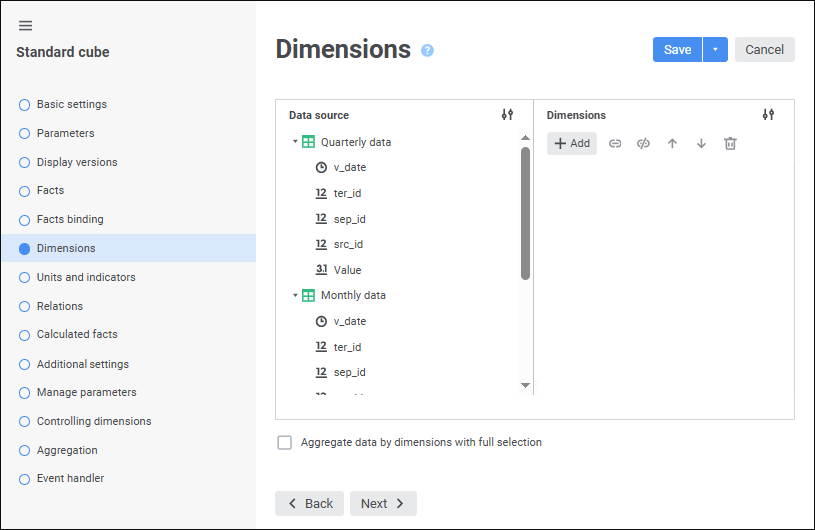
On the wizard page determine a list of the dictionaries, on which the cube is based, and bind them to data tables.
Click the Add button to add dictionaries. The Select Object dialog box opens:
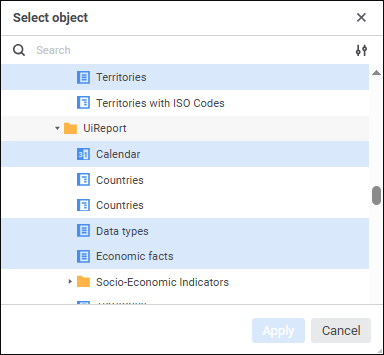
Select the following dictionaries:
Calendar.
Socio-economic indicators.
Territories.
Data types.
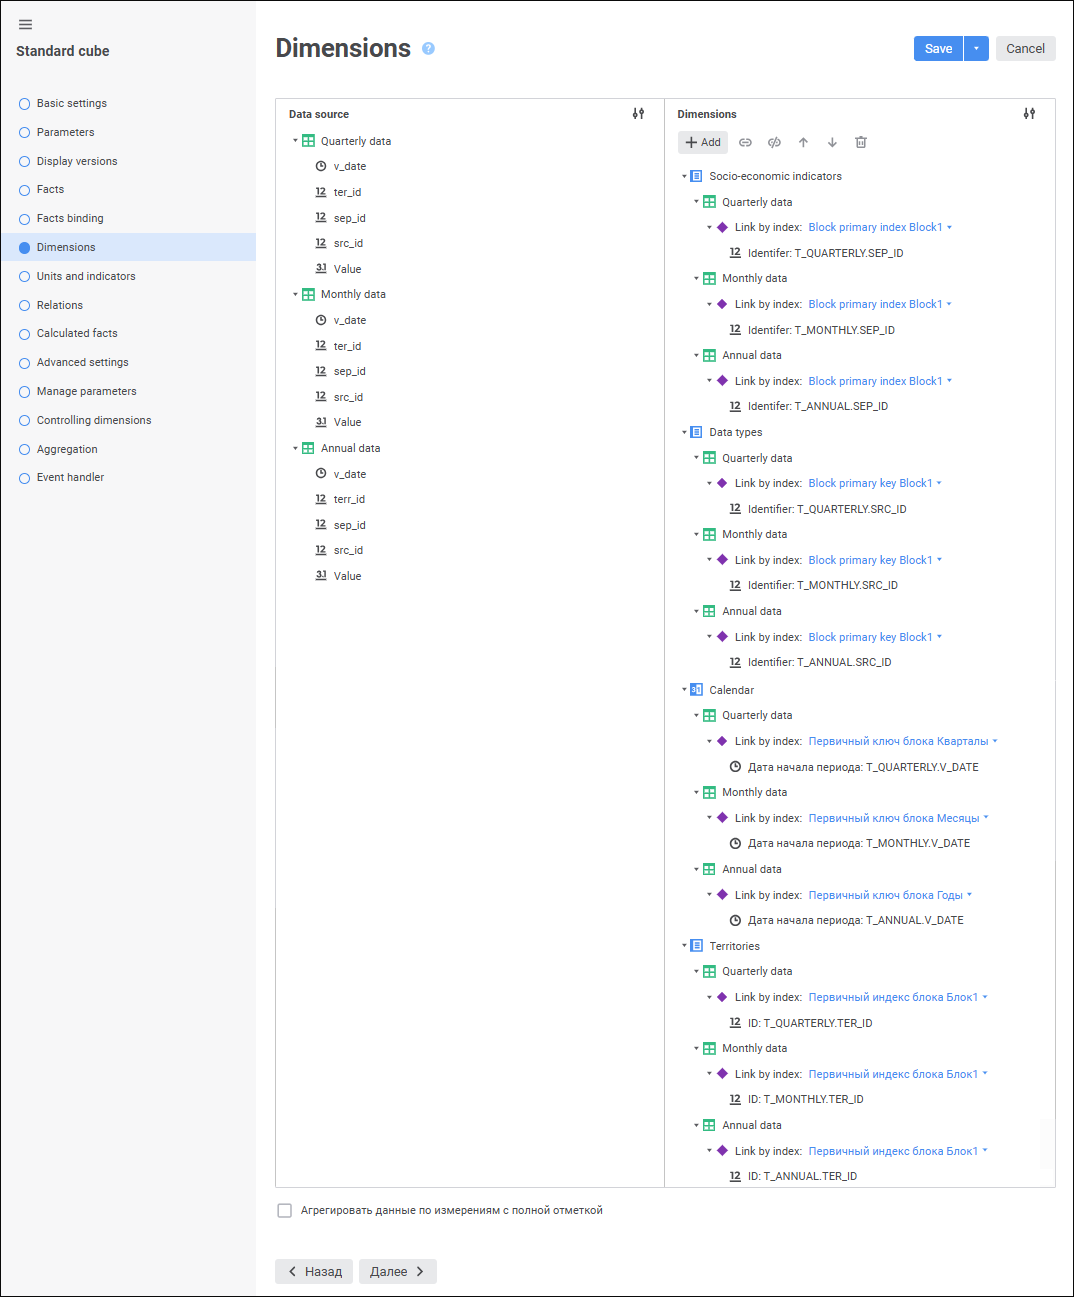
Bind data table fields to dictionary levels. To do this, specify the index links for each dimension and then bind required table fields to the selected index. To determine a link by index, select the Select Index item and select index in the drop-down list.
Drag the required table field to the dimension index.
The Dimensions page after dimensions are bound looks as follows:
Go to the Relations page:
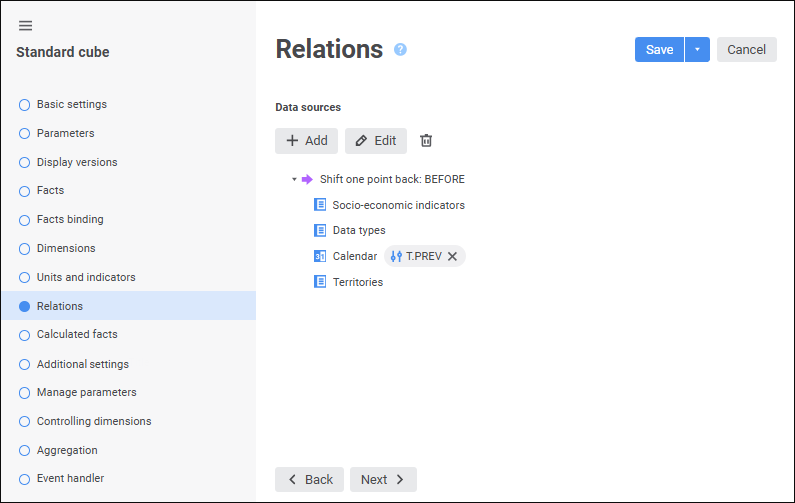
To create a relation, click the Add button. Then rename the relation by clicking the  Edit button. The Relation Properties dialog box opens:
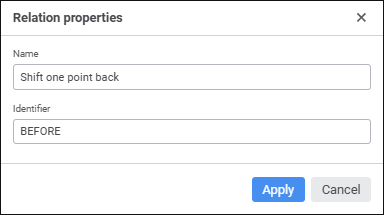
Set the following parameters in the dialog box:
Name: Shift One Point Back.
Identifier: BEFORE.
Specify relation parameters for the Calendar sublevel. To do this, select the Calendar sublevel and click the Edit button. The Relation Formula dialog box opens:
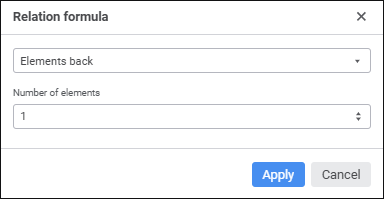
Select the Elements Back item in the first drop-down list and set the -1 value in the Number of Elements drop-down list. After saving the ICALENDARDIMENSIONCLASS_DAY.LAG(T) formula is automatically generated in the expression area.
Go to the Calculated Facts page:
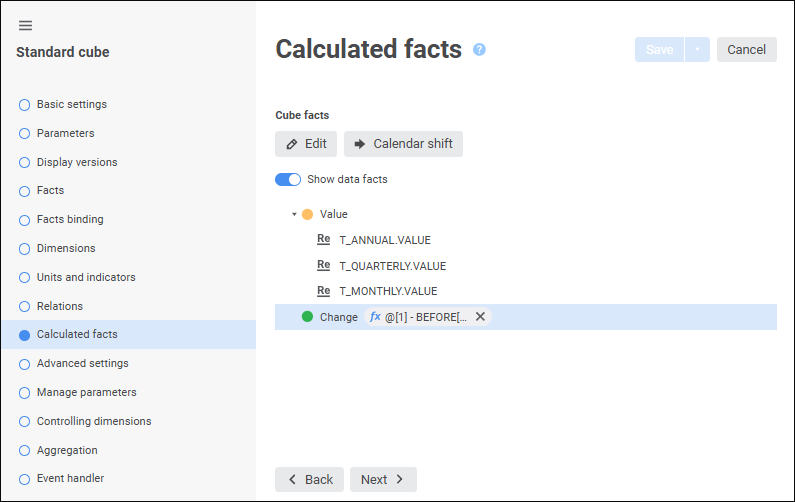
Specify a formula for the Change fact. To do this, select the fact and click the Edit button. The Calculated Fact dialog box opens:
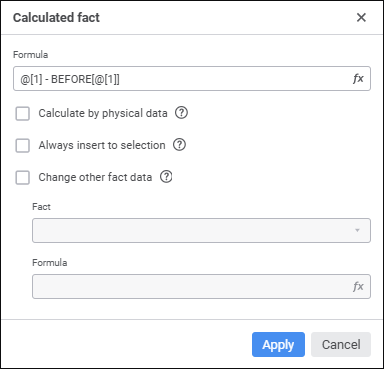
Click the  Set Formula button next to the Formula edit box. The Expression Editor dialog box opens. Set the formula: @[1] - BEFORE[@[1]].
Go to the Aggregation page:
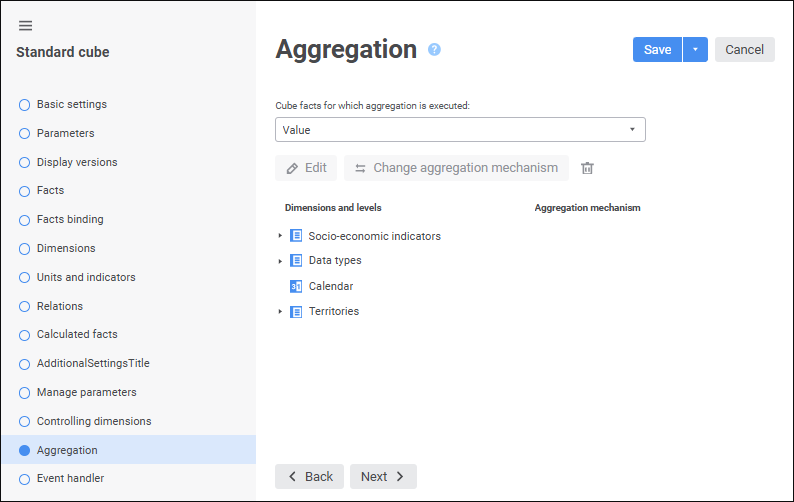
The next step is setting up data aggregation from dictionary's lower to upper levels by the Territories dimensions using the basic aggregation mechanism. The data from the Regions level is summed up and written on the FD (Federal Districts) level, and the data from the FD (Federal Districts) level is summed up and written on the RF (Russian Federation) level.
In the list of cube dimensions select the Territories dimension and click the Edit button. A dialog box for setting up aggregation for the selected dimension opens:
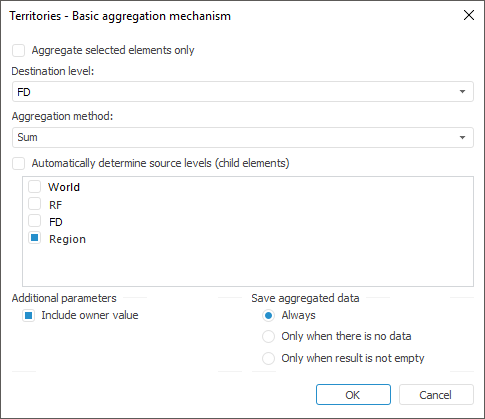
Select the Aggregate Selected Elements in Dimension checkbox to aggregate taking dimension selection into account.
Determine the following parameters by selecting a destination level one by one in the drop-down list:
| Destination level | Aggregation method | Source level |
| RF | Sum | FD |
| FD | Sum | Region |
Deselect the Include Owner Value checkbox to aggregate without taking destination level value into account. The checkbox is selected by default.
The Always radio button is selected by default in the Save Non-Aggregated Data group. This means that aggregated data is always saved to destination level. Similar description of saving non-aggregated data is given in the Basic Aggregation Mechanism section.
Click the Apply button to save dimension aggregation parameters.
The Aggregation wizard tab looks as follows:
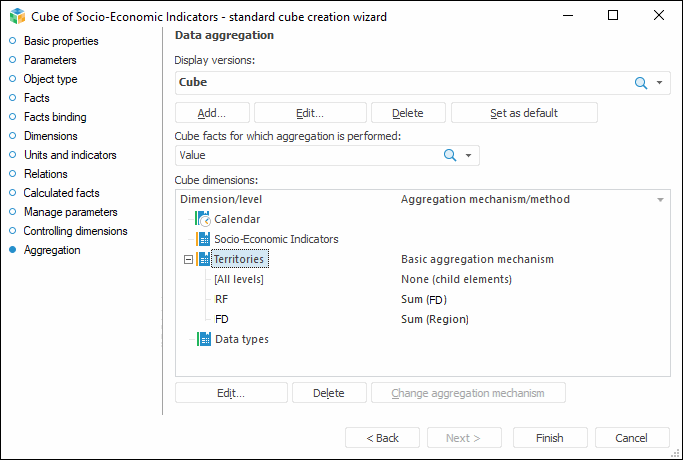
To finish the wizard, click the Save button.
Open the cube and determine the following settings:
Place calendar and fact dimension in columns, select several elements at the Years level in the calendar, select all elements in the fact dimension.
Place territories in rows, select elements located at different levels.
The rest of the dimensions must be located in fixed, set single selection for them.
If the settings are correct and tables contain the required data, the table will look as follows on cube opening:
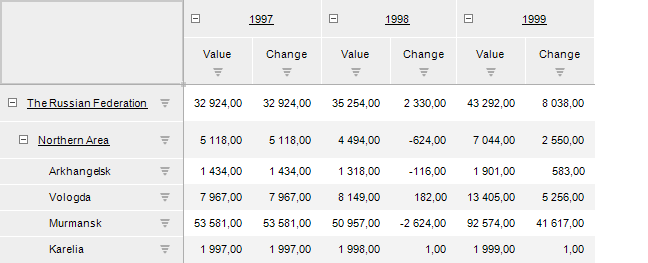
The table will display source data (the Value fact), calculated values (the Change fact) and data will also be aggregated from the Regions level to the Federal Districts and the Russian Federation level.
See also:
Creating Multidimensional Data Structures

 Indicators binding