Repository Object
The Repository Object connector is an object that is used to load data to repository objects.
After adding the connector to the ETL task working area select data consumer, set export options and edit connector input and output.
Selecting Data Consumer
When a new connector is created, the modal window with the repository tree is displayed. Select the required data consumer in the tree and click the Select button. The following objects can be selected as data consumers:
MDM dictionary.
Table.
Document.
If a database is specified in data consumer settings, autoconnection should be set up for the database. If an object shortcut from another repository is selected as a data consumer, autoconnection should be set up in the repository link.
Export Options
The properties panel can be used to change data consumer and set export options.

The list of available settings depends on the selected data consumer type. Settings for the document depend on the file type saved in the document. Settings are the same as export options for data consumer of the same format - Excel, Text.
Settings for tables/MDM dictionaries are given below.
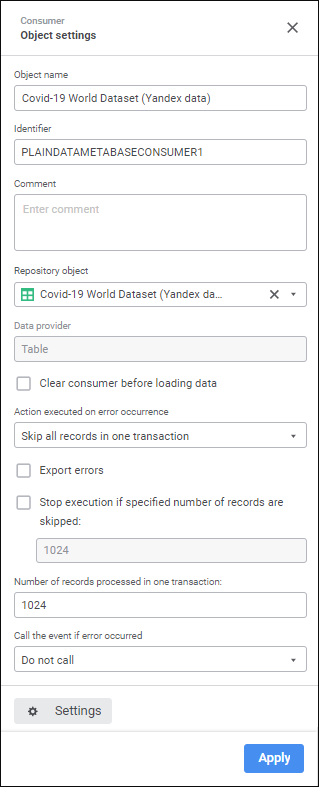
The following parameters can be set up:
Object Name. If required, change connector name.
Identifier. If required, change object identifier. Identifier should be unique with the ETL task. Usage of Latin letters, numbers and the "_" character is allowed. The identifier should start with a letter.
NOTE. If required, add a note to an object. The note can contain any information.
Repository Object. The box contains the repository object selected as a data consumer. To remove the object, click the
 button. After the object is removed, one can select a new object in the drop-down list of the Repository object box.
Clear Consumer Before Loading Data. The checkbox is deselected by default, and new data is added, and existing data is updated during loading. To delete all data from consumer object, select the checkbox before loading.
If data consumer is an MDM dictionary, one can select the Update Method parameter to select element update method:
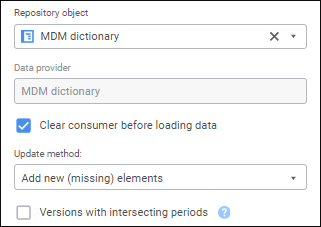
The following options are available:
Replace All Elements. Elements that are not present in the provider will be deleted.
Add New (Missing) Elements. Only new elements are added, the existing ones are not updated.
Update Existing Elements. Only existing elements are updated, the new ones are not added.
Add New Elements and Update Existing Ones. New elements are added, the existing ones are updated. Elements that are not present in the source are not updated.
If the Add New (Missing) Elements or Add New Elements and Update Existing Ones update method is selected for version MDM dictionary the following option is available:
Versions with Intersecting Periods. Select the checkbox to add a new element version that intersects with periods of existing versions. Take into account the following features of adding a new version:
If the start date of imported element version matches with the start date of existing version, the existing version will be deleted.
If the end date of imported element version matches with the end date of existing version, the existing version will be deleted.
If the start date and the end date of imported element version match with the start date and the end date of existing version, the existing version will be deleted.
If the start date and the end date of imported element version differ from the start date and the end date of existing version, and the existing version period is included in the imported version, the existing version will be deleted.
If the start date and the end date of imported element version differ from the start date and the end date of existing version, and the period of imported version is included in the existing version, the existing version will be split into two periods. In the first period, the end date of existing version will be replaced with the start date of imported version. In the second period, the start date of existing version will be replaced with the end date of imported version. The imported element version is added between the periods.
The checkbox is deselected by default, the new element version is added if its period does not intersect with the existing versions.
If an event handler was set in ETL task settings, the OnError event is generated in case of errors. One can also determine further export object behavior in case of errors:
Action Executed on Error Occurrence. Select the action executed in case of errors during data loading:
Stop Task Calculation. If export error occurs, ETL task execution is stopped.
Skip Only Incorrect Records. Incorrect records are skipped. Select this option if it is not essential whether all records are present.
Skip All Records In One Transaction. All records of the transaction where an error has occurred are skipped. Select this option if it is necessary to divide records collection into transactions to get all data without exceptions within these transactions.
When the Stop Task Calculation or Skip Only Incorrect Records options are selected, the task is also divided into transactions, and the specified number of records affects speed of task execution.
Export Errors. The checkbox is deselected by default, and errors that occurred during ETL task execution are not exported. After selecting the checkbox select where information about errors will be loaded:
Load After Execution to Browser. After export is finished, the browser opens a page with the errors list.
Specified Path. Set the path and name of the file, to which the errors list will be exported.
Stop Execution if Specified Number of Records are Skipped. The checkbox is deselected by default. To stop ETL task execution, select the checkbox and specify the maximum number of error records, after which export will be stopped.
Number of Records Processed in One Transaction. Specify the number of records processed within one transaction in the corresponding box. 1024 records are processed by default.
Call the Event if Error Occurred. Selecting the checkbox allows for selecting the custom event that will be generated in case of error. The list contains the events created in custom metadata of the repository. An event can be tracked in the task scheduler, tasks should be set up for execution after custom event.
Editing Input
To set a list of fields and link to input, go to the Input Editor tab.
 To display the Input Editor tab
 Settings button.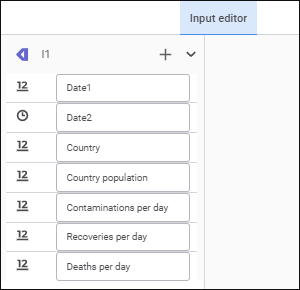
The following settings are available on the page:
 Create Link button and select an object output. If the list of provider and consumer fields fully matches, all fields will be linked automatically. A link between fields can also be set up in the
  Actions button and select the Fill from Consumer item.
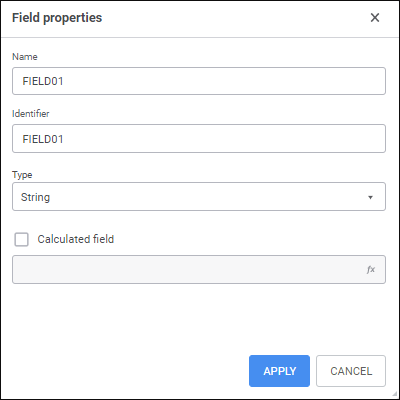
 Add button. The Field Properties dialog box opens: