In the web application:
Select process step or stage in the working area.
Click the
 Temporary Event button on the toolbar. A temporary event is added to the working area.
When building a process, it is available to set up temporary event by time that enables the user to abort process execution before the time specified in event settings expires. When enabling temporary event, execution of the current process branch is paused till time specified in the event is out.
To add a temporary event in the Set Up Business Process dialog box:
In the web application:
Select process step or stage in the working area.
Click the  Temporary Event button on the toolbar. A temporary event is added to the working area.
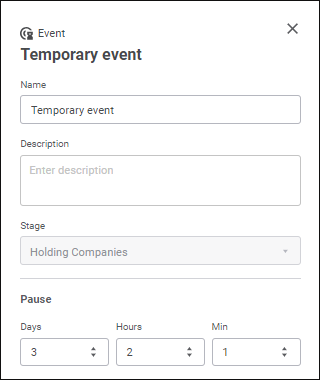
NOTE. To set up a temporary event in the web application, select the event and click the  Settings button on the toolbar. The Temporary Event parameters panel opens.
In the desktop application:
Click the ![]() Temporary Event button in the Event group on the Process ribbon tab. and select the
Temporary Event button in the Event group on the Process ribbon tab. and select the  By Timer event type.
Select the Temporary > By Timer context menu item in the working area or in the process tree.
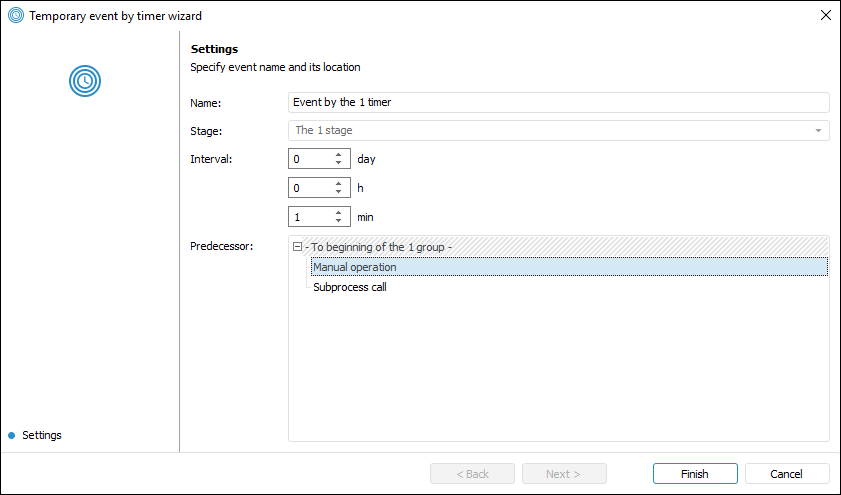
As a result, the Temporary Event by Timer Wizard dialog box opens.
To set up a temporary event, set the following parameters:
Name. Enter event name.
Description. Optional. It is available only in the web application.
Stage. The box displays the stage where the event is created. The stage is not editable. It is available only in the desktop application.
Pause/Interval. Enter value of time interval when the process execution must be aborted. The interval can be set in days and/or hours and/or minutes.
Predecessor. Select the predecessor step in the list, after its execution the created event is started. The list is displayed for the second and the following blocks. It is available only in the desktop application.
NOTE. It is available to set up predecessor step only on creating an event.


The temporary event will be displayed in the working area as a block that is identical to process steps in the web application on adding, and in the desktop application after saving settings.
To move the temporary event:
In the web application select the temporary event in the working area and drag it to the required stage.
In the desktop application finish event creation and move it to the required stage using the  Cut /
Cut / Paste buttons in the Edit group on the Process ribbon tab.
In the process monitoring working area each event is indicated with the color corresponding to its current status.
Available options of execution status indication:
Grey background. Execution is not started.
Blue background. Event timer is activated.
Green background. Execution is successful.
See also:
Building Process | Creating Stage Steps | Setting Up Stage Steps Execution Conditions