Adding a Web Part of Foresight Analytics Platform to Microsoft SharePoint Web Page
In this article:
Step 1. Adding a Web Part of Deployed Solution to Web Part Gallery
Step 2. Adding a Web Part to Page
Step 3. Setting Up Added Web Part Parameters
Features of Working with Report
The third step of integration of Foresight Analytics Platform with Microsoft SharePoint is adding a web part to the Microsoft SharePoint web page with a Foresight Analytics Platform report.
A web part of Foresight Analytics Platform can be added to Microsoft SharePoint web page using the following:
The Foresight.Webparts.wsp file that is a solution where the web part of Foresight Analytics Platform is created, which will be further added to Microsoft SharePoint web page. The web part allows for displaying any report (express report, regular report, dashboard, and so on) on the web page.
NOTE. To get the Foresight.Webparts.wsp file, contact technical support by sending a request to support@fsight.ru or via technical support services, which are available after registration at the website.
A workstation with installed and configured Microsoft SharePoint services (the guide contains settings for Microsoft SharePoint 2013).
Before adding a web part make sure that the Foresight.Webparts.wsp solution is deployed and activated on Microsoft SharePoint portal.
Order of Actions
Step 1. Adding a Web Part of Deployed Solution to Web Part Gallery
To add a web part of the deployed Foresight.Webparts.wsp solution to web part gallery:
Enter https://<portal URL>/_layouts/newdwp.aspx in the address bar of the browser.
Opening the URL opens a page with a list of new web parts.
Select the web part Foresight.Webparts.fpReportWebprt.fpWebpart in the list and click the Fill Gallery button.
After executing the operations the web part is added to the web part gallery and is available for adding to the page (by default, from the Custom folder).
Step 2. Adding a Web Part to Page
To add a web part:
Create a new page on Microsoft SharePoint portal:
1.1 Click the  Settings button at the upper right corner.
1.2 Select the Add a Page item in the button's drop-down menu.
After executing the operation the Add a Page dialog box opens. Enter page name to the New Page Name box and click the Create button. A new page is opened for edit.
Click the Web Part button on the Insert ribbon tab:
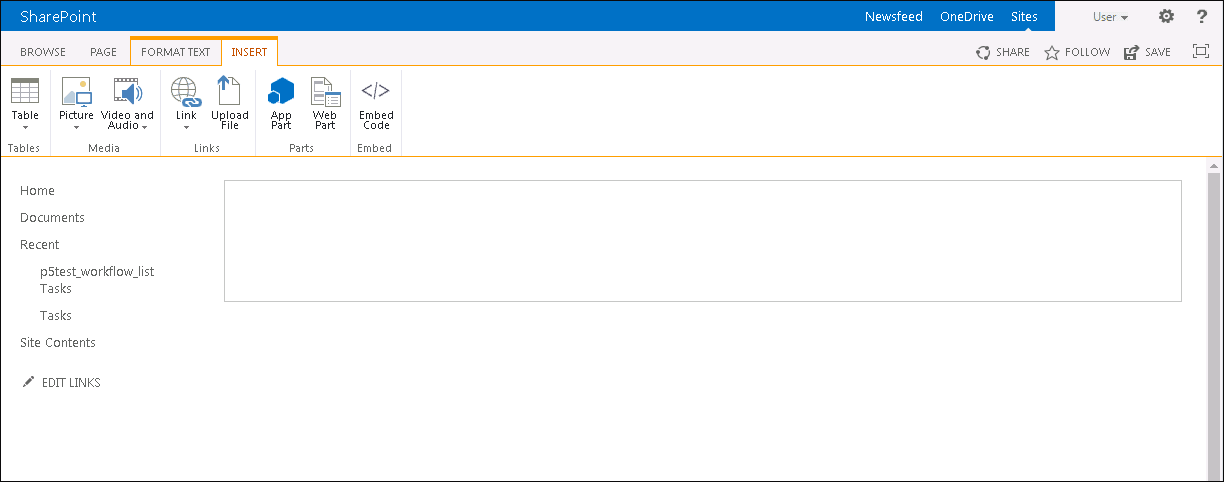
Select the Custom folder in the Categories list that opens. The Parts list displays the added part Foresight.Webparts.
Select the added web part and click the Add button:
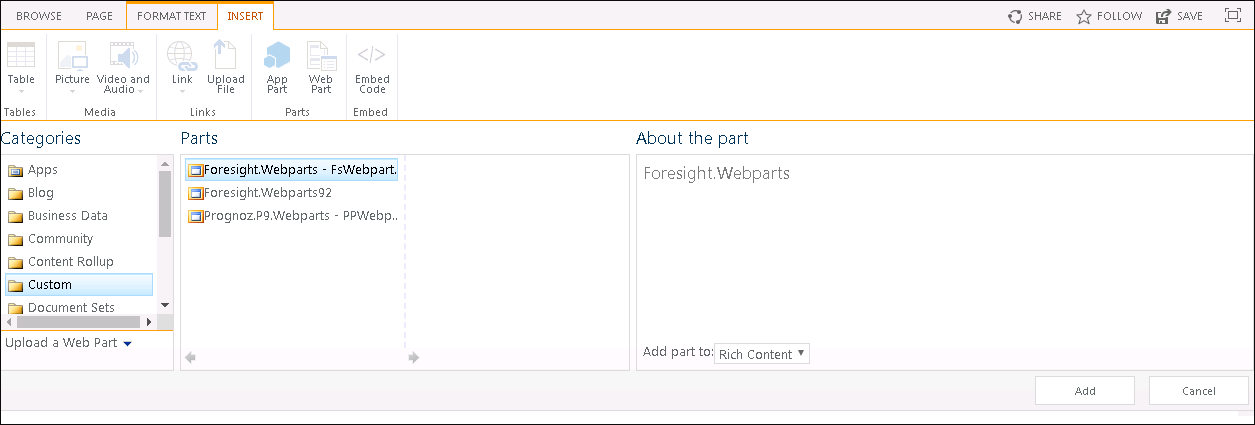
As a result, the added web part is displayed on the page as a rectangle.
Step 3. Setting Up Added Web Part Parameters
To display a report, set up added web part parameters:
Select the Edit Web Part item in the drop-down menu of the arrow icon at the rectangle's upper right corner:
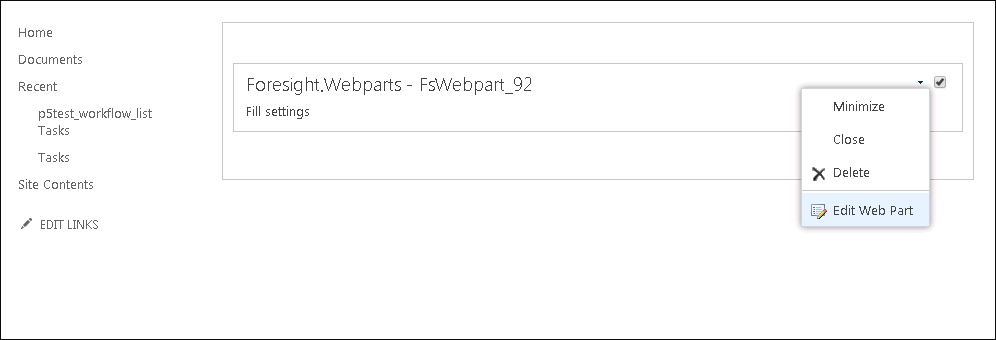
After executing the operation the upper right part of the page displays a side panel with web part parameters:
Standard web part parameters can be set up on the Appearance, Layout, and Advanced tabs.
A displayed report can be set up on the Report Webpart Settings tab.
Go to the Report Webpart Settings tab:
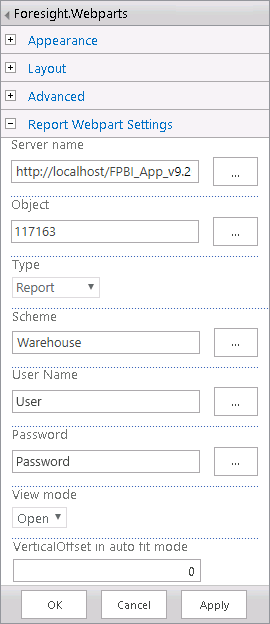
Set parameters:
Server Name. Path to BI server, for example: http://localhost/fpBI_App_v9.2/axis2/services/PP.SOM.Som.
Object. The key of the repository object, which will be displayed in the web part.
Type. Object repository type. Available objects: Olap (express report), Report (regular report), Workbook (workbook), Modeling (modeling variable), Dashboard (dashboard).
Scheme. Repository identifier.
User Name. Repository user name.
Password. A password to log in to the repository.
View Mode. Object open mode: Open - view mode, Edit - edit mode.
Click the Apply button, then the OK button.
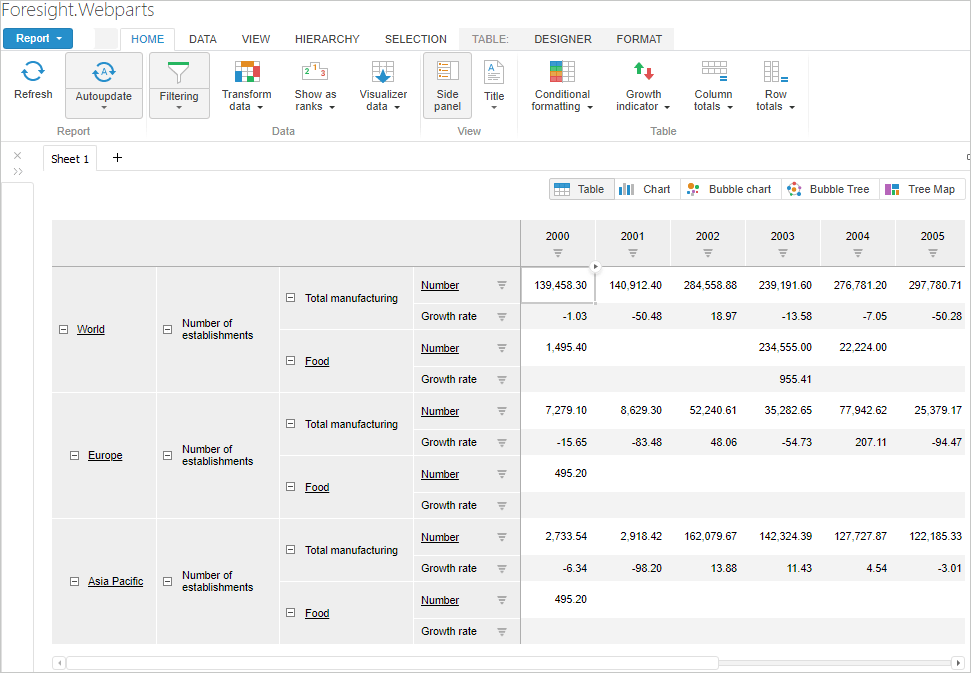
After executing the operations the specified report is displayed in the web part on the page, for example:
Next, start platform tasks from a Microsoft SharePoint workflow.
Features of Working with Report
After a web part with Foresight Analytics Platform report is added, the Microsoft SharePoint web page may display only one report, for which parameters are set. If a regular report or a dashboard contains links to other report, opening the link in the current web part is not available.
To work with other report, enter the following in the addree bar of the browser: https://<portal URL>/SitePages/<web page>.aspx?key=<object key>&type=<object type>.
When a report copy is saved using the Save As button of the main menu, a report copy with specified name and identifier is created in the repository but it is not automatically opened in the current web part. The report copy is opened separately.
When built-in advanced analytics is used, data mining is not available.
Adding Web Parts with Different Platform Versions
Adding a web part with a different platform version to the same server is identical to regular adding of web part of Foresight Analytics Platform to Microsoft SharePoint web page. Each web part is a file with unique name and identifier. The name and title of web parts contain suffixes of platform release to provide visual difference between added web parts:

Updating Web Part
A web part can be updated in the web part gallery on SharePoint server after enhancing the current web part version.
Before updating the Foresight.Webparts.wsp web part:
Open the Microsoft SharePoint management shell (Start > Microsoft SharePoint 2013 Products > SharePoint 2013 Management Shell).
Execute the command:
Update-SPSolution -Identity Foresight.Webparts.wsp -LiteralPath <solution path>
After executing the operations the web part is updated.
Deleting Web Part
To delete the web part:
Enter the following in the address bar of the browser: https://<portal URL>/_catalogs/wp/Forms/AllItems.aspx.
Opening the URL opens the Web Part Gallery page.
Click the
 button next to the web part, which should be deleted. The web
part edit dialog box opens.
Click the Delete Item button on the Edit ribbon tab.
After executing the operations the web part is deleted from the web part gallery on SharePoint server.