 Parameters button on the toolbar. After this the Working Area Settings side panel opens:
To set up workspace formatting:
To set up working area formatting, click the Parameters button on the toolbar. After this the Working Area Settings side panel opens:
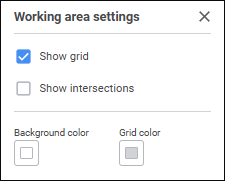
Set the parameters:
Show Grid. Deselect the checkbox to hide grid in the working area. The checkbox is selected by default, grid is shown.
Show Intersections. Select the checkbox to show line bends at the points of intersection of straight/curved lines and arrows in the working area:
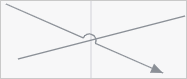
The checkbox is deselected by default, line bends are not displayed at the points of intersection of straight/curved lines and arrows. Checkbox state is not saved, the checkbox is always deselected when workspace opens.
Background Color/Grid Color. Select background/grid color in the drop-down color palette.
One can select standard and custom colors. The palette contains only standard colors by default.
To create a custom color:
Click the  Add Color button. The advanced color palette opens.
Select a color in the advanced color palette, use color picker to select color on a browser page, or set color code in the RGB or HEX format.
After executing the operations the custom color is created and added to the palette.
NOTE. The maximum possible number of custom colors in the a palette is 23.
To delete custom color from the palette, select the Delete item in the selected color's context menu.
To change color transparency, use the slider or enter value as a percentage.
To reset color settings, click the  Default Color button.
To hide or show grid in the working area, press the G key.
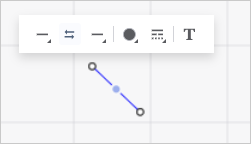
All workspace objects have the same formatting by default. To set up object formatting, set object formatting parameters on the popup panel.
For a line:
For a shape/image:
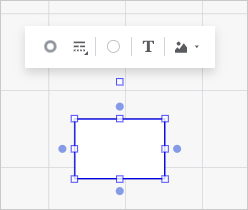
Set:
See also:

 Line parameters
 Start/
 Swap Places With button.
 Line Color button.
 No Color button.
 Set Up Line button:
 . Solid line.
 . Squared points.
 . Dashed line.
 . Dash-dot-dot-dashed line.
 . Dash-dot-dashed line.
 Border Color button.