Double-click the selected object.
Select the Rename context menu item.
Click the  Add/Edit Text button on the popup panel of the selected object.
To enter and edit line/shape/image text:
Double-click the selected object.
Select the Rename context menu item.
Click the Add/Edit Text button on the popup panel of the selected object.
The text editor is displayed. To finish text editing, click outside the editor area.
NOTE. The text created for lines is always located at the same angle with the line. Object, to which the text belongs, is rotated with the text.
To set up text formatting of the selected object, use the popup panel:
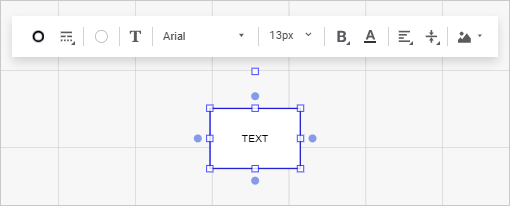
Set text parameters:
To set mixed text formatting, change font options of the selected text part.
If required, one can load custom fonts.
See also:
Setting Up Workspace Formatting

 Font
Font Font Style button:
 . Italic.
 . Underline.
 . Strikethrough.
 Font Color button and select font color in the drop-down color palette.
 Add Color button. The advanced color palette opens.
 Horizontal Alignment button:
 . Center. Default value.
 . Right.
 Vertical Alignment button:
 . Top.
 . Bottom.