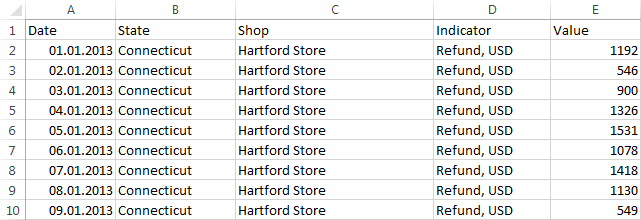
Consider the example of data import from a Microsoft Excel file to a new repository cube. Assume the following file structure and contents:
Start the import wizard using one of the ways:
Select the Tools > Data Import item in the main menu of the object navigator.
Select the Data Import item on the welcome screen in the web application.
The dialog box opens:
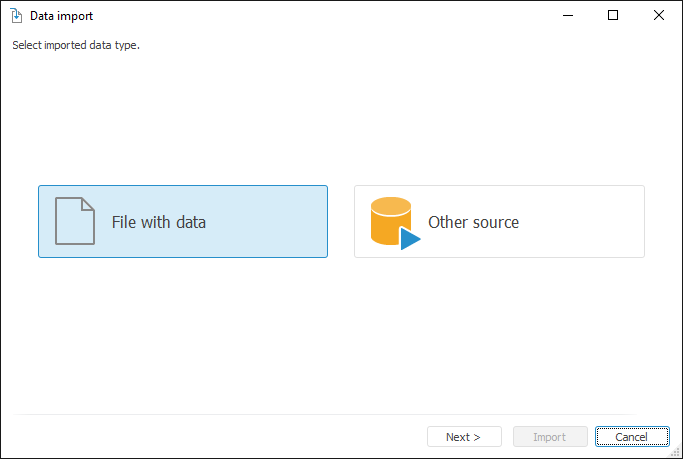
Select the File with Data item on the start page and click the Next button. Click the Browse button on the next page and select the file with data:

After parsing file structure and data identification the first 100 strings are loaded and displayed from the selected file. Click the Next button.
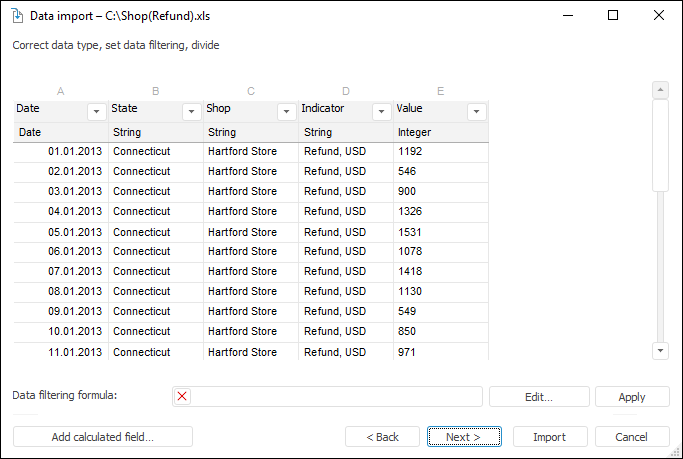
If required, correct the data:
After correcting the data contents click the Next button.

The fields are automatically divided into dimensions, values of text fields are imported as values of the Name attribute of dimension elements. All fields with real data type are imported as values. A fact in the cube dimension is created for each field with value.
If required, the contents of dimensions and their combination can be changed. To do this, drag attributes to the required dimension contents (attributes are displayed as child elements of the dimensions, so that each attribute has its role). If several attributes within one dimension have the Name role, the dimension is created as hierarchical one.
After specifying dimension contents click the Next button.
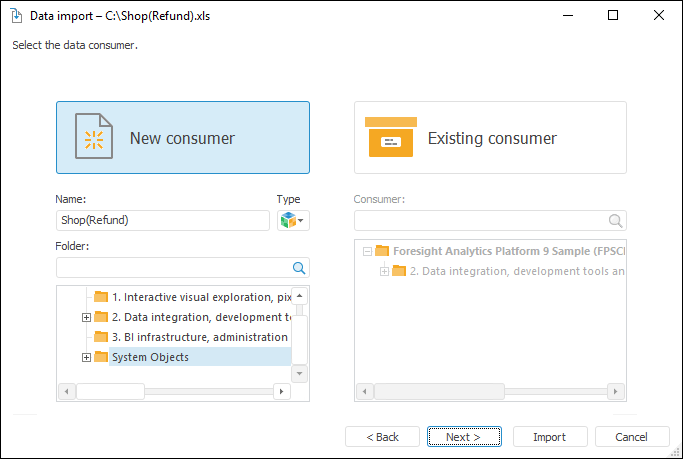
Click the New Consumer button, name a new cube and select the folder to save the cube in the repository. Click the Next button.
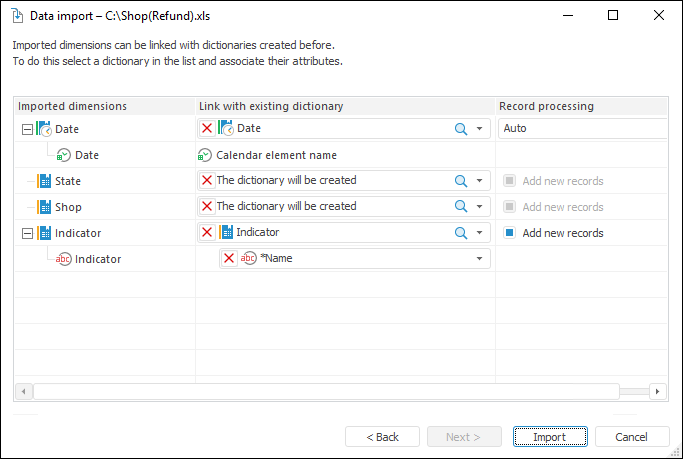
If the repository already contains dictionaries having the same purpose and structure as the imported dimensions, they can be selected in the drop-down lists. Only MDM dictionaries, composite MDM dictionaries and calendar dictionaries are available to choose from.
On clicking the Import button a new cube, all required dictionaries and a table with imported data are created and set up. Settings of data import to ETL task are also saved.
The last wizard page enables the user to modify the dictionaries used in the structure of the created cube. One can create groups of elements, selection schemas and alternative hierarchies. Clicking the Finish button closes the import wizard dialog box.
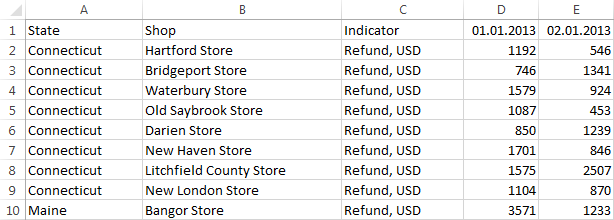
Consider the example of data import presented as a crosstab. A crosstab is a way of presenting data where information about various indicators is located in row and column headers, factual data is located in the intersection of rows and columns. Assume that the Microsoft Excel file to import contains the following structure and contents:
Start the import wizard using one of the ways:
Select the Tools > Data Import item in the main menu of the object navigator.
Select the Data Import item on the welcome screen in the web application.
The dialog box opens:
Select the File with Data item on the start page and click the Next button. Click the Browse button on the next page and select the file with data:

Select the Crosstab checkbox and click the Next button.
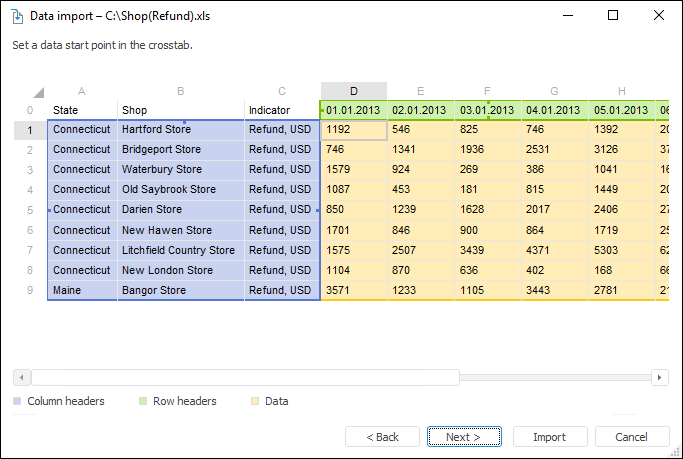
The import wizard automatically determines the numeric data start area. If it was determined incorrectly, change the data start area by selecting the required cell. Click the Next button.
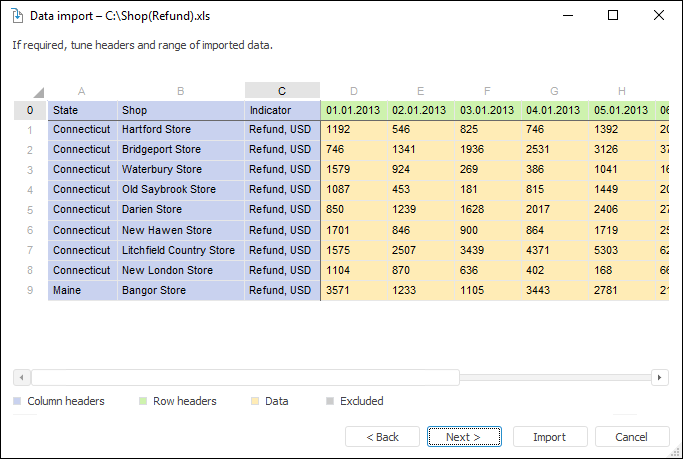
To exclude boundary columns from import, execute the Exclude context menu item. Data in these columns will not be imported.
Click the Next button.
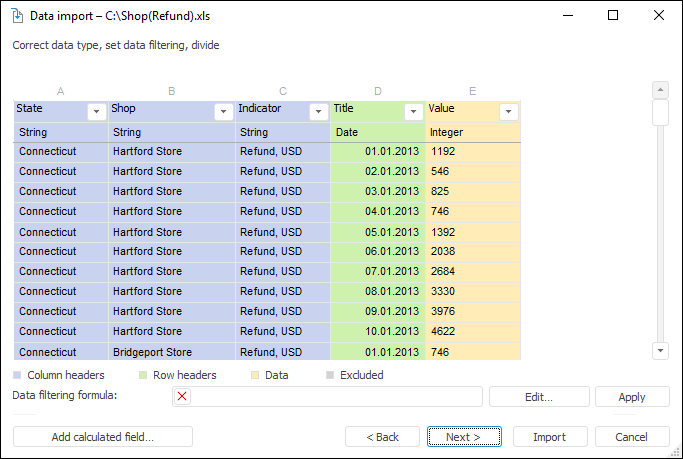
Identified data from the crosstab is converted in the following way:
Row and column headers are divided into separate fields.
Numeric data, which start was determined before, is placed in the Value field.
If required, correct the data:
After specifying dimension contents click the Next button.
The fields are automatically divided into dimensions, values of text fields are imported as values of the Name attribute of dimension elements. All fields with real data type are imported as values. A fact in the cube dimension is created for each field with value.
If required, the contents of dimensions and their combination can be changed. To do this, drag attributes to the required dimension contents (attributes are displayed as child elements of the dimensions, so that each attribute has its role). If several attributes within one dimension have the Name role, the dimension is created as hierarchical one.
After specifying dimension contents click the Next button.
Click the New Consumer button, name a new cube and select the folder to save the cube in the repository. Click the Next button.
If the repository already contains dictionaries having the same purpose and structure as the imported dimensions, they can be selected in the drop-down lists. Only MDM dictionaries, composite MDM dictionaries and calendar dictionaries are available to choose from.
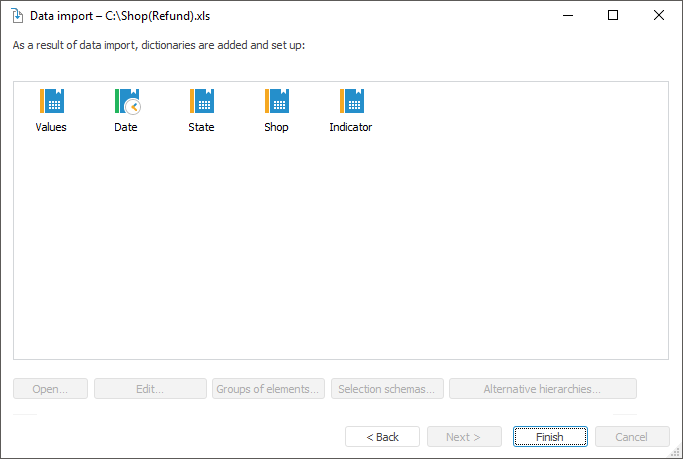
On clicking the Import button a new cube, all required dictionaries and a table with imported data are created and set up. Settings of data import to ETL task are also saved.
The last wizard page enables the user to modify the dictionaries used in the structure of the created cube. One can create groups of elements, selection schemas and alternative hierarchies. Clicking the Finish button closes the import wizard dialog box.
See also:
Data Import without Preparation