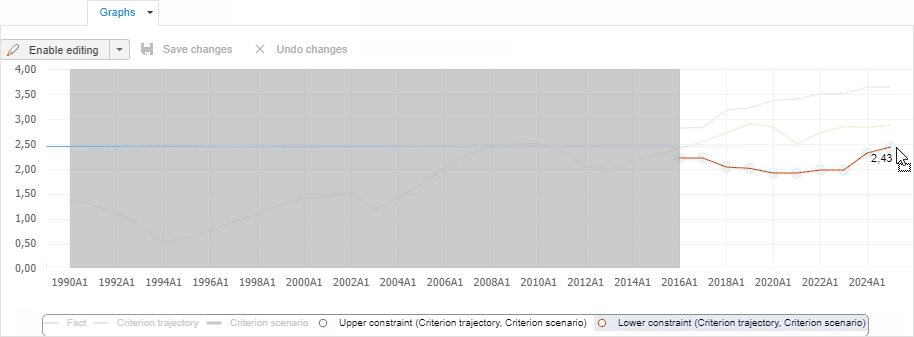
When working with the criterion function, constraints may be put on both the criterion function itself, and on the controlling variable. Constraints enable the user to specify the interval, in which criterion function values and controlling variable values must be.
Constraints values are set only in the forecasting period.
To enter constraints values:
Make sure that the results panel is displayed.
Select the criterion function constraint or controlling variable in the working area.
Go to the Graphs tab on the results panel.
Make sure that editing by drawing is enabled, and legend is displayed on the Graphs tab.
Set the lower constraint value:
Select the Lower Constraint (<scenario name>) element in the legend. The forecasting period, available for entering constraint values, is highlighted on the graph.
Point the cursor to the graph in the forecasting period. The period available for editing is highlighted.
Hold down the mouse button and move the cursor to the right along the category axis. The current value of constraint point is displayed next to the axis. For example:

After entering constraint values in the entire forecasting period release the mouse button.
Repeat the previous step for the upper constraint. Use the Lower Constraint (<scenario name>) element of the legend.
Save constraints values. Click the ![]() Save Changes button.
Save Changes button.
Constraints will be created for the criterion function or the controlling variable. The variable lower and upper constraint are marked with grey stripes at the top and at the bottom respectively:

TIP. Constraints values can also be entered on the Table tab of the results panel. Enter the appropriate values by the Upper Constraint and the Lower Constraint scenarios.
If trajectory is set for the criterion function, constraints can be weakened. Weakening enables the user to find optimal value of criterion function.
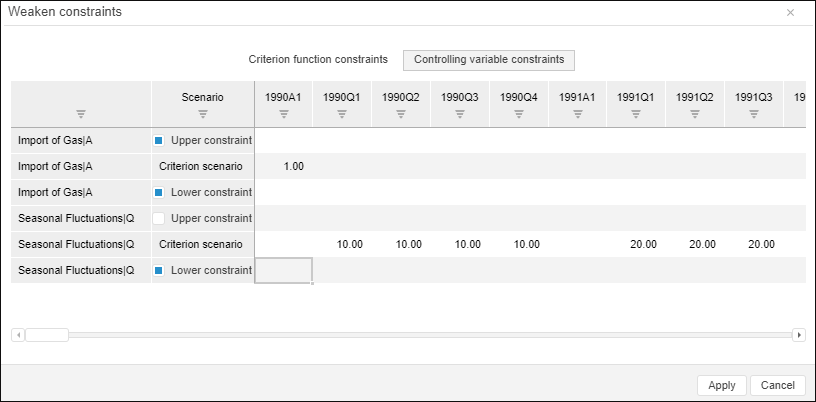
To weaken constraints, use the Weaken Constraints dialog box.

The dialog box shows all constraints that are set for the criterion function and controlling functions.
To show criterion function constraints, select the Criterion Function Constraints button, to show controlling variable constraints, select the Controlling Variable Constraints button.
To weaken upper or lower constraints, deselect the appropriate checkbox in the Scenario column.
To change constraint values, enter the required values to the table.
TIP. Constraints values can also be weakened on the Table tab of the results panel. Working with constraints on the Table tab is identical to working with constraints in the Weaken Constraints dialog box.
See also: