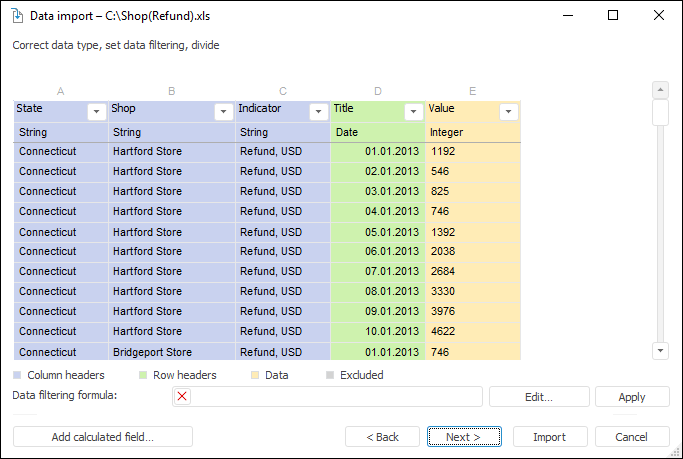
To transform data that was obtained from data source and will be imported to the consumer, go to the data adjustment page of the data import wizard:
The following operations are available on the page:
Field names are loaded from the data source. These names will be used to form attribute names in dimensions.
To rename the attribute, double-click name of the corresponding table field and enter a new name:
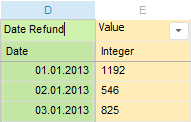
NOTE. It is recommended to rename fields with values on this page. These names will have facts in fact dimension.
All fields data obtained from the source will be used on import. If some data is irrelevant, it can be excluded. To do this, execute one of the following operations:
Select the Exclude item in the column's context menu.
Click the  Actions button and select the Exclude item.
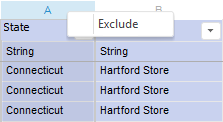
NOTE. To import to cube, there must be at least two columns, to time series database - at least three columns. The excluded fields can be used when creating an expression for calculated fields.
The type of data contained in source fields is determined automatically in accordance with the advanced settings. If the type is determined incorrectly, it can be corrected. To change data type, click the Actions button and select the required type:
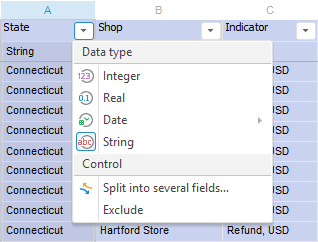
The fields with the Data type are determined automatically by checking the correspondence with most frequently used date formats, for example, DD.MM.YY, DD/MM/YY, and so on. If dates are set in some specific format, it can be specified by executing the additional command: Date > Set Up. The Date Format dialog box opens. Determine the format by means of available substitutions and required delimiting characters. After clicking the OK button the format is applied to parse date values.
String fields can be split into several fields if they have a particular delimiter character. Click the Actions button and select the Split into Several Fields item. In the dialog box that opens select delimiter in the drop-down list and click the OK button. After analyzing values and searching the selected field delimiter, the necessary number of additional fields is created, and appropriate values are placed into them. The number of created fields corresponds to the number of parts, into which a field value can be split that contains the maximum number of delimiter characters. If paired delimiter characters are used (round brackets, square brackets, and so on), new fields include only the values located inside these delimiters. The values outside the paired delimiter characters are excluded.
NOTE. If splitting is unavailable, an error message is displayed. Select another delimiter and repeat splitting.
Each created field is calculated, if required, one can change expression for it. The selected delimiter character is excluded from values. Data type is determined automatically for all created fields.
Extra fields obtained after splitting can be excluded or deleted. To do this, click the Actions button and select the corresponding item.
For example:
If the Indicator field is split by means of the , (Comma) delimiter, the result is the following:
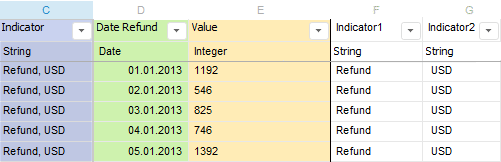
Additional columns that correspond to the specified splitting type are added to the table.
The Add Calculated Field button enables the user to create additional fields in table, which values are calculated during data loading by specified expressions. Clicking the button opens the expression editor to create an expression using source fields and various functions and statements. The excluded fields are also available for use.
After clicking the OK button the calculated field is added to the table, and value is calculated by previously loaded records:
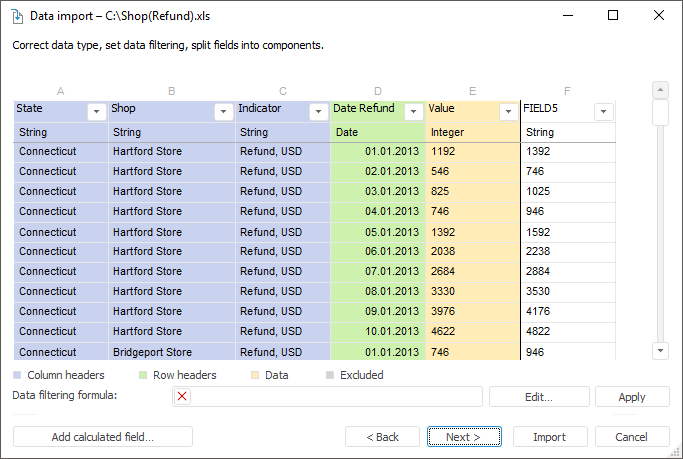
NOTE. Working with calculated fields in a crosstab is identical to working with calculated fields in a regular table.
To change the expression, by which the created field is calculated, click the Actions button and select the Edit item. After the item is selected, the expression editor opens.
To delete the calculated field, click the Actions button and select the Delete item.
If not all data should be imported from the data source, filtering by field values can be set up at the stage of data adjustment. Filtering condition can be manually set in the Data Filtering Formula box or can be created in the expression editor, which opens after clicking the Edit button. The condition is created using fields and various functions. The condition should return a logical value. The records, which satisfy the specified condition, are imported.
The Apply button enables the user to apply the specified filter to the first loaded records, which are displayed in table.
Clicking the Next button opens the page that enables the user to adjust dimension names and their structure.
See also:
Data Import without Preparation

 Rename fields