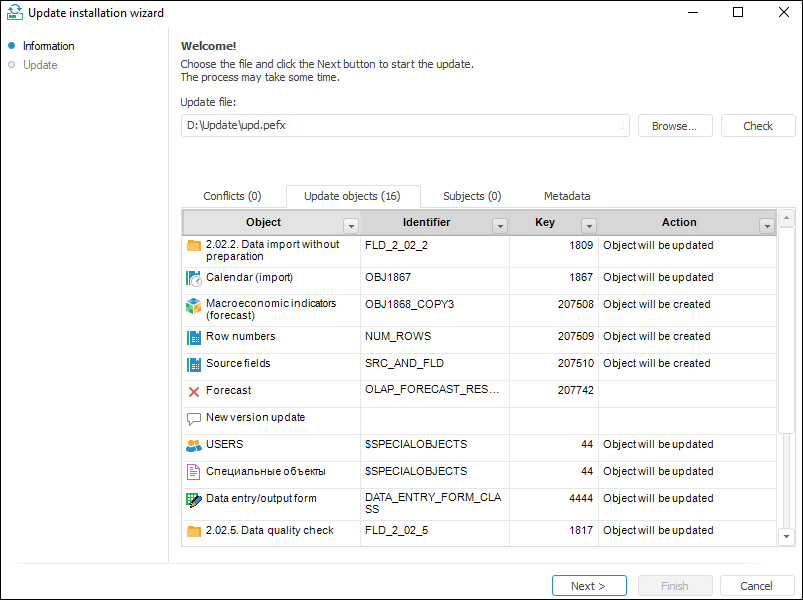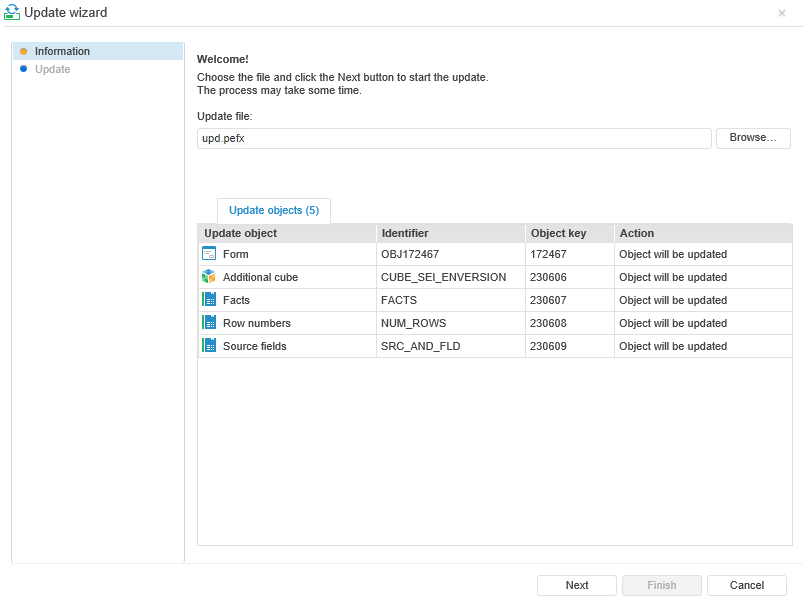

To start update process, use the update installation wizard or update wizard after selecting the update file on executing the update installation command:
The Information wizard page is displayed after an update file is selected on selecting the update setup item.


The Update File box of the Information wizard page displays path to the selected file. The update file can be replaced. The path can be entered manually or by clicking the Browse button and using a standard dialog box of file search.
The Check button is used to check the update for errors. Depending on the update configuration this procedure may take quite a long time. If any conflicts occur, the Conflicts tab becomes active. If there are no conflicts, the Update Objects tab becomes active.
NOTE. Checking the update for errors is available only in the desktop application.
The page displays a number of tabs depending on security manager settings:
Conflicts. The tab displays various conflicts (except for mandatory access control conflicts), which appear during the update check.
Update Objects. The Update Objects tab displays the update elements list.
Information. The tab displays information message. The tab is missing if the information text is not created on creating an update.
Subjects. The tab displays the list of security subjects from the update, for which the access permissions are updated but the subjects from the update are not compared to the repository security subjects when checking. The tab contains information about security subject name, SID, subject description and the operation with a subject.
Mandatory Access Control. The tab displays mandatory access control conflicts that occurred during the update check. The tab is displayed if the mandatory access control is used in both repositories (developer and customer).
Metadata. The tab displays data about update file: author, date and time, workstation name, platform version.
NOTE. The web application displays only the Update Objects tab.
Click the Next button to start the update. If the user tries to start the update with unresolved conflicts, the setup start confirmation appears.
To work with tables, the following operations are available:
Column resizing. To resize a column, put the mouse cursor on the border between columns ![]() and move the border.
and move the border.
Column sorting. Sorting is used to graphically display the list and does not affect the order of objects' update. To apply sorting, click the ![]() button in the column header and select the required sorting type:
button in the column header and select the required sorting type:
Sort Ascending.
Sort Descending.
Filtering. Filtering is used to reduce table volume and to exclude unnecessary information from consideration. The ![]() button in the column header is used to set up filtering. Click the button to display a list with elements of this column and reserved options:
button in the column header is used to set up filtering. Click the button to display a list with elements of this column and reserved options:
Clear Filter. The operation clears the previously selected filter. All column elements are displayed.
Top N. When this option is selected, the dialog box opens where the user needs to specify N, and after that the top N elements of the column are displayed (the user can set the number either explicitly or as a percentage of the element number). This filtering condition can be used only when a column contains numeric data.

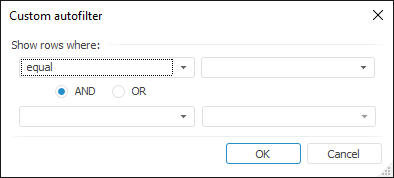
Select a comparison operator in the first drop-down list, in the second list specify a particular value. A value can be selected in the drop-down list that contains elements of the filtered column. Selecting the AND and OR radio buttons for the second condition can be specified in the same way as the first one. When autofilter is generated, the case of characters used in values is ignored.
Column elements list. When an element is selected, all other column elements are hidden. The list may also contain the following elements:
Empty. All elements that have an empty value in this column are displayed. This option is available only when there are empty values in the column.
Non-Empty. All elements that have a non-empty value in this column are displayed. This option is available only when there are empty values in the column.
When filtering is enabled, the header button changes:  .
.
See also: