 To open the dialog box
To start calculation algorithms, execute Fore-based of Fore.NET-based units, open repository object, create a custom button.
To use custom buttons:
Create a calculation algorithm, Fore unit or Fore.NET/JS-function or repository object. The following can be selected as repository object to be opened: dictionary, regular report, data entry form.
Create a custom button.
Apply custom button.
Set up the ribbon to structure added buttons.
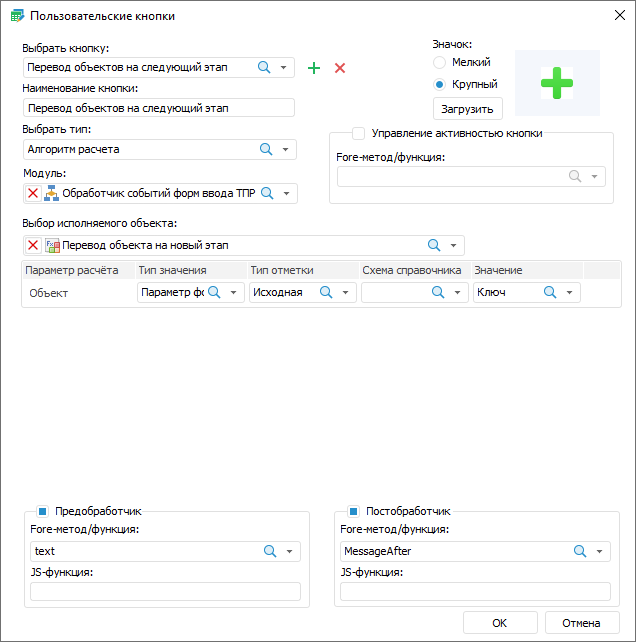
To create custom buttons, use the Custom Buttons dialog box.
To create custom buttons:
Add a custom button, enter its name and determine type.
Determine settings for the selected type: calculation algorithm, Fore/JS functions unit or opening repository object.
Load icon for button and set up its size.
Select unit that can be used for prehandler, posthandler, managing button activity and for executable method/function on creating button of the Fore/JS Function Unit type.

 Set up repository object opening
Created custom buttons are displayed on the Custom Functions ribbon tab. The tab becomes available after the custom button is added.
On clicking the button, actions are executed according to settings made on creation:
Calculation Algorithm. Calculation is started on clicking.
Fore Unit/JS-function. Specified unit is started on clicking.
Open Repository Object. Object opens on clicking the button.
If additional options were set for the button:
Activate/Deactivate Button. After executing the condition specified in the unit, the button becomes active or unavailable.
Prehandler. After clicking the button, the dialog box of selected format with the text returned by prehandler function will be displayed.Depending on the format view, the following buttons will be available in the dialog box:
Confirmation dialog box: the Yes and No buttons.To execute action of custom button, click the Yes button in the dialog box. To undo custom button action, click the No button in the dialog box.
Error, warning, information message: the OK button.To undo custom button action, click the OK button in the dialog box.
See also:
Building Data Entry Form | Working with Ready Data Entry Form