In this article:
Repository
The Repository connector is an object that is used to load data to repository objects.
After adding the connector to the ETL task workspace set basic properties, data source in repository, export options.
Depending on repository object used as consumer, consumer context menu will contain additional items:
Existing cube or time series database:
Open with. The specified repository object will be opened in one of the Foresight Analytics Platform tools: Dashboards, Reports, Analytical Queries.
Table:
Open Data Consumer. The table specified as a data consumer opens.
Edit Data Consumer. The editor wizard of the table specified as a data consumer opens.
Document:
View Data. The viewing data dialog box of the document opens.
Basic Properties
In basic properties object name, identifier and comment are set.
Repository Object
The Repository Object page is displayed only on creating a new consumer:
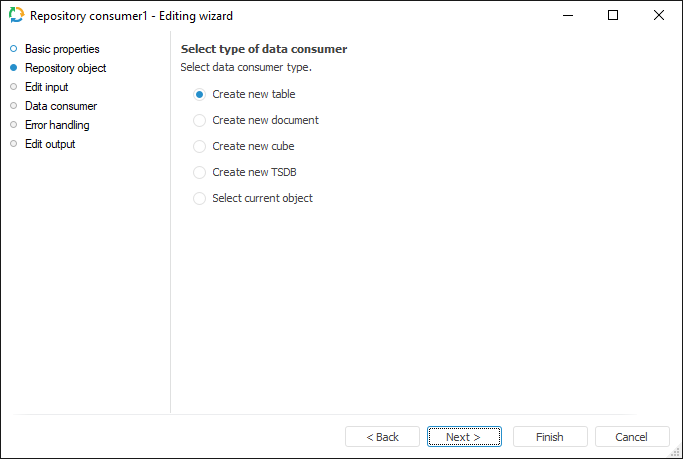
Select a consumer type, to which export is executed. If a new object is created, on moving to the Data Consumer page it is prompted to save a new object to repository.
Data Consumer
Select an object in the current repository to be used as a data consumer.
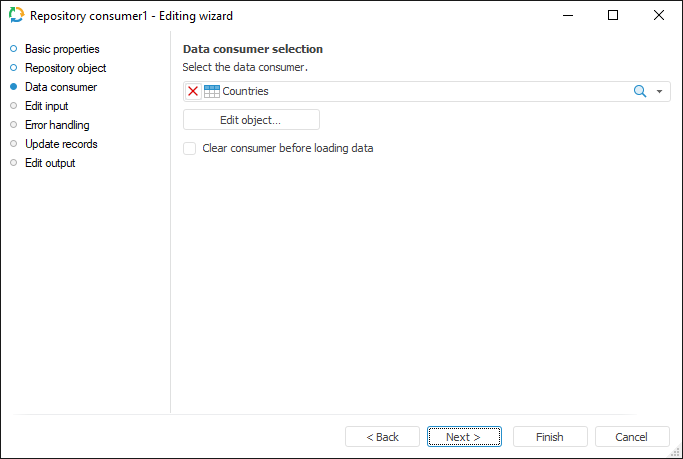
The following repository objects can be used as consumers:
Table MDM dictionary, composite table MDM dictionary.
Data sets (table, external table, view, query, ODBC data source).
Document.
Standard cube.
Time series database.
If the Clear Consumer Before Loading Data checkbox is selected, all data contained in the consumer object is deleted before loading. If the checkbox is deselected, new data is added and existing data is updated.
If consumer is a table MDM dictionary, then method of elements update can be selected in the drop-down list. The following options are available:
Replace All Elements. Elements that are not present in the provider will be deleted.
Add New (Missing) Elements. Only new elements are added, the existing ones are not updated.
Update Existing Elements. Only existing elements are updated, the new ones are not added.
Add New Elements And Update Existing Ones. New elements are added, the existing ones are updated. Elements that are not present in the source are not updated.
NOTE. On selecting a standard cube as a consumer, time series database, table MDM dictionary or composite table MDM dictionary, the Clear Consumer Before Loading Data checkbox and the Edit Object button are not available.
The Edit Object button opens the editing wizard of the selected object if the wizard was prepared.
If a new consumer is created, and the option of creating a new object is selected on the Repository Object page, on moving to the current page it is prompted to save a new object to repository. The created object is automatically selected in the drop-down list. The list will also contain the filter that enables the user to select other object of one type that was specified on the Repository Object page.
Export Options
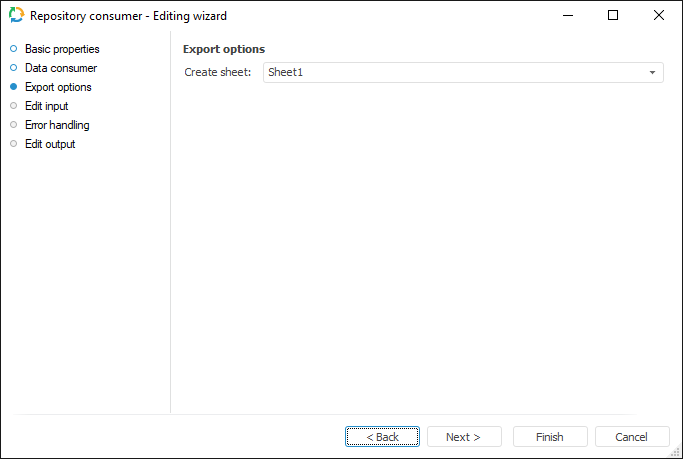
To set up parameters used to determine exported range of data, use the Export Options page.
NOTE. To display this page in the Repository data consumer wizard, specify on the Data Consumer page a file of the Document type as a data consumer.
Settings depend on the document type and are the same as export settings for data consumer of the same format.
For example, using the document with the *.xlsx extension as a data consumer, the Export Options page looks as follows:
Edit Input
To set a list of fields and link to input, use the Edit Input page.
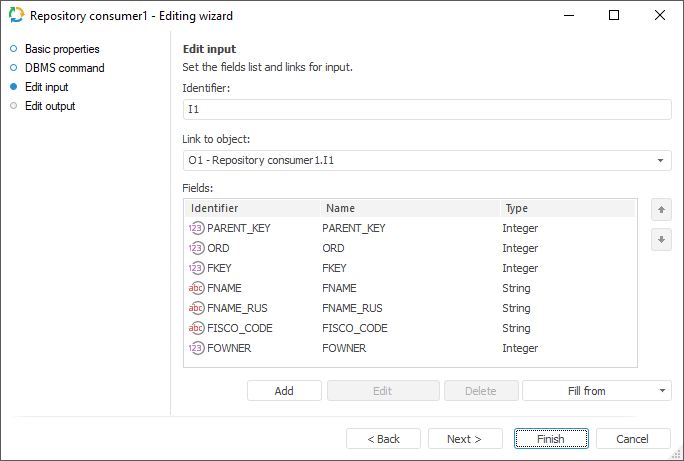
The following parameters are available on the page:
NOTE. The screenshot represents edit wizard for the Repository data consumer.
Setting Up Dimensions
To change name of dimensions and its contents, use the Dimensions Setup page.
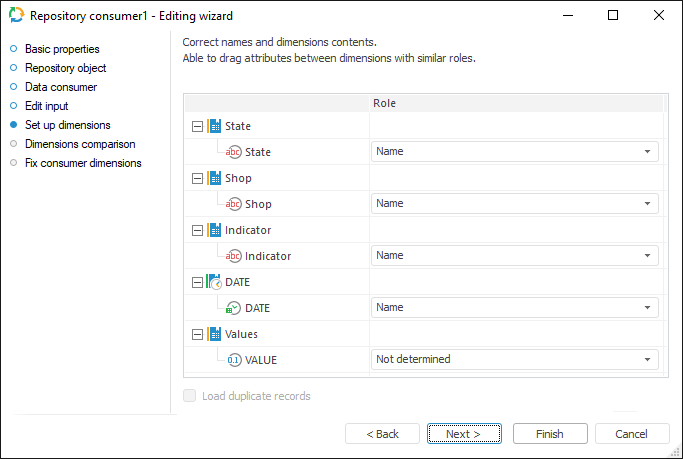
According to the type of selected data provider, on clicking the Next button the user moves to the next page.
Dimensions Comparison
To link imported dimensions with existing repository dictionaries, use the Dimensions Comparison page.
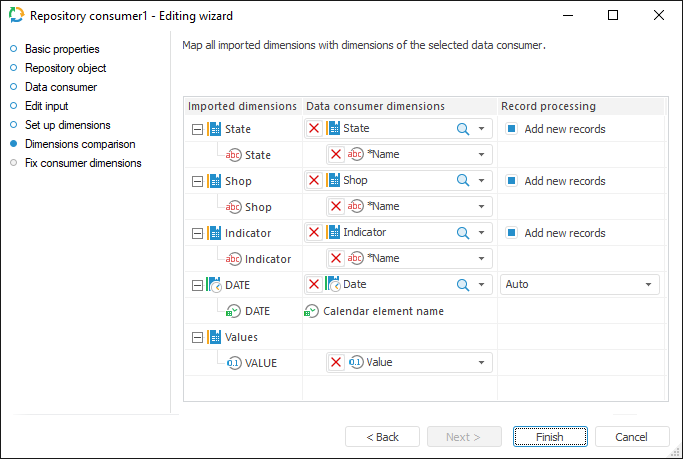
To link dimension with existing dictionary, select dictionary in the drop-down list next to required dimension. The following items are available for selection:
Calendar dictionaries.
Table MDM dictionaries.
Composite table MDM dictionaries.
To add new elements to the dimension from attribute of selected dictionary on import, select the Add New Records checkbox. The checkbox is selected by default. If the checkbox is deselected, elements are not be added. Data is imported only for the elements in the provider and in the selected dictionary. Only elements existing in the dictionary are used for data linking.
NOTE. Take into account existing features on importing to the hierarchical or multilingual dictionaries.
If dimension is not linked with existing dictionary, a new table MDM dictionary is created for it.
Error Handling
This page is available only in wizards of consumer objects and in the Copy Data object.
NOTE. The page is not displayed for repository consumer if a standard cube is selected as a data consumer.
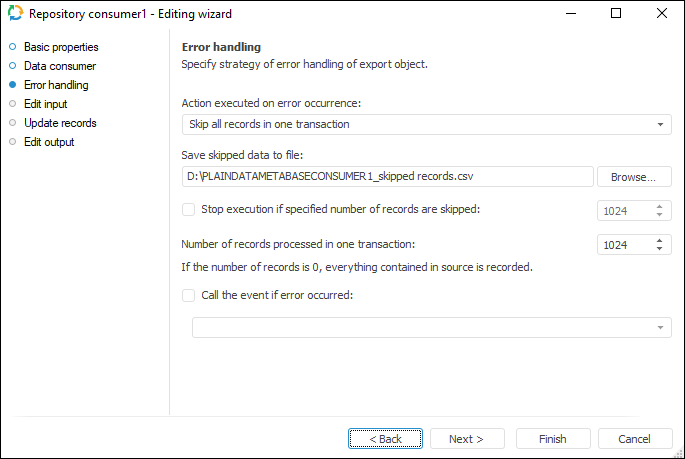
Determine behavior of the object on error occurrence:
Select the action executed if errors occur in the drop-down list Action Performed on Error Occurrence:
Stop Task Calculation. If export error occurs, ETL task runtime is stopped.
Skip Only Incorrect Records. Incorrect records are skipped. This item must be selected if it is not essential whether all records are present
Skip All Records In One Transaction. All records of the transaction where an error has occurred are excluded. Select this option in case when it is necessary to divide records collection into transactions to get all data without exceptions within these transactions
NOTE. The Skip All Records in One Transaction option is not available for the Excel (*.xlsx) consumer.
On selecting the Stop Task Calculation and Skip Only Incorrect Records actions, the task is also divided into transactions, and the specified number of records affects speed of task execution.
A file used to store skipped records can be specified on selecting the Skip Only Incorrect Records or Skip All Records In One Transaction actions.
If required, specify the maximum number of error records, over which export is stopped. To do that, select the Stop Execution if Specified Number of Records are Skipped checkbox and set maximum number of records.
Specify the number of records processed within a single transaction in the Number of Records Processed in One Transaction box. By default one thousand records are processed.
If required, set the unit that starts on error in the ETL task.To do it, select the Call the Event, If Error Occurred checkbox and specify the unit set in the ETL task settings.
Select a file to store skipped records. If there is no file with such a name, it is created automatically.
Skipped records are stored in the specified file if the Skip Only Incorrect Records or Skip All Records in One Transaction actions are selected for task errors handling. Data is deleted in the existing file before loading new data to it.
Available file formats:Encoding: Unicode.
NOTE. If on exporting there were no skipped records, the text "??" is written to the file. This means an empty Unicode file with the Win encoding.
Rows separator: {Carriage Return}{Line Feed}
Fields separator: ; (semicolon)
Text terminator: "" (double quotation marks).
NOTE. By default the following file name is formed: <consumer identifier>_skipped records.csv.
Each skipped record is registered in the ETL log as a single record containing the number of skipped record, error text and field. If all records within transactions are skipped because of one error record, the log displays this reason in the Description field.
Updating Records
To select fields for update in data provider and consumer, use the Update Records page.
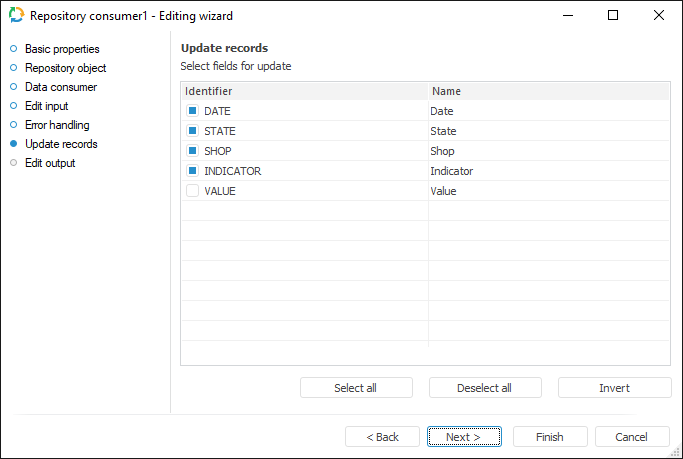
In the Identifier column, select checkboxes of the fields, which will be used to compare records in provider and consumer.
To select all fields for update, click the Select All button.
To deselect all fields, click the Deselect All button.
To deselect simultaneously selected fields and select the deselected ones, click the Invert button.
NOTE. Record update is relevant if the consumer is not cleared before data loading.
Edit Output
To set a list of fields and output link, use the Output Edit page.
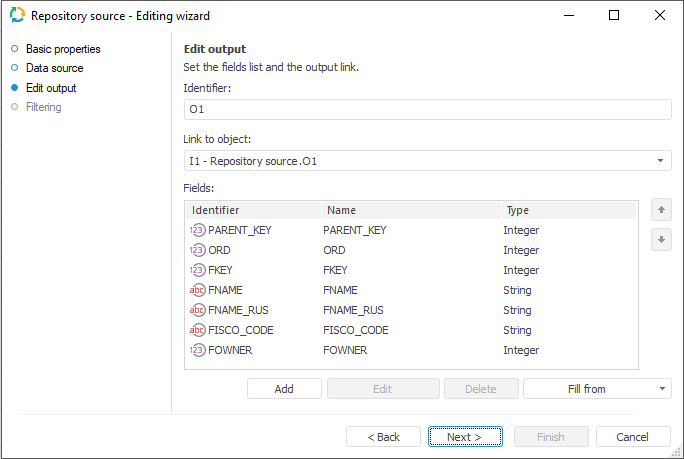
The following settings are available on the page:
NOTE. The screenshot represents edit wizard for the Repository data provider.

 To display the page