In this article:
Copy Data
Copy Data is an object that is used to load data directly from a provider to a consumer without using intermediary transformers or consumers.
Basic Properties
In basic properties object name, identifier and comment are set.
Data Source
The Data Source page is used to specify an object with imported data (repository object or external file) and parameters that are used to determine a data range.
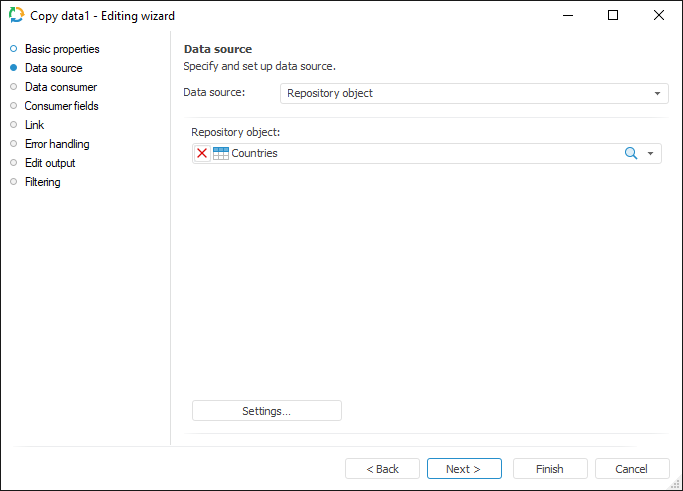
Settings on the Data Source page are the same as settings on the Import Options page of the data source selected in the drop-down list:
Repository Object.
Microsoft Excel.
Microsoft Access.
Microsoft XML.
Microsoft OLE DB.
Text File.
Visual FoxPro.
DBase.
Data Consumer
The Data Consumer page is used specify an object, to which data is exported (repository object or external file).
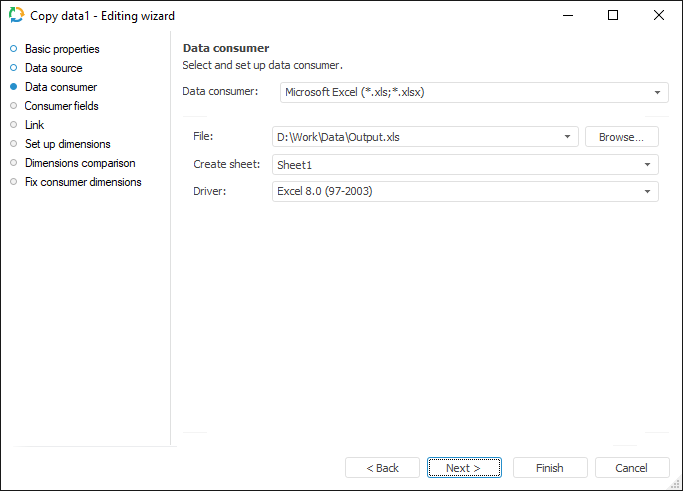
Settings on the Data Consumer page are the same as on the Export Options page of the data consumer selected in the drop-down list:
Repository Object.
Microsoft Excel.
Microsoft Access.
Microsoft XML.
Microsoft OLE DB.
Text File.
Visual FoxPro.
DBase.
Consumer Fields
The Consumer Fields page is used to set up consumer fields, to which data is copied.
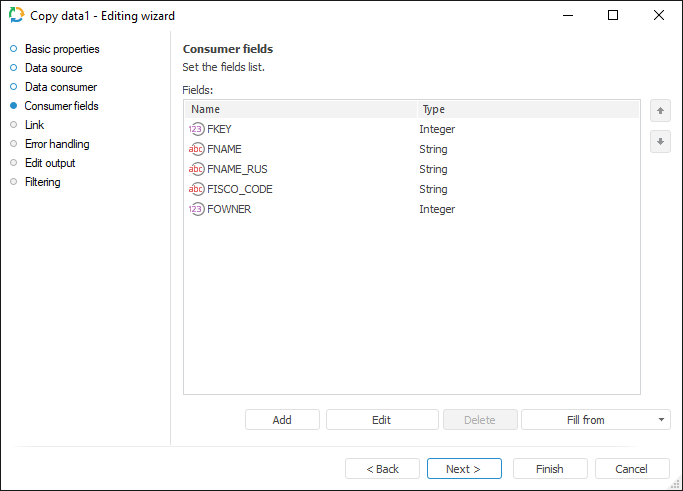
If consumer structure is fixed (the current repository object is selected), it is available to add only all fields From Consumer in the drop-down menu of the Fill From button. The Add button is disabled.
If the current file is selected, in which it is possible to identify structure, all options are available: the Add button or filling of the list based on provider/consumer structure.
If a new file is selected, the fields list is created manually. It is available to use the Add button or fill the list based on the provider structure.
Link
The Link page is used to set up links between source and consumer fields.
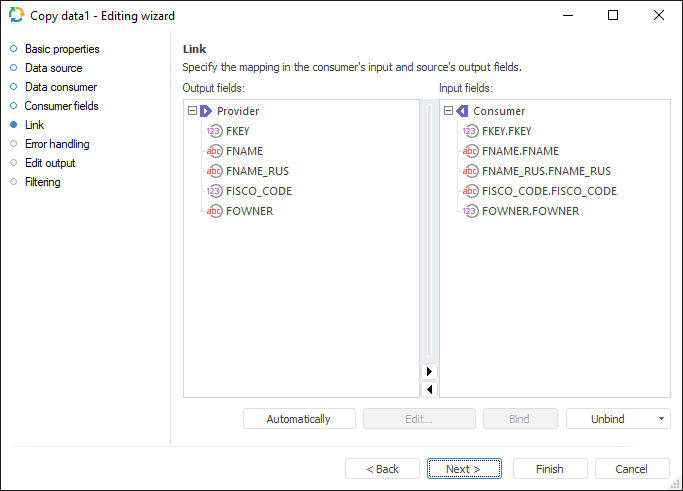
The following operations are available on the page:
Creating links automatically. Click the Automatically button to link fields with matching identifiers.
Editing input fields not linked with output. If an input field is not linked to an output field, input field value can be created automatically. To create value of the selected input field:
Open the Field Auto Fill Parameters dialog box. To do this:
Click the Edit button.
Double-click the field name.
Determine the required parameters.
Creating links manually. Drag data provider field to data consumer field or select field data and click the Bind button.
Deleting links. To delete link of selected consumer field:
Select the Unbind Selected Link item in the drop-down menu of the Unbind button.
Press the DELETE key.
To delete all links, select the Unbind All Links item in the drop-down menu of the Unbind button.
On going to this page it is prompted to set up an automatic link.
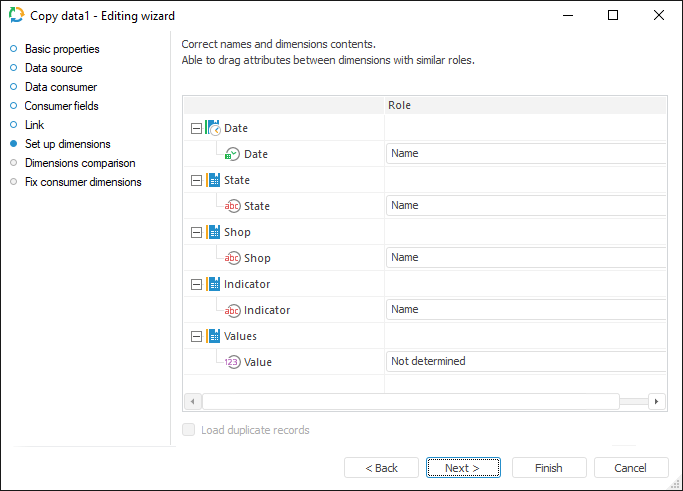
Dimensions Setup
If a standard cube is a consumer, the Dimensions Setup and Dimensions Comparison pages are available in the wizard after the Link page:
Dimensions Comparison
The Dimensions Comparison page is used to link imported dimensions with data consumer dimensions.
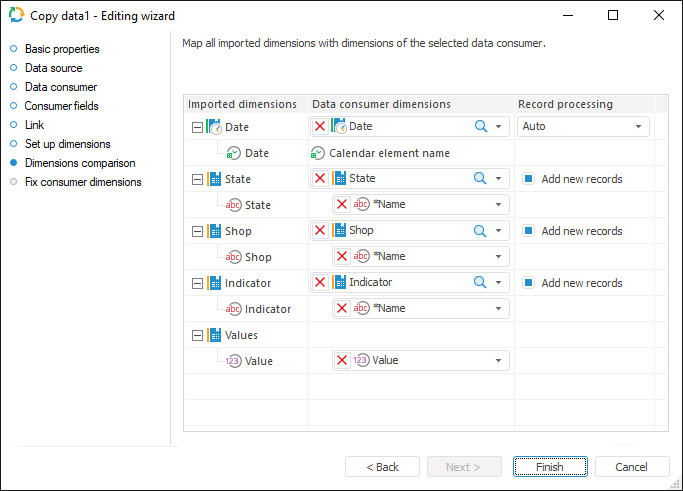
If the existing cube is selected as data consumer, imported dimensions and data consumer dimensions are linked automatically according to the specified links. The dictionary used as a dimension cannot be changed. The dictionaries that are specified in the cube structure are used.
If a new cube is created, it is available to select one of the available repository dictionaries in the drop-down lists. Only table MDM dictionaries and calendar dictionaries are available to choose from. A new separate table MDM dictionary is created for facts, that is why the facts are not displayed in the general list of imported dimensions.
Attributes of the selected consumer dimension must be mapped for each imported dimension. The attributes that have the same data type as in the imported dimension are available to choose from. A calendar dictionary is created for fields with the Date type, it is required to set data frequency for it.
To add to the list of dictionary elements from data provider field, select the Add New Records checkbox. If the checkbox is deselected, elements are not added, and data is imported only by the elements that are present in the data provider and selected dictionary. If consumer dimension is not selected, or binding is reset by the user, the "Dictionary will be Created" text is displayed in the drop-down list of dimensions. The Add New Records checkbox is not available in this case.
Error Handling
This page is available only in wizards of consumer objects and in the Copy Data object.
NOTE. The page is not displayed for repository consumer if a standard cube is selected as a data consumer.
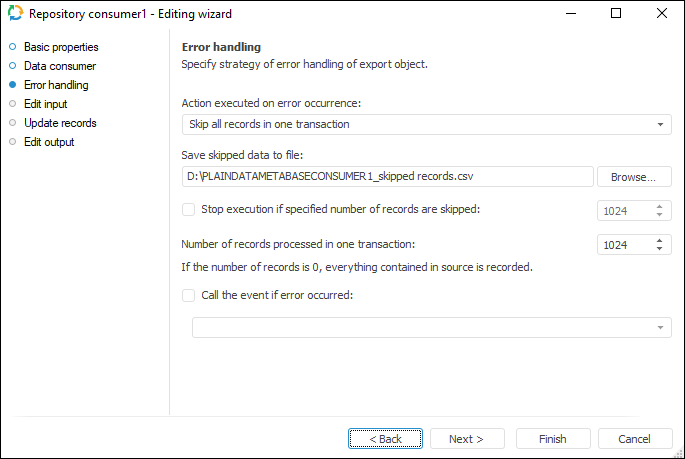
Determine behavior of the object on error occurrence:
Select the action executed if errors occur in the drop-down list Action Performed on Error Occurrence:
Stop Task Calculation. If export error occurs, ETL task runtime is stopped.
Skip Only Incorrect Records. Incorrect records are skipped. This item must be selected if it is not essential whether all records are present
Skip All Records In One Transaction. All records of the transaction where an error has occurred are excluded. Select this option in case when it is necessary to divide records collection into transactions to get all data without exceptions within these transactions
NOTE. The Skip All Records in One Transaction option is not available for the Excel (*.xlsx) consumer.
On selecting the Stop Task Calculation and Skip Only Incorrect Records actions, the task is also divided into transactions, and the specified number of records affects speed of task execution.
A file used to store skipped records can be specified on selecting the Skip Only Incorrect Records or Skip All Records In One Transaction actions.
If required, specify the maximum number of error records, over which export is stopped. To do that, select the Stop Execution if Specified Number of Records are Skipped checkbox and set maximum number of records.
Specify the number of records processed within a single transaction in the Number of Records Processed in One Transaction box. By default one thousand records are processed.
If required, set the unit that starts on error in the ETL task.To do it, select the Call the Event, If Error Occurred checkbox and specify the unit set in the ETL task settings.
Select a file to store skipped records. If there is no file with such a name, it is created automatically.
Skipped records are stored in the specified file if the Skip Only Incorrect Records or Skip All Records in One Transaction actions are selected for task errors handling. Data is deleted in the existing file before loading new data to it.
Available file formats:Encoding: Unicode.
NOTE. If on exporting there were no skipped records, the text "??" is written to the file. This means an empty Unicode file with the Win encoding.
Rows separator: {Carriage Return}{Line Feed}
Fields separator: ; (semicolon)
Text terminator: "" (double quotation marks).
NOTE. By default the following file name is formed: <consumer identifier>_skipped records.csv.
Each skipped record is registered in the ETL log as a single record containing the number of skipped record, error text and field. If all records within transactions are skipped because of one error record, the log displays this reason in the Description field.
NOTE. The screenshot represents edit wizard for the Repository data consumer.
Edit Output
To set a list of fields and output link, use the Output Edit page.
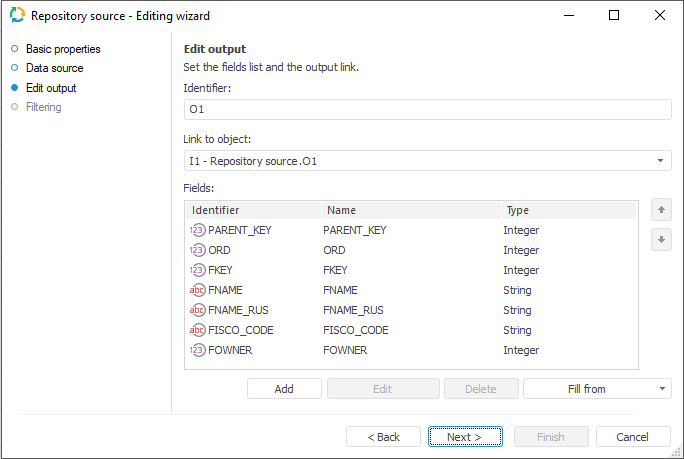
The following settings are available on the page:
NOTE. The screenshot represents edit wizard for the Repository data provider.
Filter
The Set Up Data Filtering of the Source page is used to specify the condition, by which imported data is selected:
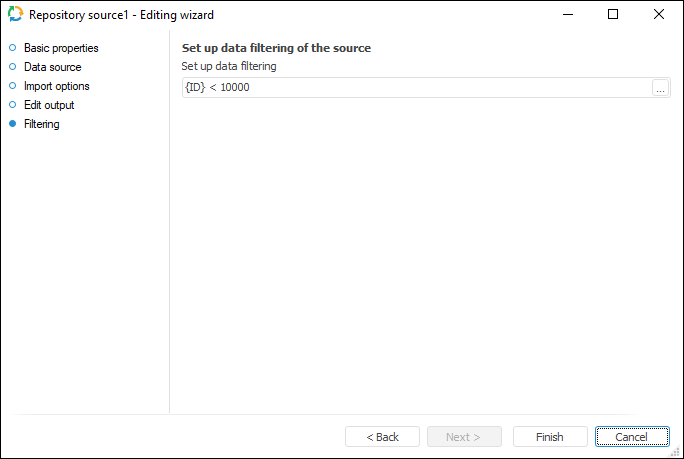
NOTE. The page is not displayed for copying data object if a standard cube is selected as a data provider.
To apply filtering condition, click the ![]() button. The following dialog box opens expression editor. All provider fields can be used to create an expression. The data that satisfies the specified condition is imported.
button. The following dialog box opens expression editor. All provider fields can be used to create an expression. The data that satisfies the specified condition is imported.
NOTE. The screenshot represents edit wizard for the Repository data provider.
Fixing Consumer Dimensions
The Fixing Consumer Dimensions page is used to fix selection of consumer dimensions that were not mapped with source dimensions. The page is available if the existing t cube is selected as a data consumer, and at least one dimension binding is reset on the Dimensions Comparison page.
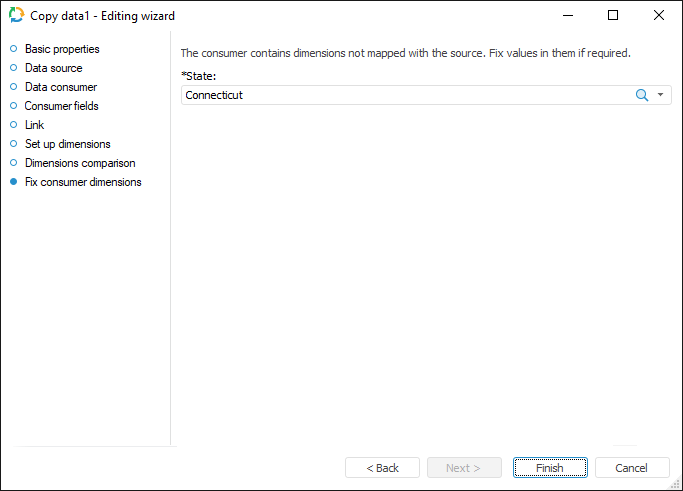

 Rename dimension