 Create a data area
How to set up pass-through rows and columns?
Quite often when multi-page printing is used, it may require to display repeated information on each page. For example, when printing the data area, it is required to display its heading and sidehead.
The data areas that fit to width of one sheet are used as source data.
In order each report sheet displays data area headings, set up pass-through rows.
To set up displaying of pass-through rows when printing, select the Report > Print > Page Settings main menu item. The Page Settings dialog box opens.
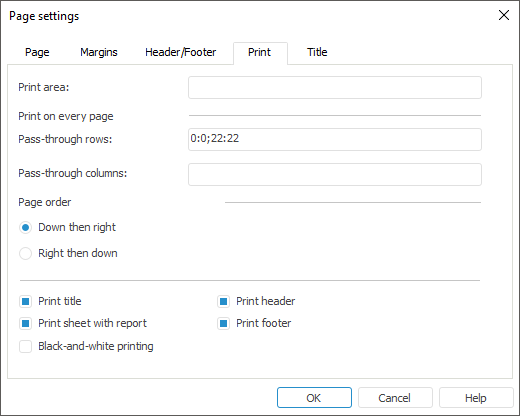
Go to the Print tab and fill the Pass-Through Rows box. To do this, select the range of rows to print on each page. In this case select the rows, which contain headings of the data areas: 0:0 and 22:22.
After the boxes are filled, the Page Settings dialog box looks as follows:
Save determined print options.
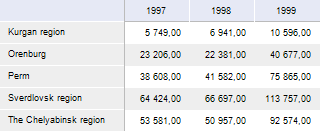
After the settings are determined, the first page of report remains unchanged when printing, and the second page looks as follows:
The data areas that fit the height of one sheet are used as source data.
In order each report sheet displays data area sideheads when printing, set up pass-through columns.
To set up displaying of pass-through columns when printing, select the Report > Print > Page Settings main menu item. The Page Settings dialog box opens.
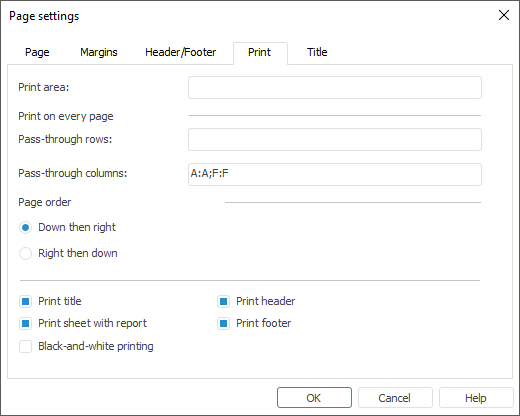
Go to the Print tab and fill the Pass-Through Columns box. To do this, select the range of columns to print on each page. In this case select the columns, which contain sideheads of the data areas: A:A and F:F.
After the boxes are filled, the Page Settings dialog box looks as follows:
Save determined print options.
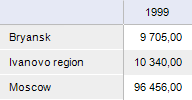
After the settings are determined, the first page of report remains unchanged when printing, and the second page looks as follows:
Several data areas are used as source data.
In order each report sheet displays data area headings and sideheads when printing, set up pass-through rows and columns.
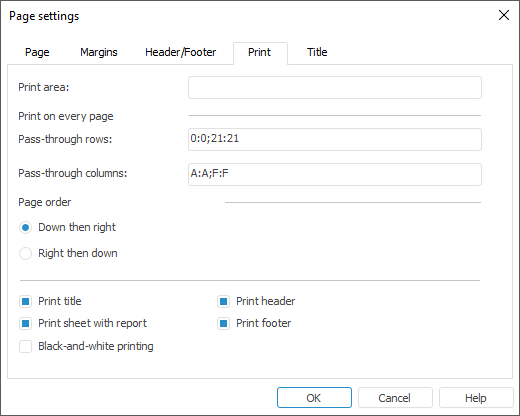
To set up displaying of pass-through rows and columns when printing, select the Report > Print > Page Settings main menu item. The Page Settings dialog box opens.
Go to the Print tab and fill the boxes:
Pass-Through Rows. Select the range of rows to print on each page. In this case select the rows, which contain headings of the data areas: 0:0 and 21:21.
Pass-Through Columns. Select the range of columns to print on each page. In this case select the columns, which contain sideheads of the data areas: A:A and F:F.
After the boxes are filled, the Page Settings dialog box looks as follows:
Save determined print options.
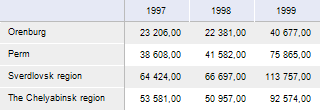
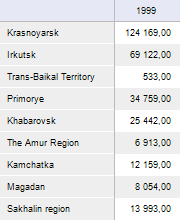
After the settings are determined, the first page of report remain unchanged when printing, and the second and third pages look as follows:
Page 2:
Page 3:
See also:
Questions and Answers | Setting Up Report for Printing | Report Preview and Print