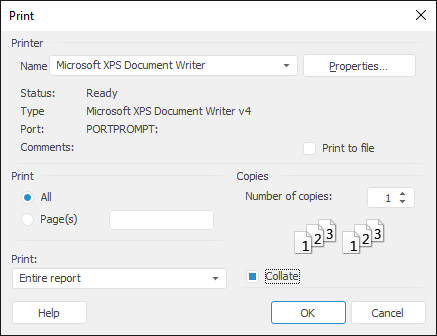
 To display the dialog box
Print options are set up using the Print dialog box in the desktop application.

Set the following print options:
Printer. Select the printer, which is used to print the object. To set up printer parameters, click the Properties button. The dialog box opens, which appearance depends on the selected printer. For details about available settings see the printer documentation.
Print to File. If the checkbox is selected, the object is printed to file. Printing to file saves the information about object structure, by which the object version can be printed without accessing it. It can be used for deferred object printing.
By default, the checkbox is deselected and the object is printed on the printer.
Print Range. Specify pages, which should be printed:
All. All object's pages are printed.
Page(s). Specify pages, which should be printed. Enter page numbers or ranges, separating them with commas. Specify order range using the - sign. For example: 1-3,5,7-9.
NOTE. Pages are printed and numerated considering printing area specified in the Print parameter.
Print. Select object printing area. Available areas set depends on the printed object type.
NOTE. If in the security policy the mandatory access control is used and for the printed object security level the labeling is enabled on export and print, each printed list contains #1 stamp according to the Guideline # 0126-87.
See also: