 Java SE Development Kit
To enable work of BI search service, install and set up the following software:
Installer for Java SE Development Kit (JDK) can be downloaded in the official Oracle site via the URL: http://www.oracle.com/technetwork/java/javase/downloads/jdk7-downloads-1880260.html. After downloading the installer follow the instruction of JDK install wizard.
NOTE. The JDK version must correspond to system requirements of Apache Solr 4.4.0. It is not recommended to install JDK of the version higher than 8.
Installer for Apache Tomcat 7 can be downloaded at: http://tomcat.apache.org/download-70.cgi. After downloading the installer follow the instructions of Apache Tomcat install wizard. When setting up the configuration, determine an administrator user name and password. The specified credentials will be later required to work in the Apache Tomcat interface. After successful installation it will be prompted to start Apache Tomcat. When the application is started, the notifications panel shows the  icon.
icon.
To further work with the application, download and copy the following files to the Lib folder of the installed Apache Tomcat:
jcl-over-slf4j-1.6.6.jar, jul-to-slf4j-1.6.6.jar, slf4j-api-1.6.6.jar, slf4j-log4j12-1.6.6.jar. Files can be taken at: https://repo1.maven.org/maven2/org/slf4j/.
log4j-1.2.17.jar. The file is available via the URL: http://logging.apache.org/log4j/1.2/download.html.
NOTE. After installing additional files restart Apache Tomcat.
The archive with files for Apache Solr 4.4.0 is available via the URL: https://archive.apache.org/dist/lucene/solr/4.4.0/.
Unpack the solr-4.4.0 folder from the archive to the appropriate place, for example, to the root folder of the C drive.
In the solr-4.4.0 folder create two subfolders solr and tomcat-config. In solr-4.4.0\solr create the "app" subfolder.
Copy the solr-4.4.0.war file to solr-4.4.0\solr from the solr-4.4.0\dist folder.
Create a file with the following contents in the solr-4.4.0\tomcat-config folder:
<?xml version="1.0" encoding="utf-8"?>
<Context docBase="C:\solr-4.4.0\solr\solr-4.4.0.war" crossContext="true"><Environment name="solr/home" type="java.lang.String" value="C:\solr-4.4.0\solr\app" override="true"/>
</Context>
Specify the path to the solr-4.4.0.war file in the docBase attribute, specify the path to the "app" folder in the "value" attribute.
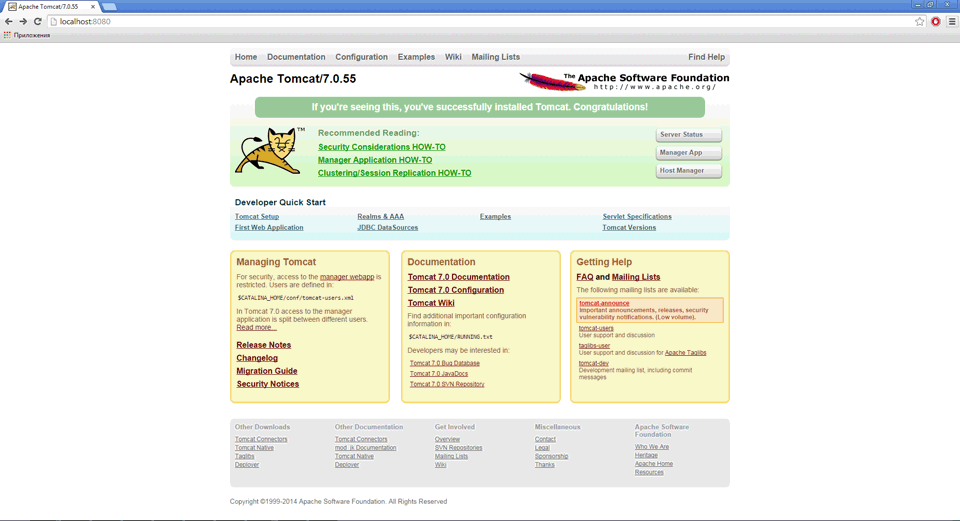
Further setup is executed in the administration console of Apache Tomcat 7. Open the console by following the URL http://localhost:<port>, where <port> is a port specified at installation.

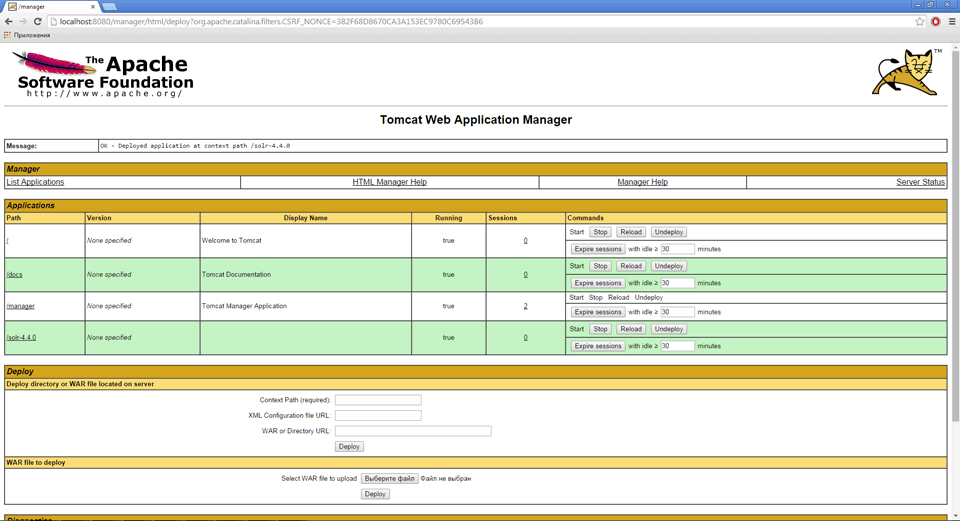
Click the Manager App button, when the authorization request appears, enter administrator user credentials, which were set at installation of Apache Tomcat. After authorization the window opens containing the list of running applications controlled by Apache Tomcat. Execute the following operations in the Deploy section:
In the Context Path (required) box specify the context path, which will be added in the browser field to access Apache Solr parameters, for example, /solr-4.4.0.
In the XML Configuration file URL box specify the path to the solr.xml file. Example: C:\solr-4.4.0\tomcat-config\solr.xml.
Click the Deploy button.
If all steps are executed correctly, Apache Solr will be started, and the page will look as follows:

In order Apache Solr works and is used for BI search in Foresight Analytics Platform, set up Solr instances.
See also: