
 To open the Parameters group of parameters
To set up table area general parameters, use the Parameters group of parameters on theside panel:
To open the Parameters group of parameters
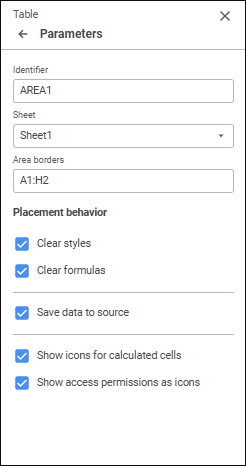
Set the parameters:
Show icons for calculated cells
Show access permissions as icons
See also:
Setting Up Data Entry Form Formatting and Display Type
 Parameters button on the toolbar. The side panel opens.
 for cells of calculated elements. The checkbox is deselected by default.
 for the cells, for which the user has no permissions. The checkbox is deselected by default.