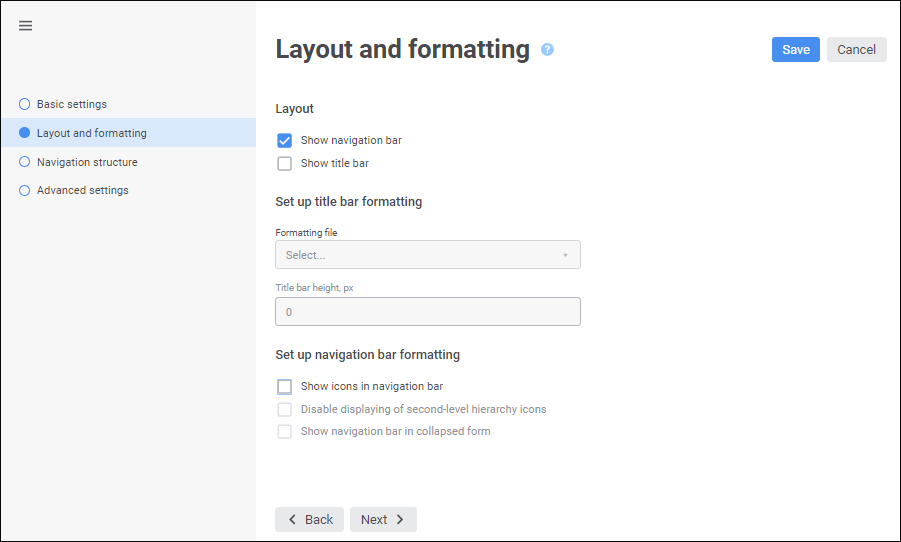
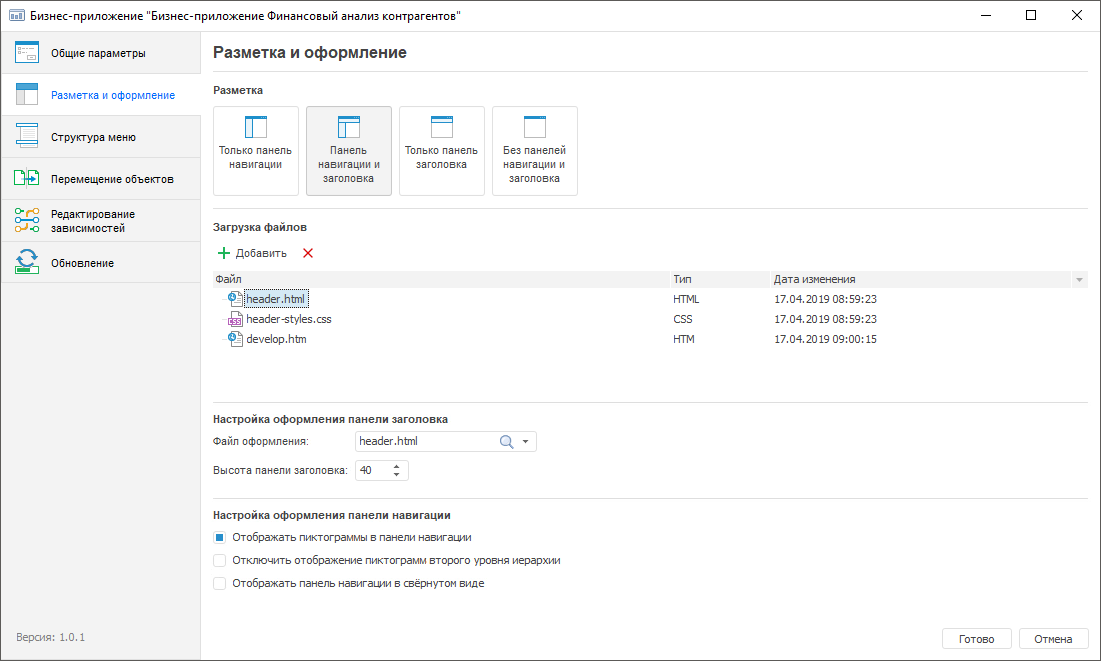
Navigation bar and title bar in business application can be set up in the Layout and Formatting section of the designer of business applications:
Open the selected business application for edit:
In the web application:
Select the Edit item in the business application's context menu.
Press F4.
In the desktop application:
Click the  Edit button on the Home ribbon tab.
Select the Edit item in the business application's context menu.
Press F4.
Select the panel layout option in the Layout section:
Select the required checkboxes in the web application:
Display Navigation Bar.
Display Title Bar.
Select the required option in the desktop application:
Only Navigation Bar.
Navigation Bar and Title Bar.
Only Title Bar.
Without Navigation Bar and Title Bar.
Depending on the selected option, the following will be displayed:
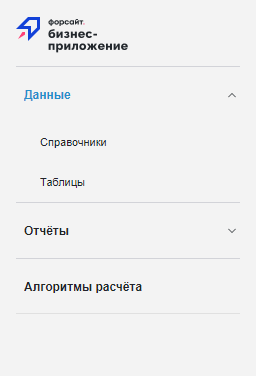
Navigation bar. Default value. For details about menu structure setup see the Creating an Internal Structure section.
Navigation Bar and Title Bar. To format the title bar, use JS, CSS, HTML files.
Title Bar. To format the title bar, use JS, CSS, HTML files.
Without Navigation Bar and Title Bar. Navigation bar and title bar are disabled. Navigation is executed using navigation menu.
The following formatting settings are available in the designer of business applications:
NOTE. The title bar formatting can also be set up during general formatting setup of designer of business applications using a CSS file. Note that if you connect a CSS file on the Layout and Formatting page, custom formatting will be applied only for the configured business application. If you connect via the DBA.config.json file, custom formatting will be applied for all business applications in the repository.
If required, files loaded for setting up layout and formatting of bars in the designer of business applications, can be used as external event handlers. The external event handler occurs on closing an object included in the business application and is set in the onCloseQuery field in the DBA.config.json file.
Layout and formatting can be set up after executing all steps of business application creation.
After application development is finished, create an update package to install an application new version to another repository.
To set up title bar formatting:
Select the page layout option in the Layout section:
Navigation bar and title bar.
Title bar.
Add title bar formatting files in the JS, CSS, HTM/HTML format in the Load Files area.
NOTE. The loaded files can contain several title formatting options. The option in use can be set in the Set Up Title Bar Formatting area.
Select one of the formatting setup files in the Set Up Title Bar Formatting area and specify title bar height in pixels.
To save the settings:
In the web application click the Save button.
In the desktop application click the Finish button. Clicking the button finishes work in the designer.
After executing the operations, business application title bar formatting will be set up.
To set up navigation bar formatting:
Select the page layout option in the Layout section:
Navigation bar.
Navigation bar and title bar.
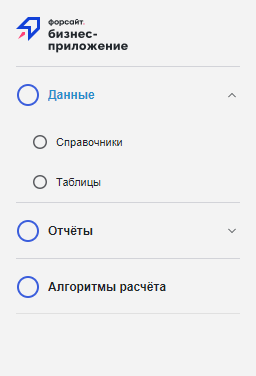
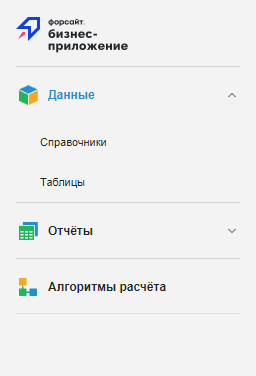
Select the Show Icons in Navigation Bar checkbox. When the checkbox state is changed, the information dialog box opens informing about changing navigation bar display mode and recommending to check actuality of connected styles files. The checkbox is deselected by default.
After the checkbox is selected, the Formatting group of settings becomes available for the first and the second menu structure levels on the Menu Structure page. If required, use the group to set custom icons of selected elements that should be displayed on the navigation bar. If some elements do not have custom icons, the navigation bar shows default icons for them. For details see the Setting Up Display Parameters for Side Menu Items subsection.
When the Show Icons in Navigation Bar checkbox is selected, the following checkboxes also become available:
Disable Displaying of Hierarchy Second-Level Icons. It disables displaying of icons for elements of the second level of the menu structure on the navigation bar. The checkbox is disabled by default.
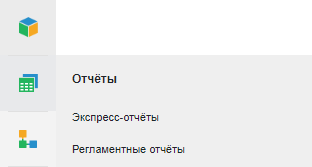
Display Navigation Bar in Collapsed Form. It activates displaying only element icons on the navigation bar without their names, on opening business application in the web interface. The checkbox is deselected by default. The navigation bar in the collapsed form displays only icons of first-level elements. To expand the collapsed navigation bar and again collapse it, use the  Expand/Collapse button in the navigation menu.
When closing a business application, the navigation bar state remains the same. For example, if on closing a business application the navigation bar was collapsed, it remains collapsed on repeated opening a business application.
If the navigation bar is displayed in collapsed form, and size of the window, in which the business application web interface is opened, cannot display all menu items, the navigation bar displays the  Down and
  Up buttons for bar scrolling. The navigation bar can also be scrolled using the mouse wheel.
To access second-level elements when the navigation bar is collapsed, hover the cursor on the icon of the required first-level element, which shows a popup panel with its child elements. Displaying icons of second-level elements on the popup panel depends on the state of the Disable Displaying of Hierarchy Second-Level Icons checkbox.
NOTE. If the Display Icons in Navigation Bar checkbox is not selected, the navigation bar is fully hidden when collapsed.
To save the settings:
In the web application click the Save button.
In the desktop application click the Finish button. Clicking the button finishes work in the designer.
After executing the operations, business application navigation bar formatting will be set up.
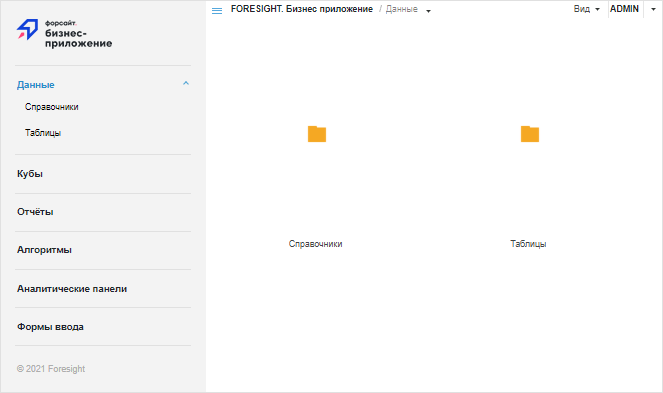
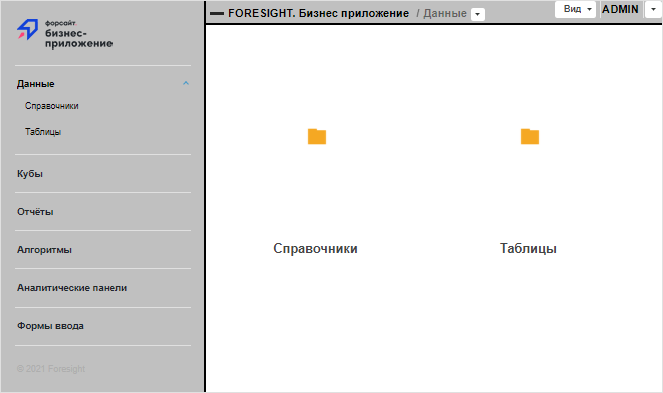
 Examples of displaying navigation bar
The following elements can be edited to set up formatting of designer of business applications:
Interface elements without icons. A CSS file is used to set the following: navigation bar display parameters, title bar display parameters, contents, colors, sizes, and fonts of various text, business application background color, as well as formatting of other interface elements not related with object images or icons. To set up business application formatting by means of a CSS file:
Create a CSS file with custom formatting settings in the S\assets folder, where S is the folder with installed designer of business applications.
Connect the custom CSS file to the business application. To do this, open the DBA.config.json file for edit, which is located in the S\config folder, where S is the folder with installed designer of business applications, and add the following command to it:
"externalCss":["assets/<CSS file name>.css"]
After executing the operations, custom formatting is set for all business applications in the repository.
Example of setting up formatting by means of a CSS file
Icons and logos. Business application icons and logos are set as images in the folder with installed designer of business applications. The following icons and logos can be set up:
Business application logo. To set a new business application logo, replace the favicon.ico file in the folder with installed designer of business applications.
Start page logo. To set a new business application logo on the start page, open the DBA.config.json file for edit and change the following command in it:
"pageMetadataLogo": "assets/design/img/<PNG file name>.png"
Title bar logo with expanded side menu. To set a new business application logo in the title bar, open the DBA.config.json file for edit and change the following command in it:
"mainMenuLogo": "assets/design/img/<PNG file name>.png"
Title bar logo with collapsed side menu. To set a new business application logo in the title bar with collapsed side menu, open the DBA.config.json file for edit and change the following command in it:
"mainMenuLogoMini": "assets/design/img/<PNG file name>.png"
Standard class icons. To set new icons for business application standard classes, change the files glbClsImg16.png, glbClsImg16.retina.png and glbClsImg32.png in the S\assets\platform_modules\build\img\metabase folder, where S is the folder with installed designer of business applications.
NOTE. Custom class icons cannot be edited.
Business application name. To set a new name for the business application tab, open the DBA.config.json file for edit and change the following command in it:
"breadcrumbRootTitle": "<business application tab name>"
See also:
Building Business Application | Creating and Installing Application Updates