To set up infrastructure of the project that controls access to data sources, select the environment:
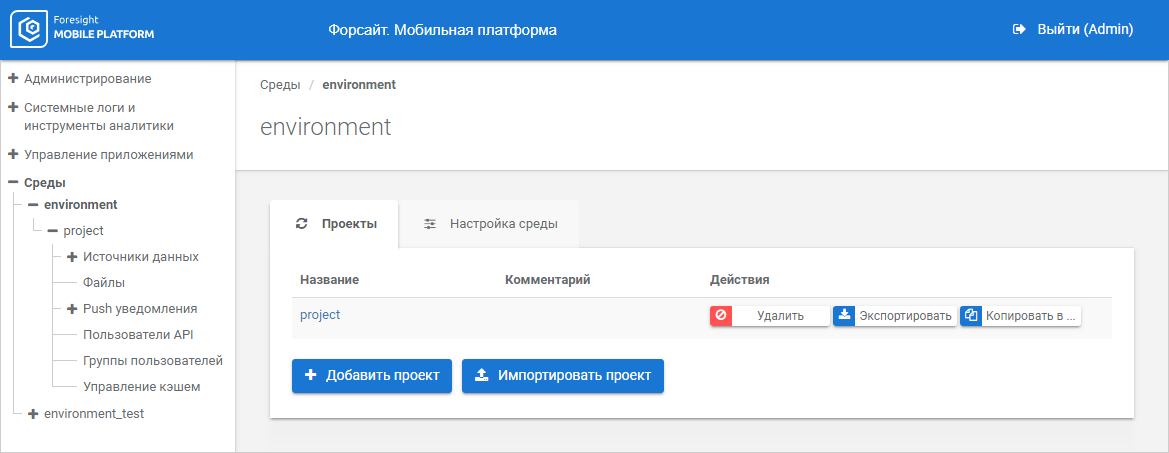
The Projects tab displays the list of environment projects with parameters.
Key features:
To add a project in environment:
Click the Add Project button.
Set project parameters identical to those on adding an environment.
After executing the operation the project is added to the projects list for further editing.
To edit project parameters:
Click the project name.
After executing the operation the project opens in the edit mode:
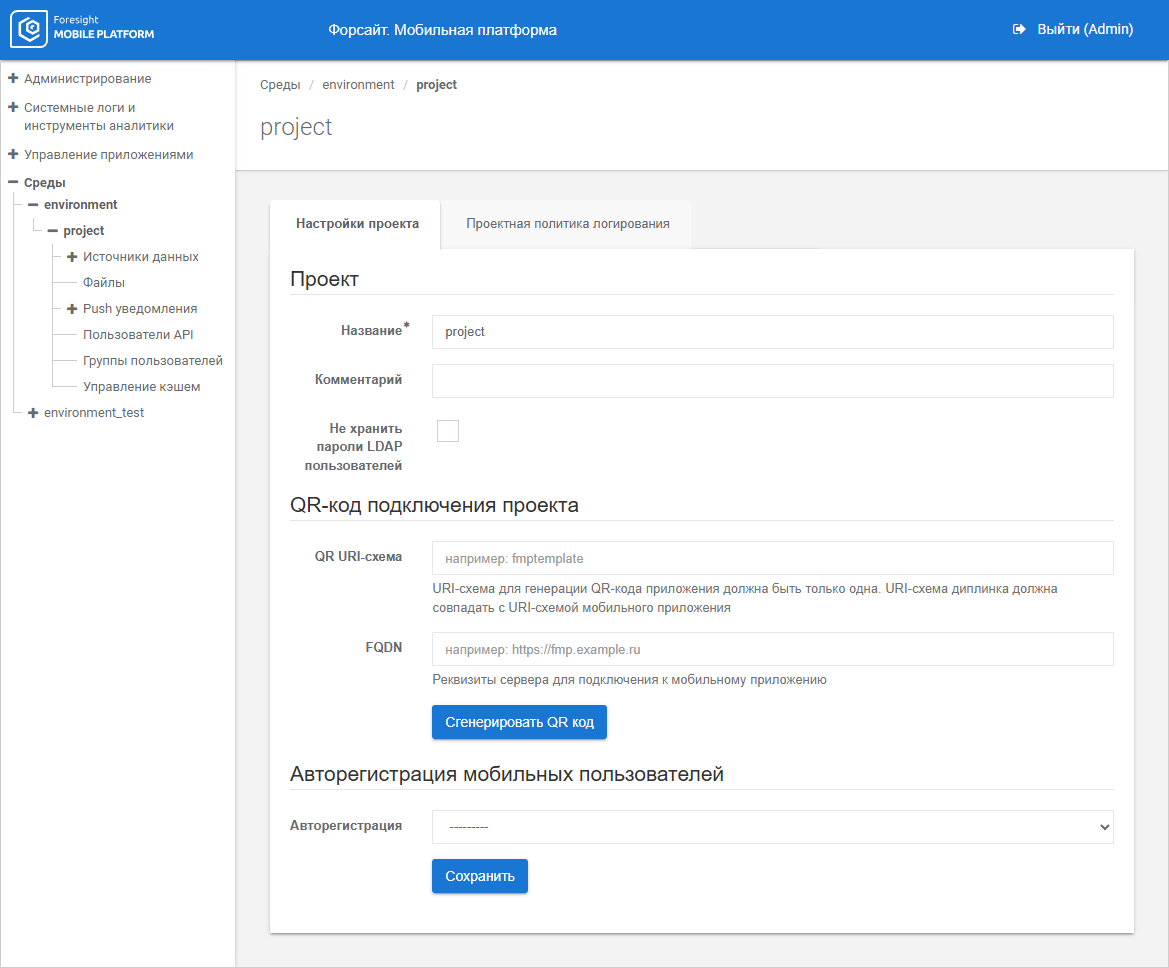
Change parameters on the Project Settings tab:
Name. Enter unique project name within one environment. The name must consist of Latin letters, numbers, underscores or hyphen. The box is mandatory.
Comment. Enter the comment to the added project that is set at administrator discretion.
Do not Store LDAP User Passwords. Select the checkbox to delete passwords of LDAP users from the project for higher security requirements.
NOTE. When the checkbox is selected, user TGT are not deleted.
QR URI Scheme. Enter URI scheme of the mobile application that will be connected to the project. Using the URI scheme, the mobile device determines which mobile application must be hidden after scanning QR code. The parameter is used together with the FQDN parameter.
FQDN. Enter full URL of mobile platform server. The parameter is used together with the QR URI Scheme parameter.
NOTE. To generate QR code, set the QR URI Scheme and FQDN parameters and click the Generate QR Code button. The QR code available for downloading is displayed. The generated QR code allows for quick connecting of the mobile application to mobile platform server instead of entering mobile platform server URL, environment, and project manually.
Autologin. Select mobile user autologin option in the drop-down list:
LDAP. Autologin is executed via the LDAP server.
Data Source. Autologin is executed via the data source server.
When the Data Source autologin option is selected, set the advanced parameters:
Autologin Data Source. Select the data source server in the drop-down list: SAP, Postgres Pro/PostgreSQL, Oracle, Microsoft SQL Server, 1C, JSON, WEB, Foresight Web in the format: Server <data source name>.
When the JSON or WEB data source is selected, make sure that corresponding autologin parameters are set in data source connection settings.
NOTE. The project enables the use of autologin of one of data sources.
Groups. Select one or several user groups available for autologin.
Set up project logging policy for devices on the Project Logging Policy tab.
Click the Save button.
After executing the operation the project is edited and refreshed in the projects list.

 Copy project to another environment
To copy the project to another environment:
Click the Copy button next to project name.
After executing the operation the project copy parameters are displayed:
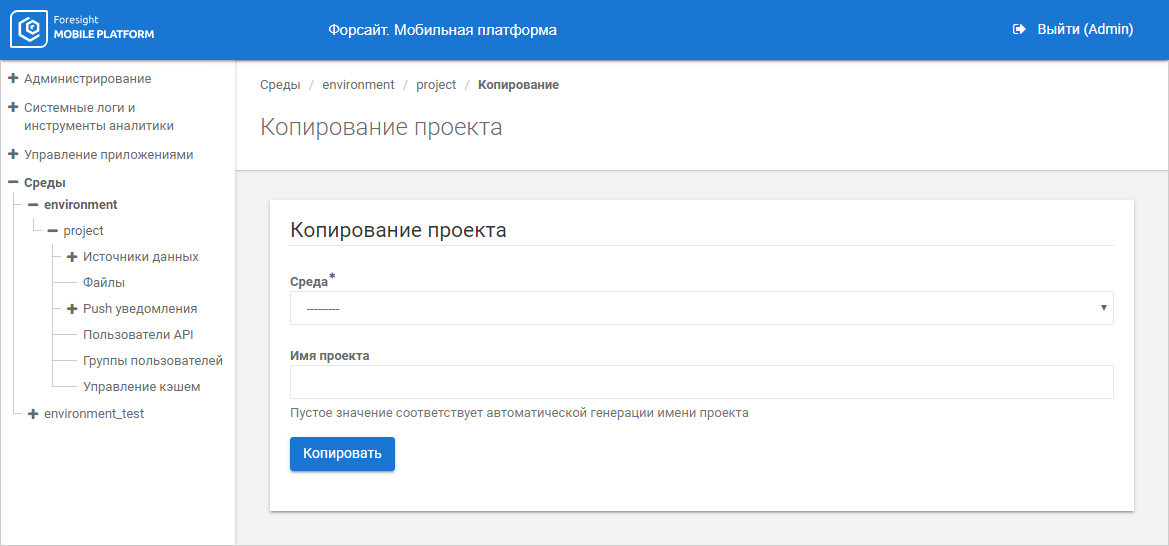
Set the parameters:
Environment. Select the environment in the drop-down list. The box is mandatory.
Project Name. Enter name of the new project that will be copied to the selected environment, or leave the box empty to generate project name automatically. The name must consist of Latin letters, numbers, underscores, or hyphen.
Click the Copy button.
After executing the operation the project is copied to the selected environment.
NOTE. When the project is copied, all data is copied except for cache and data contained in local database resources.
To delete the project, click the Delete button next to the project name.
After executing the operation it is asked to confirm project deletion. If the answer is yes, the project is deleted from the environment.
To export the project to file:
Click the Export button next to the project name.
After executing the operation the project export parameters are displayed:
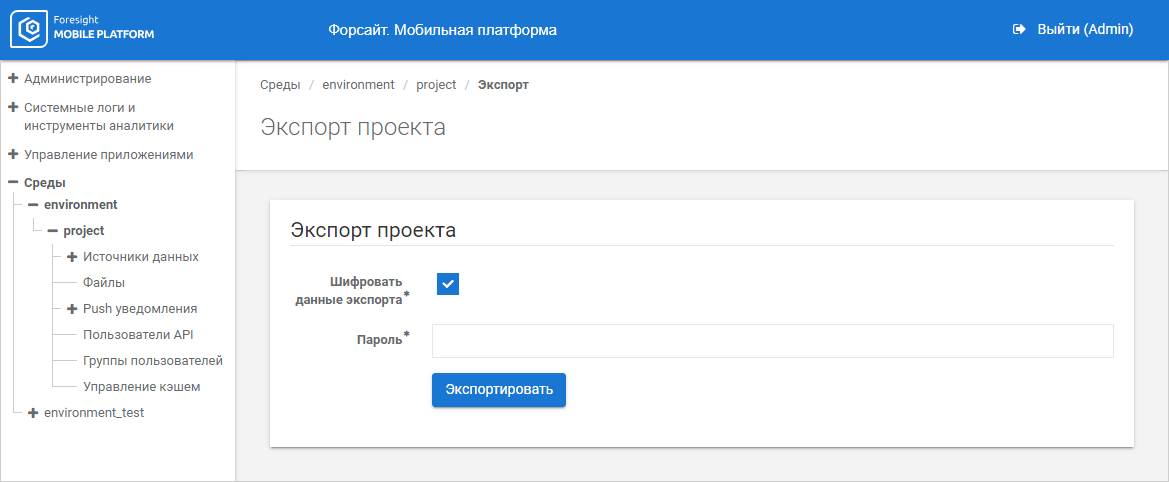
Set the parameters:
Encrypt Export Data. If required, select the checkbox to export the project without encryption, after which data can be changed. For example, to import the project to another server, change data source connection parameters. The checkbox is selected by default.
Password. Set password to encrypt export file.
NOTE. The parameter is available if the Encrypt Export Data checkbox is selected.
Click the Export button.
After executing the operation the project is exported to JSON(*.json) file and is further imported to the environment on this or other server. File name matches the project name on export.
NOTE. When the project is exported, all data is exported except for cache and data contained in local database resources.
The project may not be exported to file if it contains large amount of data (for example, by the number of users) or the system does not have enough RAM to execute export. To resolve this issue when using standalone configuration of Foresight Mobile Platform:
Set the timeout from 600 to 10000 seconds for proxy servers located before the mobile platform.
Set the RAM limit fmp_server_1 up to 2 GB in the .env file:
SERVER_RAM_LIMIT = <RAM volume>
When using a fault-tolerant cluster based on OKD/OCP deployed during installation of cluster configuration of Foresight Mobile Platform, execute the following operations:
Set timeout Ingress from 600 to 10000 seconds using the command:
oc annotate routes -n fmp --all --overwrite haproxy.router.openshift.io/timeout='<number of seconds>s'
For example:
oc annotate routes -n fmp --all --overwrite haproxy.router.openshift.io/timeout='10000s'
If additional proxy servers are located before Ingress, set timeout for them too, if required.
Set RAM limit for the fmp-dashboard pod up to 2 GB.
After executing the operations the project should be exported to file.
To import the project to environment:
Click the Import Project button.
After executing the operation the project import parameters are displayed:
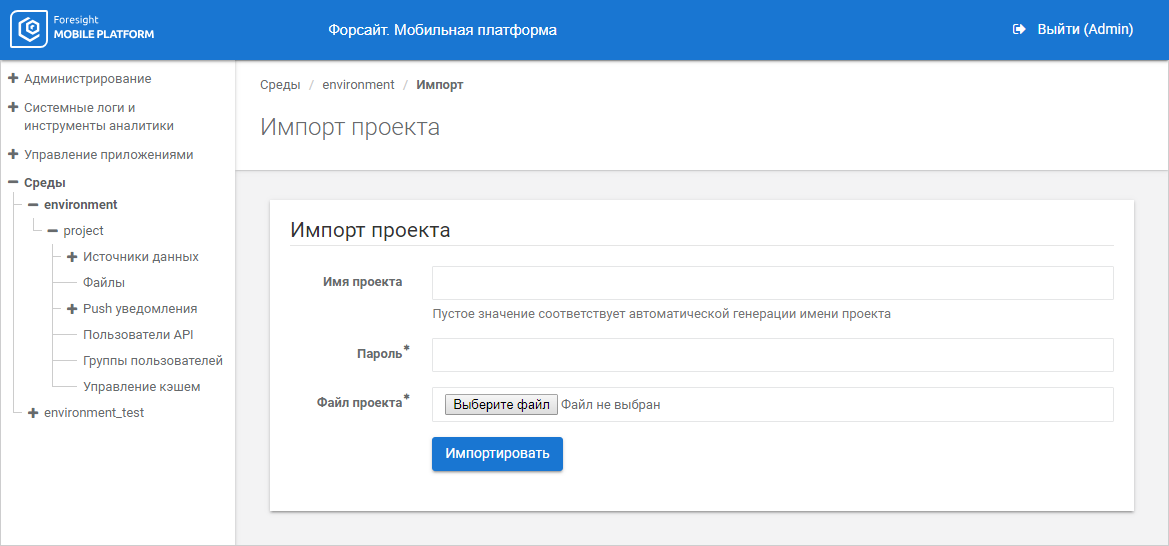
Set the parameters:
Project Name. Enter name of the new project that will be imported from file to the selected environment, or leave the box empty to generate project name automatically. The name must consist of Latin letters, numbers, underscores, and hyphen.
Password. Enter password of the encrypted project file. The box is mandatory.
Project File. Select the project file using the Select File button. The box is mandatory.
Click the Import button.
After executing the operation the project is imported from the file exported at this or other server to the selected environment.
NOTE. When the project is imported, all data is imported except for cache and data contained in local database resources.
See also:
Setting Up Environments and Projects | Connecting Data Sources and Resources