Tool Interface Description
In this article:
Foresight Analytics Platform tools have a uniform interface that uses WYSIWYG approach (What You See Is What You Get) that enables the user to see the influence of executed operations on the final result.
The interface contains common elements that are used to work with tools:
Main menu. Main commands to work with a tool.
Ribbon. Quick access to command to control objects in all tools.
Side panel. Managing active object properties that concentrates user's attention on necessary settings.
Working area. Building a tool.
Status bar. Setting up calculation parameters of the basic aggregates of the selected table cell range and displaying calculation results, displaying information about selected objects and indicating CAP, NUM and SCRL working modes.
Common tool interface:

 Features of web application interface
To study main principles of working with tools in the desktop and web applications, see the General Principles of Work section.
Main Menu
The main menu includes a list of commands that are used to execute various operations with a tool, and consists of several submenus:
Main menu. It contains commands that are used to work with a tool.
NOTE. The menu name depends on the tool, for example, the main menu named Document in the Dashboards tool.
Tools. Contains commands for setting up tool parameters:
Help. Contains commands for opening a help system and the About dialog box.
Ribbon
The ribbon enables the user to quickly find necessary commands. The commands are grouped logically and displayed on tabs. Each tab is related to the type of executed operation, for example, working with data or setting up page layout.
Some tabs are shown only on demand. These tabs are named context tabs, as they are brought up by some kind of event. For example, the Object.Chart and Object.Format tabs are displayed in the Reports tool on selecting a chart on the report sheet.
On resizing the window, groups of buttons are minimized to one button. Clicking such a button displays the whole command group, for example:

Main functions and features of the ribbon:
Side Panel
Side Panel is a tool to manage active object properties.
The side panel contains a set of tabs that are used to set up object parameters. The set of tabs and their names depend on the object type to work with.
Side panel tabs are grouped. To navigate the groups of tabs, use radio buttons with the same names in the upper part of the side panel.
Example of side panel for working with a chart:
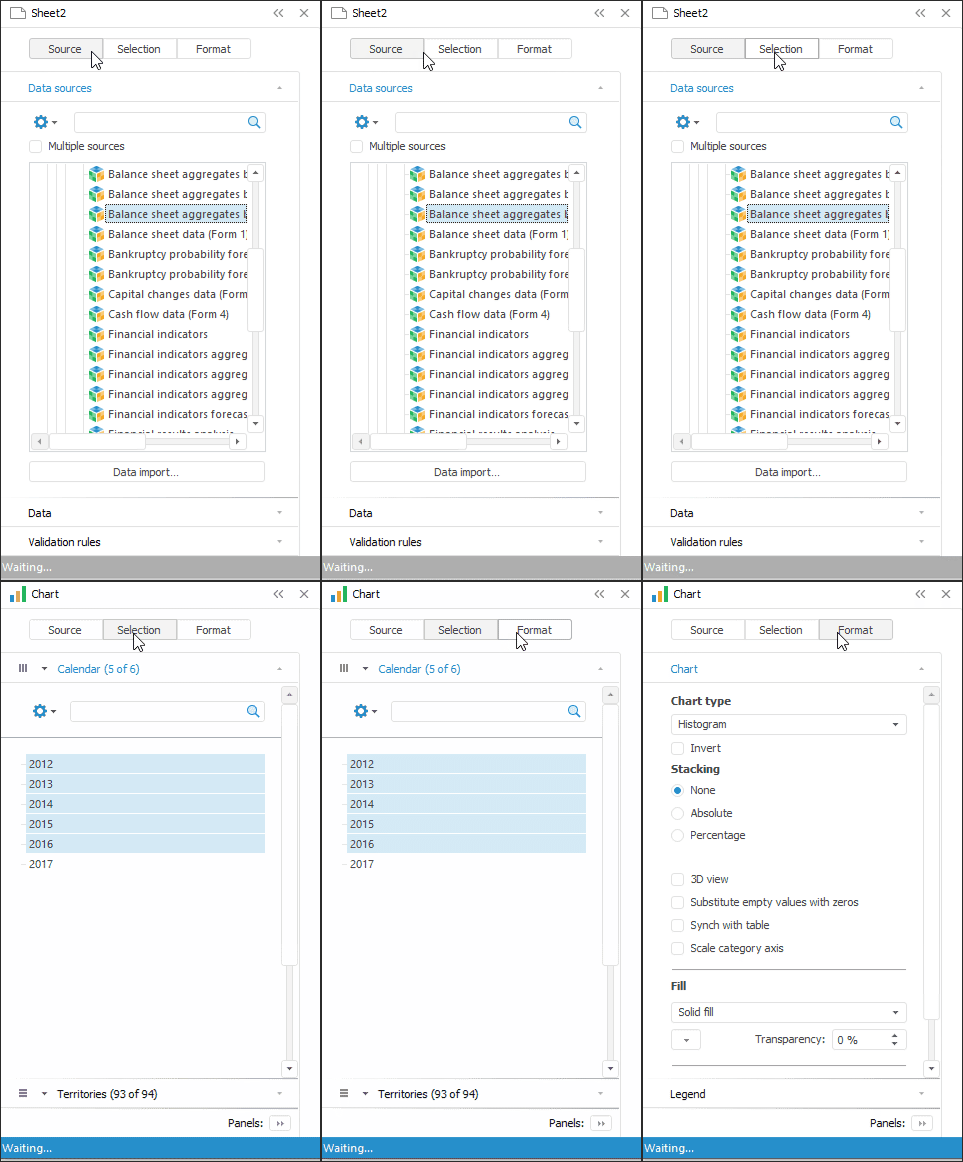
The upper part of the panel shows a name and an icon of active object. The example presents an active object - Chart.
To display the list of hidden tabs, click the  Panels button. To go to the required tab, click its name.
Operations with side panel:
Status Bar
A status bar is a bar at the bottom of the window.
Basic aggregates of the selected cell range are calculated using commands of status bar context menu:
Mean. Mean value of numeric data for selected cells.
Count. Number of cells containing data.
Numerical Count. Number of cell containing numeric data.
Minimum. The least of the selected numeric values.
Maximum. The greatest of the selected numeric values.
Sum. Sum of numeric values of selected cells.
Non-numeric data. Number of cells containing non-numeric data.
NOTE. Basic aggregates of the selected cell range can be calculated only in reports and data entry forms.
By default, checkboxes of the Mean and Sum options are selected. When a checkbox is selected or deselected, the menu remains open so that multiple aggregates can be selected. The selected aggregates are saved for the current report and are displayed in the status bar when the report opens next time. If the dialog box is resized and all selected aggregates cannot be displayed in the status bar, the last displayed aggregates are hidden first of all.
The status bar always shows status of working modes enabled and disabled using keyboard keys.
| Mode | Key | Description |
| CAP | CAPS LOCK | Mode of entering upper-case letters. |
| NUM | NUM LOCK | Mode of use of additional numeric keyboard. |
| SCRL | SCROLL LOCK / SCRLK | Mode that changes control keys behavior using the cursor. |
Advanced Interface Settings
Toolbar
Some Foresight Analytics Platform tools use toolbars instead of the ribbon in the interface. Toolbars contain duplicated frequently used main menu commands. Toolbars may also contain various controls that are not available in the main menu. If required, the user can create a custom toolbar and put all required controls to it.
Toolbar setup is available in development environment, styles table, task container, MDM dictionary and so on.
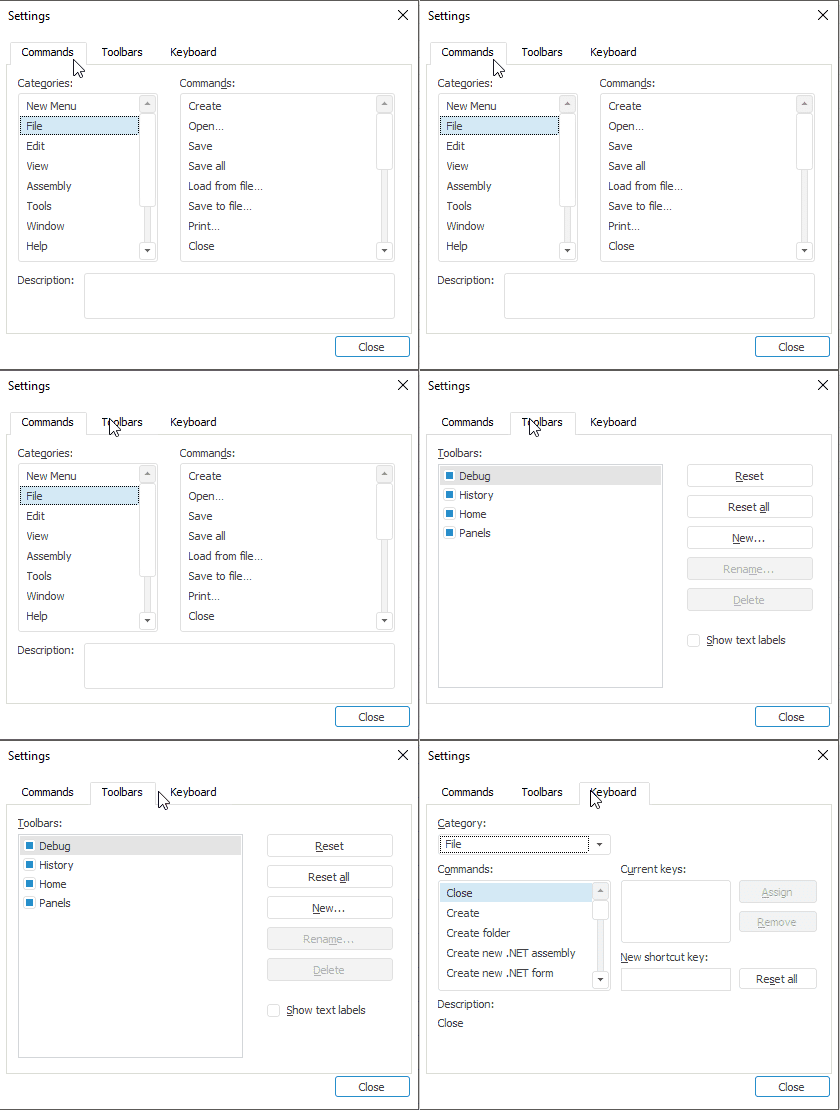
To set up toolbars, open the context menu in the main menu area or toolbar area and select the Set Up item.
Quick Access Toolbar
A quick access toolbar is used to locate the most frequently used items on the top of the ribbon.
Depending on the tool in use, the quick access toolbar contains the following default commands:
In all tools and in the Calculation Algorithms extension:
 . Saves made changed.
In the Analytical Queries (OLAP), Dashboards, Reports and Workspace tools:
 . Cancels the last operation.
 . Repeats the cancelled operation.
In all tools and extensions except for the Time Series Analysis tool and the Interactive Data Entry Forms extension:
 . Opens a printing options setup dialog box.
To set up quick access toolbar, select the Set Up Quick Access Toolbar item in the ribbon's context menu. The quick access toolbar setup dialog box opens:
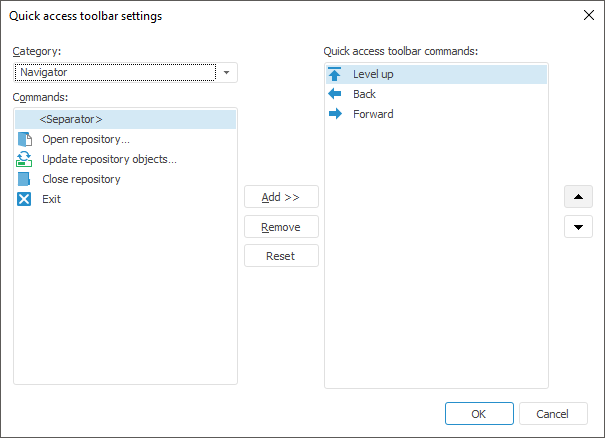
Available operations with commands:
Add a command to the quick access toolbar. Select the command category in the Category drop-down list. Select the required command in the Commands box and click the Add >> button. The command is added to the list of quick access toolbar commands.
Set up the commands order in the quick access toolbar. To set up the order, select the command, which is to be moved in the list in the Commands box. The Up and Down buttons control the command location in the list.
Remove a command from the quick access toolbar. Select the command in the Commands box. Click the Remove button.
Reset quick access toolbar settings. To set the default settings for the quick access toolbar, click the Reset button.
NOTE. The quick access toolbar in the web application is fixed and contains the Undo and Redo buttons.
Floating Panel
Floating panels are special windows attached to one of the application main window sides that provide quick access to logically grouped functions. For example, the Search Results floating panel in the repository object navigator shows the list of all objects selected based on specified conditions and shows functions that can be used to work with these objects. This enables the user to control objects contained in different folders using the same panel.
Panels can be moved to any position on the screen or other display. Use autohide functions to save screen place.
Shortcut Keys
Shortcut keys are used to provide quick access to menu and ribbon options from the keyboard.
A shortcut key is a keyboard button pressed together with modifiers.
Modifiers are CTRL, SHIFT, ALT keys. A shortcut key may include different number of modifiers. In this case it does not matter, in which order these keys are pressed.
Shortcut keys are denoted by "+" sign, for example:
CTRL + V.
CTRL + SHIFT + F.
CTRL + SHIFT + ALT + D.
Shortcut keys are set up:
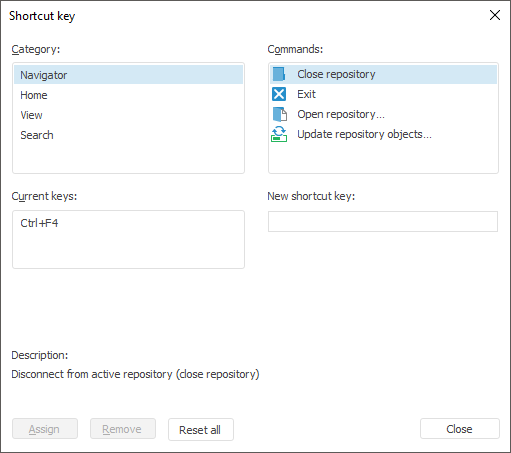
In the Shortcut Key dialog box in the object navigator.
In the Settings dialog box on the Keyboard tab for tools.
The Shortcut Key dialog box in the object navigator:
The Keyboard tab in Settings dialog box for tools:
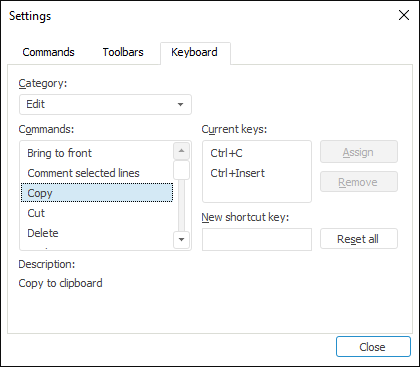
The Settings dialog box is opened by means of the Tools > Parameters command for tools:
For other tools, the dialog box is opened by means of the Tools > Settings main menu item.
The following settings are available:
Category/Categories. Select the required command category.
Commands. Specify the required command in the selected category.
NOTE. Command sets depend on the tool, in which the dialog box was opened.
Current Keys/Current Keys. This box displays the customized shortcut keys for the selected command. To remove the current shortcut key, select it and click the Remove button. To assign a new shortcut key for the selected command, enter a new combination in the New Shortcut Key box. The shortcut key is entered automatically by pressing the appropriate keys. Then click the Assign button. To reset all the current shortcut key settings, click the Reset All button.
Description. This section contains brief description of the selected command.


 button.

 buttons to scroll tabs.
 Side Panel button.
 button can also be used that is located in the upper part of the side panel.
 . Collapse panel.
 . Expand panel.
 menu open button on the floating panel title and select the Auto Hide item.
 button on the floating panel title.