NOTE. It is available to set up header in corner only using the context menu. It is available to divide corner into rows/columns only on displaying names of dimensions/attributes.
The cell can contain user-defined text, for example: No.
On disabling header display in corner, column header of row numbering will no more displayed. On re-enabling headers in corner, the text for column/row with numbering will be displayed again.
On editing data entry form, select the Set Up item of the Numbering button drop-down menu on the Table ribbon tab
The Numbering dialog box opens:
The dialog box contains the Rows and Columns tabs, the tabs availability depends on enabled numbering: if the numbering by rows is enabled, the Rows tab is displayed, if the numbering by columns is enabled, the Columns dialog box is displayed, if numbering by rows and columns is enabled, then both tabs are displayed.
Available settings:
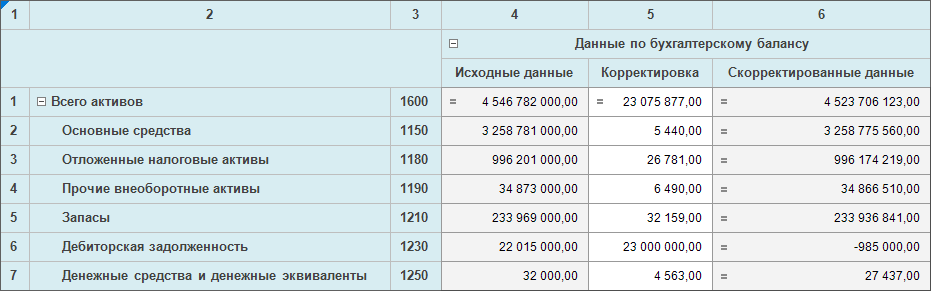
Layout Area. To determine layout position for column with numbering toward the headers, select one of the following checkbox editor options: Before Header or After Header:
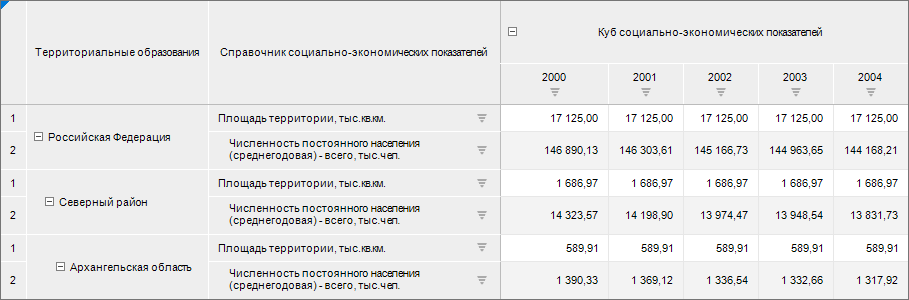
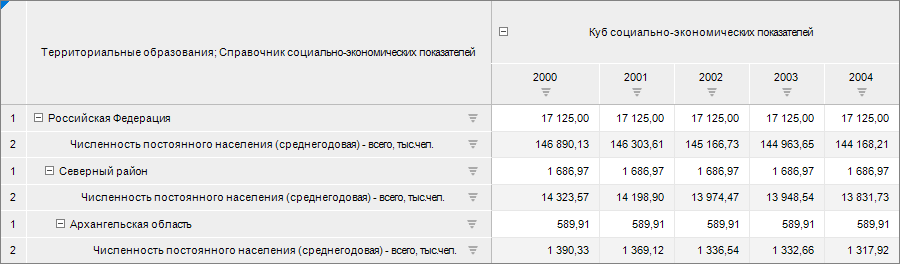
Merge for All Dimensions. For continuous numbering of all dimensions, select the Merge For All Dimensions checkbox. It is available, if the sidehead or heading contains two or more dimensions. The checkbox is disables by default. When the checkbox is deselected, elements numbers are set for each element of the first dimension displayed in the sidehead. On merging sidehead dimensions with tucking, the logic remains unchanged
Apply merge of sidehead dimensions with tucking:
Apply merge of sidehead dimensions with tucking:
Consider Dimension Elements Paddings. To display numbering paddings according to dimension elements layout paddings in table area, select the Consider Dimension Elements Paddings checkbox:
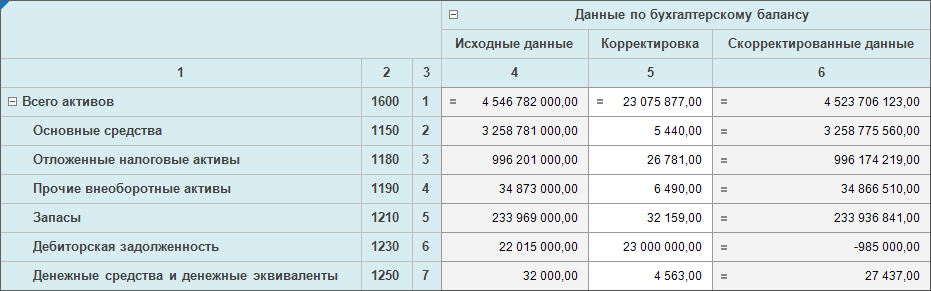
Start Numbering from Corner. For numbering considering rows/columns of corner, select the Start Numbering from Corner checkbox:
Numbering Settings for Dimensions and Levels. Specify in the numbering setting area for dimensions and dimension levels :
Numbering Type. Set up numbering type for dimension/level. Available types:
Inherit from Parent. It enables to modify numbering type, format, delimiter in chain order. It is available only for dimension levels. It is selected by default for dimension levels
Continuous. It enables to set continuous numbering for level elements independently of parent level numbering. It is selected by default for dimension
Hierarchical. On selecting this type, level numbering follows the parent level
Hierarchical with Prefix. On selecting this type, level numbering follows the parent level numbering, parent element number will be included into prefix
Format. Set up numbering format. It is available for the following numbering types: continuous, hierarchical and hierarchical with prefix. Available options:
1, 2, 3. Default
a, b, c.
A, B, C.
i, ii, iii
I, II, III
i, ii, iii
а, б, в.
А, Б, В.
NOTE. If letters of the alphabet are finished, the numbering starts from the beginning with the repeated symbol.
Delimiter. To add a symbol after number or for numbering with prefix, specify any one symbol in the field. If the symbol is not specified, the delimiter after number and between number and prefix, if hierarchical numbering type with prefix is specified, will be absent. It is available for the following numbering types: continuous, hierarchical and hierarchical with prefix. It is not specified by default
Initial Value. To determine the initial numbering value, enter a value in the field. It is available for the first dimension. By default the 1 value is set. Depending on the specified numbering format, the start value in table area is transformed for format, the value remains number in the settings dialog box.
Prefix. To add any characters before the number, determine any characters in the field.The prefix will be added for the specified dimension.To apply the prefix to all dimensions, select the Hierarchical with Prefix numbering type for the rest dimensions. By default it is not selected.
 Numbering button on the Table ribbon tab
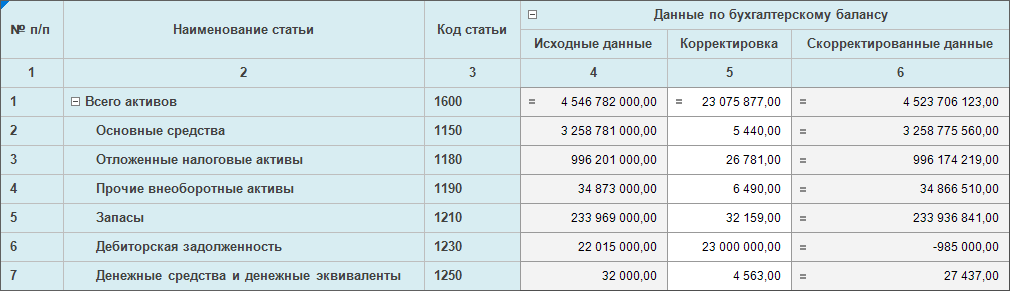
 button. The button becomes available after selecting the
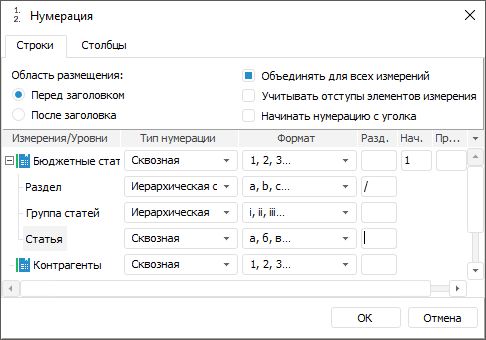


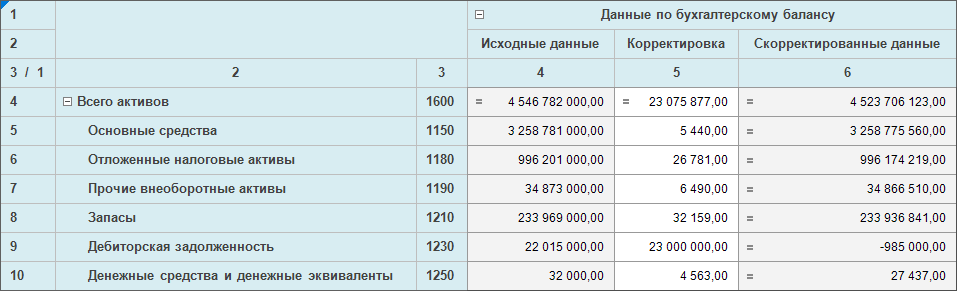

 The example of numbering settings use