 Parameter Editor button on the Designer ribbon tab:
The parameter is used to dynamically control data displayed in the data entry form. For example, the list of organizations is selected as a parameter for registry data entry form, on changing selection in the parameter, the working area of data entry form will display registry data corresponding to the required organization.
On adding a parameter, the control is automatically created on the sheets that were selected on determining parameter properties.
To set up form parameters, follow the steps:
Create a parameter.
Determine parameter properties.
Create a link with another parameter to manage available values of parameter.
Change control size.
Edit parameter.
After the form parameters are set, if required, follow the step:
To set up data entry/output form parameters, use the Parameters dialog box, open the dialog box by clicking the  Parameter Editor button on the Designer ribbon tab:

The dialog box consists of the form parameter list and property setup panel.
 Determine parameter properties
 Limit available parameter values using filter
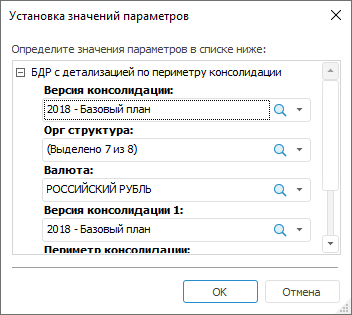
On opening data entry form with parameters, the Determine Parameter Values dialog box opens:

The appearance of the parameter edit boxes depends on parameter type. If a default value has been determined for the parameter, the value is displayed in the corresponding box.
Enter or select (depending on parameter type) values for other parameters and click the OK button.
NOTE. On working with data entry form parameters, the last entered values are automatically saved. On the next opening of the data entry form the saved parameters values are displayed.
See also:
Building Data Entry Form | Working with Ready Data Entry Form