 Resize object
To resize the object:
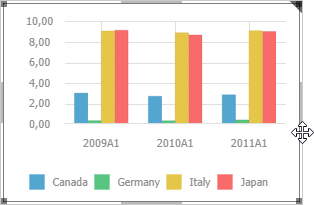
Point the mouse cursor on the object border. The mouse cursor changes to the two-headed arrow.
Hold down the main mouse button and stretch or shrink the object to the required size.
The object is resized.
If the automatic object layout mode is used, the neighboring objects will be resized in the way to save the previous distance between the changed object and the neighboring objects.
If the manual object layout mode is used, select the Binding > Stretch item in the context menu of the object to resize the object in the way that it fills all available area of dashboard.
TIP. To select optimum object size in the manual layout mode, use the rulers displayed when border of the active object approaches borders and central axes of other objects.
To move the object:
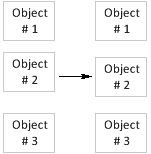
Point the mouse cursor on the object border. The mouse cursor changes to the four-headed arrow. Hold down the main mouse button and drag the object to the required position. For example:

Select an object and use the arrow button.
If the automatic object layout mode is used, the object is moved by means of swapping this object and the object, to which the source block is configured. The object cannot be moved by means of arrow keys.
If the manual object layout mode is used, the object is moved to the specified position.
TIP. To select optimum object position in the manual object layout mode, use the rulers displayed when border of the active object approaches borders and central axes of other objects.

 Align size of selected objects
To align size of several objects, select the Equal Size item in the context menu and select the method of object size alignment:
By Height and Width. All objects are to be of equal width and height.
By Width. All objects are to be of equal width.
By Height. All objects are to be of equal height.

 Align borders of selected objects
NOTE. The option is available only in the web application.
To align borders of several objects, select the Align item in the context menu and select the method of object border alignment:
Top. All objects are to be aligned to the top edge of the top object.
Bottom. All objects are to be aligned by the bottom edge of the bottom object.
Left. All objects are to be aligned by the left edge of the leftmost object.
Right. All objects are to be aligned by the right edge of the rightmost object.

 Set up the order of object location in space
To reorder objects, use commands in the object's context menu:
Bring to Front > Bring Forward. An object is placed in the dashboard foreground.
Send to Back > Send to Back. An object is placed in the dashboard background.
Bring to Front > Bring to Front. An object is moved one level closer to the dashboard foreground.
Send to Back > Send to Back. An object is moved one level closer to the dashboard background.
NOTE. The items are available only in manual mode of object layout.

 Object distribution in working area
Object distribution in the working area enables the user to align objects relative to each other on manual object layout.
NOTE. Object distribution operation is available on selecting three or more working area objects.
To distribute the selected objects, select the Binding item in the context menu of objects, and select the required method of object distribution:
Distribute Vertically. The selected objects are distributed vertically at an equal distance from each other. The distance is calculated on the basis of the uppermost and the lowermost objects position among the selected objects, and object size. For example:

Distribute Horizontally. The selected objects are distributed horizontally at an equal distance from each other. The distance is calculated similarly to the previous method. For example:

The distance between objects is aligned regardless of whether object borders are overlapped or not.
Dashboard objects can be grouped.
To create a group of objects:
Select two or more objects.
Select the Group > Group item in the context menu of the selected objects.
The objects are grouped, it is available to work with this group as a single object.
On grouping of objects the order of group position in the working area corresponds to the group object most closely located to the front border of the dashboard. Objects within the group save default settings of position in the working area.
The following operations are available for a group of objects:
Setting up object layout in the group.
Moving of object group.
Resizing of object group. On resizing the group objects included into the group are resized respectively.
To ungroup the selected group of objects, select the Group > Ungroup item in the context menu of the group of objects. After ungrouping objects save default settings (size, position, and so on).

 Bind object borders to borders of parent element
NOTE. The option is available if the manual object layout mode in the workspace, and workspace custom size is used.
If the object border is bound, on parent element resize the object border remains at the same position relative to the parent element border.
To bind a border, select the checkbox corresponding to the border to be bound:
Top. Left. Right. Bottom. To bind a border, select the checkbox that corresponds to the bound border. If the object border is bound, on parent element resize the object border remains at the same position relative to the parent element border. Binding options:
%. Determines whether relative binding is used.
The checkbox is deselected by default, and absolute binding is used, that is, on parent element resize, distance between object border and parent object border remains unchanged.
If the checkbox is selected, relative binding is used, that is, distance between object border and parent object border changes in accordance with the parent object size.
Checkboxes are located:
In the Binding submenu of the object's context menu.
On the Block side panel tab.
To maximize the selected object to the entire working area:
Display object control buttons:
Point the mouse cursor on the top right corner of the block:

The object controls will be displayed, for example:

Click the  button.
The selected object will be maximized.
To minimize the selected object:
Show object control buttons.
Click the ![]() button.
button.
The object will take the previous size.
See also:
Setting Up Sketch Element Appearance