To work with formatting:
Select table element.
Use:
Quick conditional formatting. To do it, click the Conditional Formatting ribbon button:
In the Analytical queries (OLAP), Reports tools on the Home tab.
In the Analytical Queries (OLAP), Dashboards tools on the Constructor tab.
In the Analytical Queries (OLAP), Reports, Dashboards tools on the Format tab.
NOTE. On working with the Reports tool, if conditional formatting is set using the Home ribbon tab, it is applied to the report sheet and if it is set using the Format tab - it is applied to the table.
In the Time Series Analysis tool on the Table tab.
Advanced conditional formatting. To do it select the Conditional Formatting side panel tab. To display the tab:
Select the Table, Format or Totals radio button on the side panel. The radio button name depends on the area selected in the table.
Go to the Conditional Formatting tab.
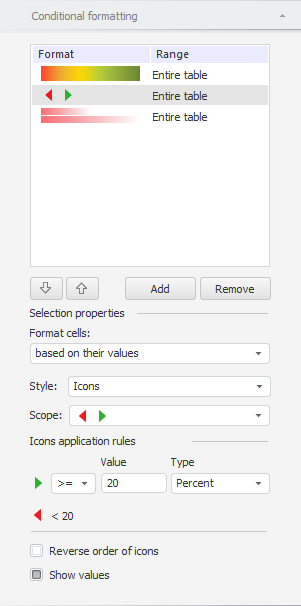
Conditional Formatting tab appearance
NOTE. It is available to work with conditional formatting of the Reports tool only in the desktop application.
The following operations are available for quick formatting:
The use of configured conditional formatting. To do it, click the Conditional Formatting ribbon button and select one of the conditional formatting options in the opened dialog box:
Color scales:
Histograms:
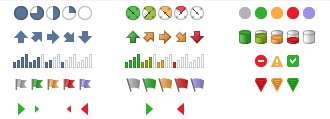
Icons:
Create/edit/change order/delete conditional formatting. To do it, click the Conditional Formatting ribbon button and select:
The Edit Conditions item in the displayed dialog box. The Edit Conditions dialog box opens.
NOTE. The Conditional Formatting side panel tab opens in the web application.
In the Edit Conditions opened dialog box select the required conditions.
NOTE. It is also available to create a conditional formatting in the reports desktop application using the Create Condition item in the Conditional Formatting button drop-down menu on the ribbon.
Delete all formatting conditions. To do this:
In the Analytical Queries (OLAP) and Dashboards tools, select the Clear item in the Conditional Formatting drop-down menu on ribbon.
In the Reports tool:
Select the Delete Conditions item in the drop-down menu of the Conditional Formatting ribbon button.
Select the method of condition deletion:
Clear Conditions from Selected Cells. All formatting conditions are deleted from the selected table range.
Clear Conditions from Entire Sheet. All formatting conditions are deleted from the sheet.
The Edit Conditions dialog box enables creating, editing, changing application order and deleting formatting conditions:
NOTE. The feature is available only in the desktop application.
In the Edit Conditions dialog box, the following operations are available:
Create a conditional formatting. To do this, click the Add button. The Formatting Condition Parameters dialog box opens. Set up the created formatting condition in it. The dialog box enables the user to set up all formatting conditions, except for fill by cell groups based on their values.
Edit conditional formatting. To do it, select the required condition and click the Edit button. The Formatting Condition Parameters dialog box opens. Set up the created formatting condition in it. Using this dialog box, it is available to set up all formatting condition types, except the filling by cell gorups based on their values.
Delete conditional formatting. To do it, select the required condition and click the Delete button or the DELETE key. Confirm deletion in the dialog box.
Change order of formatting conditions. To do this:
Select the required condition and use the and buttons.
Hold down the main mouse button and drag the condition to the required position.
Select the required condition and press ALT + ↓ to move the condition one level up and ALT + ↑ to move the condition one level up.
NOTE. The formatting condition editing/order changing/deleting operations are also available in the condition context menu.
The following operations are available for advanced conditional formatting:
Create a conditional formatting. To do it, go to the Conditional Formatting side panel tab and click the Add button. The tab displays setup parameters for the created condition.
Edit conditional formatting. To do it, go to the Conditional Formatting tab on the side panel, then:
Select the required condition. The available parameters of the condition to be edited will be displayed on the tab. Available parameters depend on type of the condition to be parameterized.
Select the required condition and double click it. The Formatting Condition Parameters dialog box opens. Set up the created formatting condition in it. Using this dialog box, it is available to set up all formatting condition types, except the filling by cell gorups based on their values.
Change order of formatting conditions. To do it, go to the Conditional Formatting side panel tab:
Select the required condition and use the and buttons.
Hold down the main mouse button and drag the condition to the required position. The feature is available only in the desktop application
Select the required condition and press ALT + ↓ to move the condition one level up and ALT + ↑ to move the condition one level up. The feature is available only in the desktop application.
Delete formatting condition. To do it, go to the Condition Formatting tab on the side panel and on selecting the required condition click the Delete button or press DELETE (it is available only in desktop application).
NOTE. In desktop application, the operations of formatting condition editing/order changing/deleting are available in the condition context menu.
See also: