Click the ![]() Add Series button in the Data Series group on the Home ribbon tab.
Add Series button in the Data Series group on the Home ribbon tab.
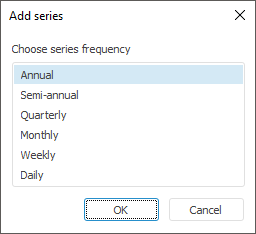
If the sheet data source contains several calendar levels, the Add Series dialog box opens. Specify the calendar frequency level of created time series. For example:
Tool interfaces in the web application and in the desktop application are identical, and differences in functionality are given in appropiate commments.
To create a time series:
Click the ![]() Add Series button in the Data Series group on the Home ribbon tab.
Add Series button in the Data Series group on the Home ribbon tab.
If the sheet data source contains several calendar levels, the Add Series dialog box opens. Specify the calendar frequency level of created time series. For example:

An empty time series is added to the current workbook sheet.
Specify values of mandatory series attributes by using:
The Series Attributes side panel tab.
The Series Attributes dialog box. It is available only in the desktop application.
NOTE. If the data source already contains time series with specified attributes values, series observations values are displayed in the data table.
Specify the series name. To do this:
Double-click the current series name in the data view area. The name opens in the edit mode. Make required changes and press the ENTER key.
Enter series name in the Name box on the Primary side panel tab.
Enter series name in the Name box in the Series Attributes dialog box. It is available only in the desktop application.
Enter names of series observations.
Custom time series are saved to a workbook without binding to dimensions of the time series database.
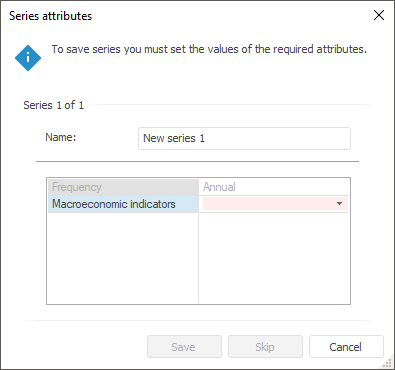
If on setting a new time series, values of all mandatory attributes are not specified, the Series Attributes dialog box opens:

Specify the series name, values of all mandatory attributes and click the Save button.
If one time series is saved, the dialog box closes. If more than one time series are saved, the dialog is refreshed to enter attribute values of the following series. To move to saving the following series without saving the current one, click the Skip button.
See also: