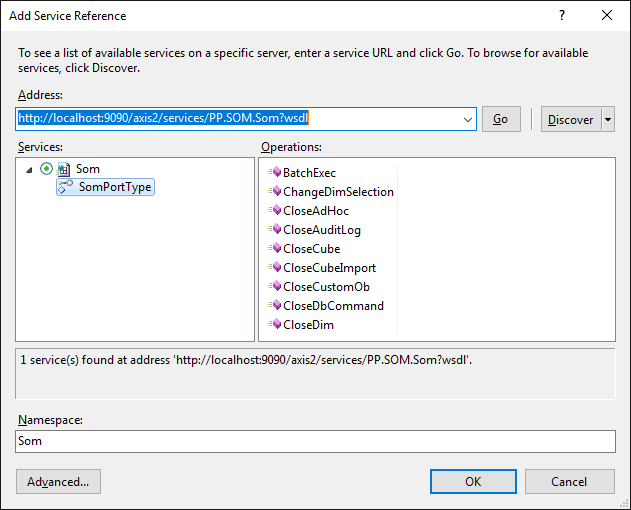
To use the web service, add a link to it in the developed project. To do this, select the Project/Add Service Reference item in the main menu of the Visual Studio development environment (or the same command in the context menu that opens for the project in the project browser).

In the dialog box that opens specify the URL to wsdl of the set BI server. Address format is given in basic description of web service connection. In the Namespace field specify name of the namespace to be created for the project and to be used to access web service resources. After that click the Go button. If the connection is successful, the name of the available web service and the list of its operations are displayed. Click the OK button. The following objects are added to the project: the System Reference folder that contains a reference to the created namespace and the App.config file. Based on the wsdl file contents, the types to be used to write the code for working with the web service, will be created in the specified namespace.
NOTE. To use types, add the Using directive in the code: using <ProjectName>.<ServiceNamespace>.
Among all the types there is the SomPortTypeClient proxy class on connecting to BI server. This class implements methods used to execute identically named operations of the web service. All the operations can be divided into the platform blocks, for which they are intended. These operations are described in the Web Service Operations section.
The App.config file contains configuration elements that control application work. File contents is presented in the XML format, file structure is described in MSDN. After connecting to web service, the following elements are generated in this file:
End point that contains an URL to be used to connect to the web service.
Settings used when working with this end point.
The following changes must be made in the App.config file:
The <system.serviceModel><client>... </client></system.serviceModel> section will have the <endpoint>...</endpoint> element that contains parameters of the end point for connecting to a web service. By default, the following URL is generated for this point: http://localhost:9090/axis2/services/PP.SOM.Som. It should be corrected by specifying correct BI server URL and port.
The <basicHttpBinding>...</basicHttpBinding> element that contains settings that are used to work with the end point is added to the <system.serviceModel><bindings>... </bindings></system.serviceModel> section. During web service operations, the amount of generated requests and obtained responses will exceed the default amount of those specified in these settings. Therefore, it is advisable to change settings immediately by increasing values in the following attributes:
maxBufferSize and maxReceivedMessageSize (must have the same value).
maxNameTableCharCount.
See also: