The following operations are available for managing calculation algorithm objects:
To rename algorithm block:
Select the Rename item in the context menu of the block located in the calculation tree.
Open the block for edit using the Edit item in the block's context menu and change its name.
After executing one of the operations the block is renamed.
To resize an object in the working area:
Using the mouse:
Hover the cursor to the point located at object border. The mouse cursor changes to a two-headed arrow.
Hold down the mouse button and stretch or shrink the object to the required size.
Using the keyboard:
Press CTRL+SHIFT.
Resize the object by 1 pixel using the UP, DOWN, LEFT, RIGHT keys.
After executing the operations the object is resized.
To change object order in the working area, use the
Bring to Front and
Send to Back items in the object's context menu.
To select one object in the calculation tree or in the working area:
Click the required object.
Press the TAB key to select the object from left to right and from top to bottom.
Press SHIFT+TAB to select object from bottom to top and from right to left.
NOTE. The object will be selected within the visible working area.
To select all objects in the working area, press CTRL+А.
To select several objects in the working area:
Hold down the CTRL key and click each selected object one after another.
Select the
Cursor mode on the toolbar and use a frame to select objects:
Determine a group of objects to be selected.
Click and hold down the mouse button outside the group of objects to be selected.
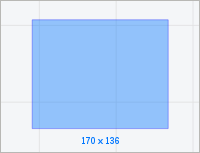
Start dragging the mouse cursor. A rectangular frame appears:

Move the cursor until all required objects are within the frame.
Release the mouse cursor. All objects fully or partially located within the frame are selected.
To align objects relative to one another:
Select several objects.
Execute one of the operations:
Select the Align item in the object's context menu.
Click the
Align button on the toolbar.
Select object alignment option in the command/button's drop-down menu:
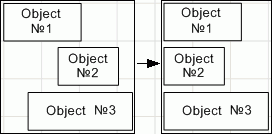
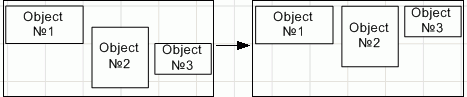
Align Left. The selected objects are aligned to the left edge relative to the leftmost object:

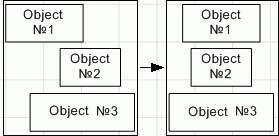
Align Center. The selected objects are aligned to the center. The midpoint is calculated from the rightmost and leftmost objects and their dimensions:

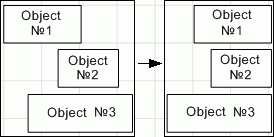
Align Right. Selected objects are aligned to the right edge relative to the rightmost object:

Align Top. The selected objects are aligned to the top edge relative to the topmost object:

Align Middle. The selected objects are aligned to the middle. The midpoint is calculated from the topmost and bottommost objects and their dimensions:

Align Bottom. The selected objects are aligned to the bottom edge relative to the bottommost object:


Connect object with other objects
There are five basic points for an object that are used to connect with other objects in the working area:

A line is a shape that determines correspondence between objects by connection points. A line connected to such a point remains anchored to this point regardless of the object position. Central connection point is floating, that is, the link is anchored to one of the perimeter points depending on the object position.
To connect the object with other objects:
Hover the cursor to one of the object connection points and hold down the mouse button.
Keep holding down the mouse button and drag the cursor to the connection point of other object.
Release the mouse button.
After executing the operations, a line connecting points of object is added.
To search for an object in the working area, execute one of the operations:
Click the
Search button on the toolbar.
Press CTRL+F.
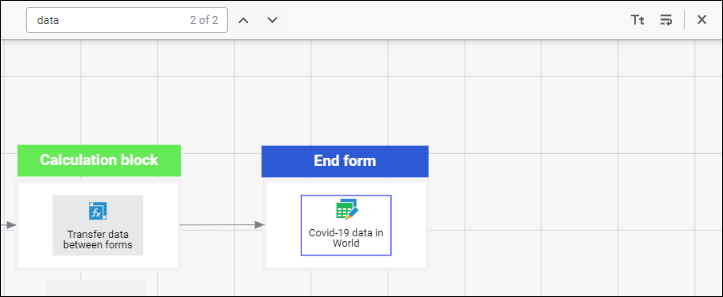
After executing the operation the search panel is displayed:

Enter partial or full object name in the search string and press the ENTER key. If required, use advanced search options:
Click the
Match Case button. The case of the specified letters will be taken into account during search.
Click the
Match Whole Word button. The full object name will be taken into account during search.
After the ENTER key is pressed, the first found object satisfying the search criteria gets focused:

To navigate through the found objects, use the
Find Previous and
Find Next buttons.
To hide the search panel, execute one of the operations:
Click the
Close button.
Release the
Search button on the toolbar.
After executing the operation the search panel is hidden.

Move objects in the working area
To move one or several selected objects in the working area:
Use the UP, LEFT, DOWN, RIGHT keys to move objects by one pixel.
Press SHIFT+UP, SHIFT+LEFT, SHIFT+DOWN, SHIFT+RIGHT to move objects by 10 pixels.
Press CTRL+UP, CTRL+LEFT, CTRL+DOWN, CTRL+RIGHT to move objects by 100 pixels.

Rotate objects in working area
To rotate one or several selected objects in the working area, select the Rotation item in the object's context menu and select one of the methods:
Rotate 90o Clockwise.
Rotate 90o Counterclockwise.
The following operations for working with the clipboard are available in the working area:
To copy an object to the clipboard:
Select the
Copy item in the object's context menu.
Select the object and press CTRL+C.
After executing one of the operations the object is copied to the clipboard.
NOTE. Objects can be copied by the users who have the Access to Update Manager privilege.
To cut an object to the clipboard:
Select the
Cut item in the object's context menu.
Select the object and press CTRL+X.
After executing one of the operations the object is cut to the clipboard.
To paste an object from the clipboard:
Select the
Paste item in the working area's context menu.
Press CTRL+V.
After executing one of the operations the object is pasted from the clipboard to the calculation tree or to the working area.
To delete objects:
Select one or several objects.
Execute one of the operations:
Select the Delete item in the object's context menu.
Click the
Delete button on the toolbar.
Press the DELETE key.
Press the BACKSPACE key.
After executing the operations the selected objects are deleted.
See also:
Building Calculation Algorithm