Custom Class Description
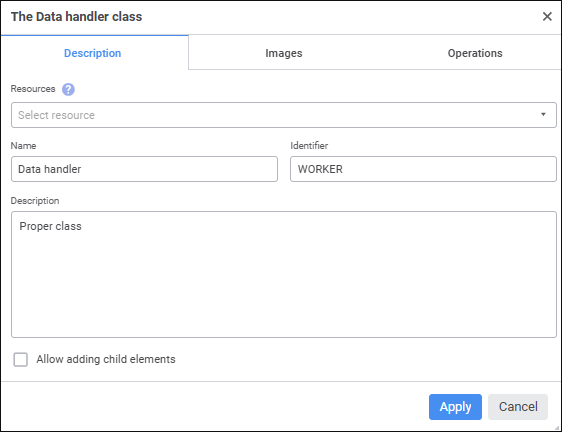
To describe a custom class, use the Description tab in the <class name> Class dialog box.
Set the parameters:
To quickly search for the Resources object in the repository, use the search string. Depending on the object display settings, enter name, identifier, or key of the searched object into the search string. Search is executed automatically as the searched text is entered into the search string. The list will display the objects, which names/identifiers/keys contain the entered text. To clear the search string, click the  Clear button or press the BACKSPACE key.
To set up displaying of repository objects on the side panel, click the  Show Object button and select display option in the drop-down menu:
Name. Objects are displayed with their names. Default option.
Identifier. Objects are displayed with their identifiers.
Key. Objects are displayed with their keys.
Several options can be selected. Identifier and key will be specified in brackets.
The resource can be set for a specific class or for all classes on the Custom Metadata > Object Classes tab.
To add custom class images in the desktop application, use the Small Icon and Large Icon buttons. Clicking the buttons opens the file selection dialog box, in which select an image with 32*32 or 16*16 pixels respectively. The selected file is split into images and saved in the specified resource. Indexes of large and small icons should be equal. To select custom class images, click the corresponding empty area nest to the Large Icon and Small Icon buttons. If a common resource is set for all custom classes on the Custom Metadata > Object Classes tab, clicking the white area one can select the images contained in the ImageList Editor dialog box.
If it is required to open the resource in the desktop application, click the Open button; to create a new resource, click the Create New button.
Name. Enter a custom class name. The default name is CustomClass.
Identifier. Enter a sequence of Latin letters, numbers, and underscore characters, starting with a letter. Custom class identifier should be unique. The identifier generated automatically is set as a default one.
Description. Enter short name for custom class.
Allow Adding Child Elements. Select the checkbox if custom class objects are supposed to be used as container objects. Any repository objects can be created inside container objects. These objects also contain a proper identifier space.
Next, in the web application add custom class images, in the desktop application - set up operations.
See also:
Creating Custom Classes

 To open the dialog box
 Parameters button on the side panel of the object navigator.
 Add button.
 Edit button.