
 Create an object
Tool interfaces in the web application and in the desktop application are identical, and differences in functionality are given in appropriate comments.
Stages of creating a dashboard sketch:
Sketch creating stages also include working with objects. Dashboard objects are: container elements, visualizers, reports, interactive controls and other blocks.
Undo/redo operation with objects
By default, dashboard layout is executed automatically, that is, block size is automatically selected to fit the dashboard on one screen without scrollbars. It is also available to toggle to the manual mode, where block size and their position are set by the user. Return to the automatic mode from the manual mode is not available.
Automatic layout enables the user to arrange objects in the dashboard working area without having to align, bind and change size of created objects.
Automatic layout of objects is executed by the following rules:
The first object is added in the way that it occupies the entire working area.
The second and each next object is added in the way that the current objects are divided in two: horizontally or vertically depending on the mouse cursor position. If the object is a control, the size is adjusted according to the control.
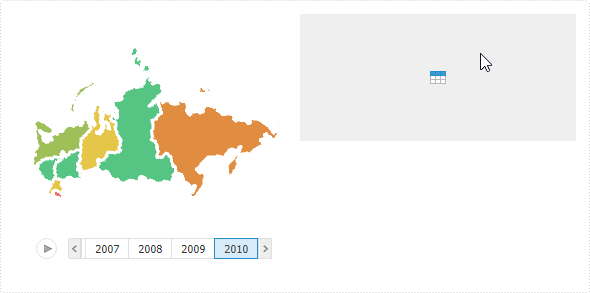
The possible object position is highlighted, and the user is prompted to choose the position of the object to be added, for example:
To insert an object to the selected position, click on it.
Features of automatic layout:
In the automatic layout mode, on resizing an object a blue dashed line appears:
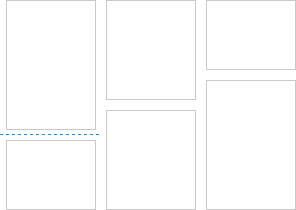
If borders of objects in adjacent rows coincide, these rows are attached to each other. The dashed line becomes common for these rows:
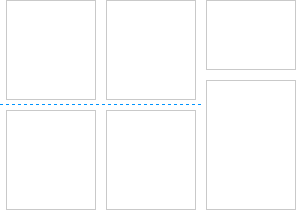
All objects in attached rows are resized simultaneously. To resize one object in an attached row without resizing other objects, hold down the SHIFT key and drag the object border. The rows will be detached.
Each object has a minimum size. If the user reduces the working area, which contains an object with minimum size, scrollbars will be displayed in the object.
Manual layout enables the user to arrange objects in the dashboard working area in a custom way to further align, bind and change size of created objects.
To enable manual layout mode, click the  Manually button in the Blocks Layout group on the Home ribbon tab.
IMPORTANT. Return to the automatic mode from the manual mode is not available.
When the manual layout mode is used, working area custom size can be set up by means of the Custom Size checkbox on the Document/Slide tab side panel tab:
If the checkbox is selected, the following operations are available:
Place blocks one after another.
Set fixed size of working area.
Automatically increase working area size by dragging a block outside the working area. It is available if the block is not bound.
If the checkbox is deselected, the following operations are available:
Dynamically resize blocks on working area scaling.
Custom layout of blocks and resize within the working area.
For details see the Setting Up Basic Parameters of Dashboard section.
By default, automatic object layout mode is used in all created dashboards.
TIP. To learn which settings are required to enable the manual object layout mode for created dashboards, see the How to Disable Default Automatic Object Layout Mode? section.
See also:
 Copy button on the Home ribbon tab.
 Cut button on the Home ribbon tab.
 Paste button on the Home ribbon tab.