Example of the List control:
Example of the Drop-Down List control:


The List and the Drop-Down List controls allow to control block dimension elements selection.
To insert lists use:
The List/Drop-Down List item in the drop-down list of the Control button on the Home or Insert ribbon tab.
The List or Drop-Down List item in the drop-down list of the New Block > Control item of the dashboard's context menu.
The control will be inserted to the working area.
To insert a control for the particular block:
Select the required block.
The List/Drop-Down List item in the drop-down list of the Control button on the Home or Insert ribbon tab. The menu will appear with all block links, for which a control can be created. The link name is formed by the scheme: Link <link_number> (<controlled_dimension_name>).
Select the required link.
The control will be inserted to the working area and configured to the selected link.
Example of the List control: |
Example of the Drop-Down List control: |
|
|
To change selection, view or to edit elements of the selected dimension, use commands in the drop-down menu of the Control item in the context menu of the List and Drop-Down List controls or manually select required dimension elements.
NOTE. The list of dimension elements corresponds with the dictionary of selected block data source.
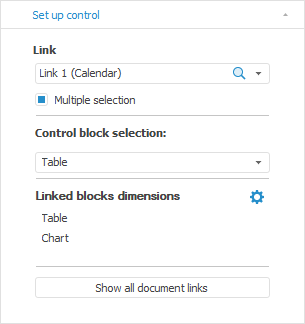
To set up parameters of the List and Drop-Down List controls, use the Control Settings side panel tab.
To set up basic parameters, use the Block tab on the side panel.
Except for basic parameters of object, the Block side panel tab enables the user to set up list font:
The tab is located on the side panel and is used to set up the List and Drop-Down List controls.

The following control settings are available on the tab:
See also: