In this article:
Step 1. Setting Up Repository Connection
To log in on repository connection, in the web application it is available to use OAuth protocols of 1.1 version and OAuth of the 2.0 version.
The OAuth 1.1 protocol enables logging in under the Twitter account, the OAuth 2.0 protocol - under accounts of other services supporting the protocol, for example, Google.
To set up system login with simultaneous use of OAuth 1.1 and OAuth 2.0 protocols, follow the steps specified below.
To connect to the repository under the specific user authorized on the external server, determine the settings described in this step for each user and fort each repository. As a user name, specify the login used by this user on the external server. Repeat this step on all work cluster nodes.
To set up repository connection:
Add the Alg parameter to the registry:
In Windows OS start registry editor using the regedit.exe file located in C:\Windows:
1.2. Go to the HKEY_CURRENT_USER\SOFTWARE\Foresight\Foresight Analytics Platform\9.0\Debug\Crypt section where security certificate privacy key is stored.
1.3. Create the Alg string parameter:
In the section context menu select the Create > String Parameter item.
The parameter will be created, its name will be opened in edit mode. Enter the Alg name and press ENTER.
NOTE. If the Alg parameter already exists, skip the step.
1.4. Set the GOST value for the Alg parameter:
Double click with the main mouse button the Alg parameter or select the Change parameter context menu item.
In the Change String Parameter opened dialog box in the Value field enter the GOST value.
Click the OK button.
In Linux OS open the registry.reg file where registry settings are stored and select one more method:
Add the Alg parameter with the GOST value in the HKEY_CURRENT_USER\SOFTWARE\Foresight\Foresight Analytics Platform\9.0\Debug\Crypt registry section manually.
Export the Windows OS registry section with the added Alg parameter to the file and import it to Linux OS.
For detailed information about registry settings in Linux OS, see the Configuration and Setup section.
Start the PP.Util utility located in the Foresight Analytics Platform installation folder, using command line or as administrator.
2.1. Make sure that for web application pull, the operating system account.
2.2. Save encrypted password to log in the repository:
PP.Util /save_creds "repository identifier" /dc "repository user name"
After executing the operation, the password to connect the repository will be asked. Enter the password, after that the Password for metabase 'repository identifier' and login 'user name' saved message will be displayed.
2.3. To set up repository connection, the user will need a privacy key and a certificate, that is, a personal digital user signature. The privacy key and the certificate are generated in PEM format using specific software tools (such as OpenSSL). Before this set up OpenSSL:
For Windows OS use the latest version of OpenSSL. Unpack or install OpenSSL.
For Linux OS use the version of OpenSSL for Linux OS.
To install OpenSSL in Ubuntu/Debian/Astra Linux, execute the command:
sudo apt-get install openssl
To install OpenSSL in Ubuntu/Debian/Astra Linux, execute the command:
sudo yum install openssl
2.4. Create the openssl.cnf file containing auxiliary information. The file configuration is identical for Windows OS and Linux OS:
[ req ]
default_md = sha1
distinguished_name = req_distinguished_name

[ req_distinguished_name ]
countryName = Country
countryName_default = RU
countryName_min = 2
countryName_max = 2
localityName = Locality
localityName_default = Russia
organizationName = Organization
organizationName_default = Foresight
commonName = Common Name
commonName_max = 64

[ certauth ]
subjectKeyIdentifier = hash
authorityKeyIdentifier = keyid:always,issuer:always
basicConstraints = CA:true
crlDistributionPoints = @crl

[ server ]
basicConstraints = CA:FALSE
keyUsage = digitalSignature, keyEncipherment,
dataEncipherment
extendedKeyUsage = serverAuth
nsCertType = server
crlDistributionPoints = @crl

[ client ]
basicConstraints = CA:FALSE
keyUsage = digitalSignature, keyEncipherment,
dataEncipherment
extendedKeyUsage = clientAuth
nsCertType = client
crlDistributionPoints = @crl

[ crl ]
URI=http://testca.local/ca.crl
2.5. Execute the command to create a root certificate (the command can be used in both Windows OS and Linux OS):
openssl req -config ./openssl.cnf -newkey rsa:2048 -nodes -keyform PEM -keyout ca.key -x509 -days 3650 -extensions certauth -outform PEM -out ca.cer
Additional data is requested on executing the command: PEM password and certificate owner data. On requesting the "Common name" specify name of the issuing certification authority, for example, Test CA.
2.6. Execute the command to generate a key for server certificate (the command can be used in both Windows OS and Linux OS):
openssl genrsa -out server.key 2048
Create a request to sign server certificate (the command can be used in both Windows OS and Linux OS):
openssl req -config ./openssl.cnf -new -key server.key -out server.req
Execute the command to issue server certificate with an expiration of 1 year (the command can be used in both Windows OS and Linux OS):
openssl x509 -req -in server.req -CA ca.cer -CAkey ca.key -set_serial 100 -extfile openssl.cnf -extensions server -days 365 -outform PEM -out server.cer
If it is required to change certificate expiration date, edit the -days parameter before issuing the certificate.
The certificate will be generated as a *.cer file, the privacy key will be generated as a *.key file. Certificate and key names may be custom, for example, client.cer and client.key.
2.7. Save the generated certificate with the *.cer extension in the repository:
PP.Util /save_cert "path to certificate" <repository identifier> <user name>
After executing the operation, the password of the specified user will be asked. The obtained account data is used to connect to the repository. If the authorization and certificate saving are successful, the Certificate from file 'path to certificate' with identifier 'certificate identifier' saved to metabase 'repository identifier' message will be displayed.
2.8. Save the generated privacy key in the registry:
PP.Util /save_private_key "path with key file" <certificate identifier> <algorithm

of encryption := gos|pro, if not specified, then pro>
Identifier of the certificate that is required to execute the command is displayed in the previous command result.
After executing the operation, the Certificate from file 'path to key' with identifier 'certificate identifier' saved message will be displayed.
After executing the operations, the repository connection will be set up.
For OAuth protocols in the Windows OS registry editor or in the registry.reg file in Linux OS add subsections containing names of OAuth servers and set corresponding registry settings in the HKLM\SOFTWARE\Foresight\Foresight Analytics Platform\9.0\PP\BIS\System\OAuth registry section or generation the System section in the settings.xml file:
Parameters for OAuth 1.1:
PPUserNameFormat. User name format, for example, "oa-tw-%s".
ConsumerKey. Registered application key.
ConsumerSecret. Secret code of the registered application.
Parameters for OAuth 2.0:
PPUserNameFormat. User name format, for example, "oa-ggl-%s".
ConsumerKey. Registered application key.
ConsumerSecret. Secret code of the registered application.
AuthUrl. Authorization service URL that will be used in the web application for the RequestTokenUrl parameter.
RequestTokenUrl. Authorization service URL by which the access token will be returned.
RequestCallbackParam. Attribute named that will be used to send URL to forward used after authorization in web application, for example, «redirect_uri».
UserDataUrl. Data service URL that will be used to return user data after authorization in the web application.
UserIdAttr. Path to the field in the requested data that will be used as unique user identifier, for example, «/path/to/id».
UserNameAttr. Path to the field in the requested data that will be used as displayed user name, for example, «/path/to/displayName».
When setting up repository connection under the specific user authorized on the external server, values of the UserIdAttr and the UserNameAttr parameters may match.
Values specified in the ConsumerKey and ConsumerSecret parameters can be obtained after registering developed application at the required OAuth server. Those parameters are required in order that BI server can check after authorization on OAuth server and authorizr the corresponding user in repository.
If the ConsumerKey and ConsumerSecret parameters are not specified, internal settings of the BI server are used; the OAuth server must contain registered application based on Foresight Analytics Platform.
After executing the operations, parameters for the OAuth protocols will be set.
NOTE. In the designer of business applications it is possible to set up automatic redirection to user authorization via the OAuth 2.0 protocol when logging in the web application. To do this, in the DBA.config.json file set the OAuth2 value in the authentication field and and in the autoStartOauthProvider field specify the authorization service specified on setting up OAuth parameters.
To prepare BI server, check whether there is internet connection on the server where BI server is installed and make sure that access to services sites is open.
If proxy server is used for internet connection, then create the CURLOPT_PROXY and CURLOPT_PROXYUSERPWD system variables:
In Windows OS open advanced system settings using the Properties > Advanced System Settings computer context menu»:
On the Advanced tab in the System Properties section click the Environment Variables button.
In the System Variables section of the Environment Variables dialog box click the Create button:
CURLOPT_PROXY. Set the proxy.sever.ru:8080 value to the variable where proxy server URL and port used for connection are specified.
CURLOPT_PROXYUSERPWD. Set the login:password value to the variable where user name and password for internet connection are specified.
In Linux OS add environment variables to the envvars file located at: /etc/opt/Foresight/fp9.2-biserver. The file contains environment variables which are read on BI server start with the Apache2 instance.
Add variables:
CURLOPT_PROXY. Set the proxy.sever.ru:8080 value to the variable where proxy server URL and port used for connection are specified
CURLOPT_PROXYUSERPWD. Set the login:password value to the variable where user name and password for internet connection are specified.
Variables are added to the file in the format:
export <variable name>=<value>
For detailed information about adding environment variables in Linux OS, see the Configuration and Setup section.
After executing the operation, the BI server will be ready.
When setting up and debugging web application the user may face various errors. To track executed actions and collect debug output, enable logging. To do this, in the file /etc/opt/Foresight/fp9.2-biserver/envvars add the environment variables PP_LOG and CURLOPT_VERBOSE. For details see the Configuration and Setup article.
To prepare web application:
In the PP.xml file set the OAuth value to the authentication attribute in the <metabase> section and set the true value for the enabled attribute in the <oAuthService> section. Set the use_default_user_oauth attribute to true if repository connection is to be established under the default user, or set the false value to connect the repository under the specific user authorized on the external server:
<pp>
…
    <metabase authentication="OAuth" id="repository identifier"/>

    <oAuthService enabled="true" use_default_user_oauth="true"/>
…
</pp>
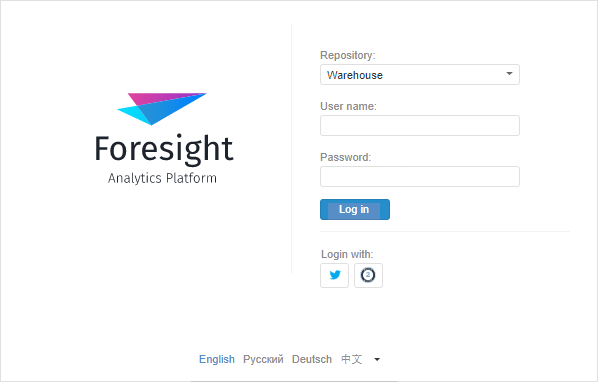
After executing the operations, system login authorization buttons using the OAuth protocols will be available on the login.html page:
Select the repository and click the button of any authorization services without entering user name and password. After that navigation to the account page of corresponding service, for example, Twitter or Google, will be executed. Enter user name and password on the service page and click the Log In button. After successful login, the web application start page opens.
See also:
Questions and Answers | Setting Up Login via SAML