To connect extensions to Foresight Analytics Platform web application, the following installations and settings must be executed:
Web application back end of Foresight Analytics Platform.
Extensions of Foresight Analytics Platform.
Designer of business applications back end.
How to connect extensions to Foresight Analytics Platform web application:
Open the PP.xml file containing settings of Foresight Analytics Platform web application for edit.
Create a new subsection with extension connection settings in the <modules> section. Description of subsections of the <modules> section and attributes and subsections that are required for the specified attributes are given below.
Save changes to PP.xml file.
Restart BI server which is used by web application back end.
Open web application of Foresight Analytics Platform.
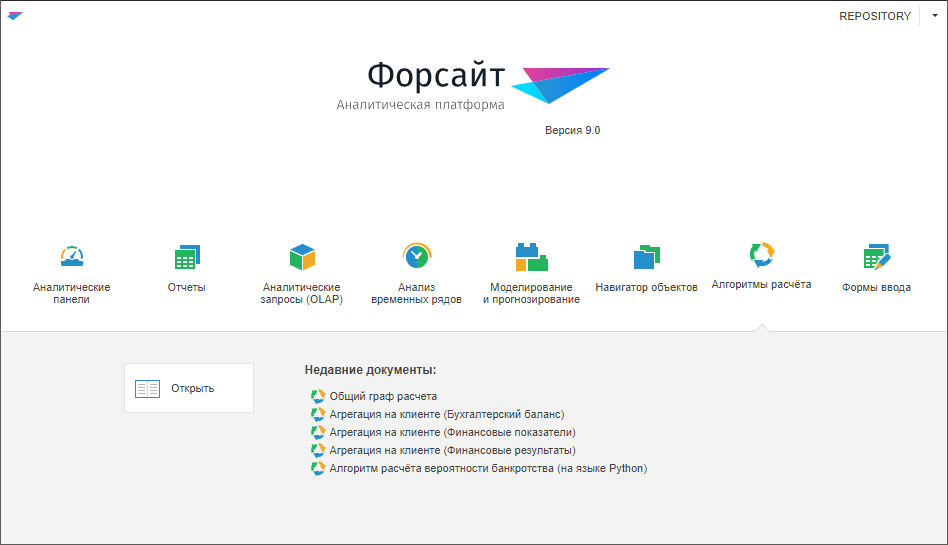
As a result, the extension will be connected to the Foresight Analytics Platform web application and the welcome screen will display the button to work with extension.
Names of subsections of the <modules> section for extensions setup:
| Attribute/section | Description |
| <entryform> | Calculation Algorithms |
| <algorithm> | Interactive Data Entry Forms |
| <agreement> | Business Process Management |
Set the following attributes and subsections for the subsections mentioned above:
| Attribute/section | Description |
| name | Name of extension which will be displayed in the web application welcome screen. |
| url | Path to the extension in designer of business applications back end. It is specified in the format: url="http://<server>/DBA_App_v9.2/#/<extension>" The following can be set as extension:
url="/DBA_App_v9.2/#/dataentryform" |
| Visible | The attribute that extension is displayed in the web application welcome screen. Available values:
|
| data | Extension type. Available values:
|
| classId | Identifier of extension object class. It is specified in the format: classId="[<class>]" To view class identifier:
In the dialog box that opens, on the Description tab in the Identifier box, there will be an identifier of extension object class. For example: classId="[DATA_ENTRY_FORM_CLASS]" |
| eventHandler | Identifier of the module, which implements the CopyCustomObject custom method for copying extension object. It is specified in the format: eventHandler="<module_identifier>" To view identifier of the selected module in the desktop application, select the Properties item in the object's context menu. In the Object Properties dialog box that opens, the Identifier box on the Object Type tab contains the module identifier. For example: eventHandler="UNIT_WEB_METHODS" The developed CopyCustomObject custom method in the specified module should contain following signature: Public Function CopyCustomObject(SourceKey, DestFolderKey: Integer; Name: String=""; Id: String=""): Integer; |
| useCopyHandler | Indicates whether extension object should be copied using the custom method specified in the module specified in the eventHandler attribute. Available values:
|
| actions | Operations available for the extension in the web application welcome screen. Available operations:
NOTE. Parameter is unavailable. Reserved for future use.
actions="[0, 1]" |
| <moduleUrlSettings> | Determine a string: <moduleUrlSettings sign="?"/> Change character to specify parameters from # to ?.This string is required in order that the Foresight Analytics Platform web application and designer of business applications web interface will be compatible. |
| <images> | The section with icon settings for extension. It contains the following subsections:
Indexing of images in sprites contains from zero. For icons of 32x32 pixels, the system sprite with the modules32 identifier is used. The sprite contains one string, determine the following columnIndex for extensions:
For icons of 16x16 pixels, the system sprite with the modules16 identifier is used. The sprite contains one string, determine the following columnIndex for extensions:
If you want to use your icons from your sprite, then after the <Modules> section create the <imageLists> section containing subsections with sprite settings. |
The example is given for the PP.xml file containing connection settings for Calculation Algorithms and Interactive Data Entry Forms extensions to the Foresight Analytics Platform web application:
<pp>
    <service url="http://localhost/FPBI_App_v9.2x64/axis2/services/PP.SOM.Som" />

    <metabase id="REPOSITORY" recentObjects="true" />
    <cultures>
        <culture cultureName="ru" />
        <culture cultureName="en" />
    </cultures>
    <Modules>
        <algorithm name="Calculation Algorithms"
            url="/DBA_App_v9.2/#/elt"

            Visible="1"
            data="268033"
            classId="[P10002_CALC_ALG]"
            actions="[0]">
            <moduleUrlSettings sign="?"/>
            <images>
                <WelcomeScreenIcon imageListId="modules32" rowIndex="0" columnIndex="8"/>
                <AddressBarIcon imageListId="modules16" rowIndex="0" columnIndex="8" />
                <DocumentsIcon imageListId="modules16" rowIndex="0" columnIndex="8" />
            </images>
        </algorithm>
        <entryform name="Data Entry Forms"
            url="/DBA_App_v9.2/#/dataentryform"

            Visible="1"
            data="2103041"
            classId="[DATA_ENTRY_FORM_CLASS]"
            actions="[0]">
            <moduleUrlSettings sign="?"/>
            <images>
                <WelcomeScreenIcon imageListId="modules32" rowIndex="0" columnIndex="10"/>
                <AddressBarIcon imageListId="modules16" rowIndex="0" columnIndex="13" />
                <DocumentsIcon imageListId="modules16" rowIndex="0" columnIndex="13" />
            </images>
        </entryform>
    </Modules>
</pp>
As a result, the web application welcome screen will contain buttons to work with extensions:

See also:
Basic Web Application Settings | Installing Foresight Analytics Platform Extensions