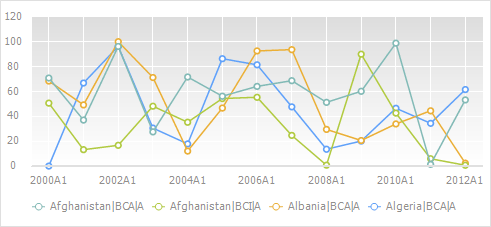
A chart is used for graphic presentation of table data. For example:![]()

Basic operations with chart are described below. For detailed description of features see the Setting Up Chart Components section.

 Select data table area, by which a chart is plot
Click the ![]() Visualizer Data button on the Home or Data ribbon tab to select a data table area that is used to plot a chart. The menu is displayed:
Visualizer Data button on the Home or Data ribbon tab to select a data table area that is used to plot a chart. The menu is displayed:
Entire Table. The chart is plot by all table data.
Selected Area. The chart is plot by data selected in the table.

 Select series displayed on the chart
The operation is available if the calculated series is selected in the data table.
To select displayed series, click the ![]() Show Series button on the Chart ribbon tab. Select required series in the drop-down menu of the button. Depending on the calculation method, the following series are available:
Show Series button on the Chart ribbon tab. Select required series in the drop-down menu of the button. Depending on the calculation method, the following series are available:
Source Series. Source data of the output variable.
Modeling Series. Modeled values.
Forecast. Forecast values calculated with the equation.
Residuals. The difference between source and modeled data.
Upper Confidence Limit. The upper confidence limit values for the forecast values.
Lower Confidence Limit. The lower confidence limit values for the forecast values.
To show of hide a series, click the series name in the legend.
To edit series data on the chart, click the ![]() Enable Editing button on the Chart ribbon tab. Select the edit mode in the drop-down menu of the button:
Enable Editing button on the Chart ribbon tab. Select the edit mode in the drop-down menu of the button:
By Points. Each point in the series is edited separately.
Select a series in the legend or the chart using the mouse. After this editable points of the chosen series become selected. Hover the mouse over a point of the series (the cursor becomes a double-headed arrow), hold the left mouse button down, and move the point to a new position. The current value of the point is displayed next to the point.
Drawing. Multiple series points are edited in a single movement.
Select a series in the legend or the chart using the mouse. After this editable points of the chosen series become selected. Hover the mouse over a point of the series (the series background along the value axis is highlighted), hold down the left mouse button, and move the point to a new position. Keep holding the mouse down to edit the neighboring points. The current value of the edited point is displayed next to the point.

 Change data transfer method to the chart
By default data is sent by rows and series are generated from data in rows.
To transfer data to the chart by columns, click the ![]() Rotate Rows/Columns button on the Chart ribbon tab. As a result series will be generated from data in columns.
Rotate Rows/Columns button on the Chart ribbon tab. As a result series will be generated from data in columns.
To return to data transfer by rows, click the ![]() Rotate Rows/Columns button one more time.
Rotate Rows/Columns button one more time.
To get the example, see the Example of Changing Data Transfer Method section.
To change chart type, click the ![]() Type button on the Chart or Home ribbon tab. The menu opens that contains icons of various chart types. Pointing the mouse cursor to the icon shows a tooltip with name of the chart type. Choose the required chart type.
Type button on the Chart or Home ribbon tab. The menu opens that contains icons of various chart types. Pointing the mouse cursor to the icon shows a tooltip with name of the chart type. Choose the required chart type.
Chart type can also be changed on the Chart side panel tab.
To hide or show legend position, use the drop-down menu of the Legend button on the Chart ribbon tab.
It is also available to use the Legend side panel tab.
Labels are captions of series observations.
To hide or show labels, use the drop-down menu of the Legend button on the Chart ribbon tab.
NOTE. The option is available only in the desktop application.
To set up chart component, double-click it. An appropriate dialog box opens to set up the component format.
For detailed description of parameters of chart component format see Setting Up Chart Components section.
To automatically build corridors on the calculated series chart, click the ![]() Chart Corridors button on the Chart ribbon tab. A corridor is added between the forecast series and confidence limits.
Chart Corridors button on the Chart ribbon tab. A corridor is added between the forecast series and confidence limits.
NOTE. The corridor is shown, if the forecast series and confidence limit series are present on the chart.
To add the corridor manually and set up existing corridors, select the Chart Corridors item in the chart's context menu. The Chart Corridors dialog box opens where the user can perform required operations.
See also:
Description of Time Series Analysis Interface