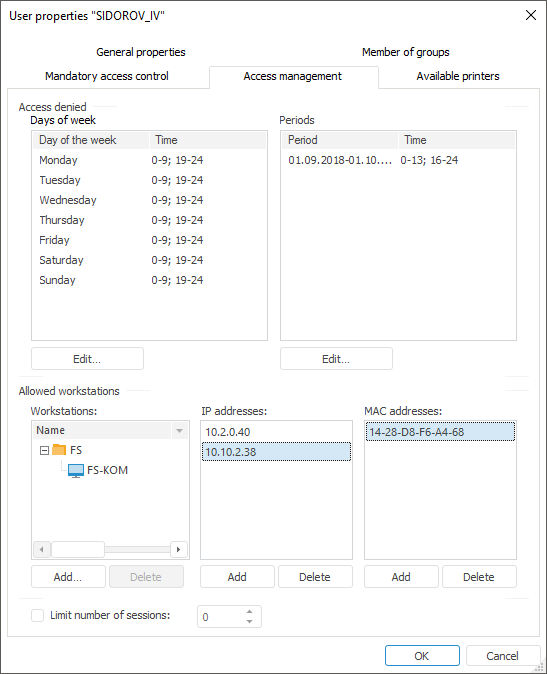
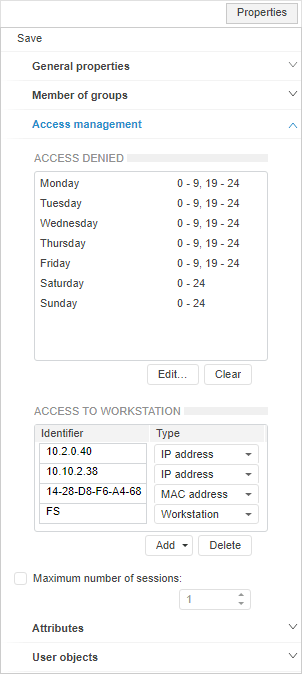
To manage parameters of user access to the system, use the Access Management tab in the User Properties dialog box in the desktop application and on the Properties side panel in the web application:
NOTE. When roles of information security administrator and application administrator are separated, the Access Management tab is available only for information security administrator.


By default, the user can access the system any time, from any workstations, IP and MAC addresses.
If access time is set up for the user of Foresight Analytics Platform, the system shows warning first 15 minutes and then 5 minutes before the time limit. When this time elapses, the user is disconnected.

 Deny access by days of the week
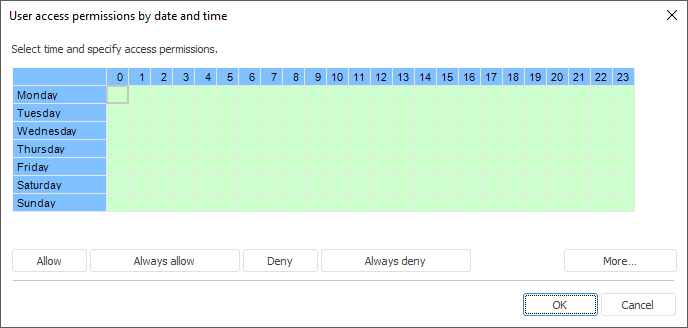
To set up access by days of the week, click the Edit button below the Days Of Week list in the desktop application. The User Access Permissions by Date and Time dialog box opens:
To set up access by days of week in the web application:
Click the Edit button below the Access Denied list.
Click the Weekly button in the Deny Access by Schedule dialog box:
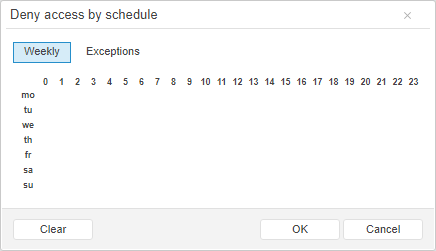
The table by days of week or days is displayed in the User Access Permissions by Date and Time or Deny Access by Schedule dialog box. One cell equals one hour of access on the specified day of the week, starting from the specified time.
To separate access time, select the required cell range.
NOTE. The selected cell range in the web application denies system login during the selected time.
After the cell range is selected in the desktop application, click the appropriate button:
Allow. Access to the system is allowed during the selected time; the cells are highlighted in green.
Deny. Access to the system is denied during the selected time; the cells are highlighted in red.
Always Allow. Click the Always Allow button to allow the user access to the system at any time; all the cells will be highlighted in green.
Always Deny. Click the Always Deny button to prohibit the user access to the system at any time; all the cells will be highlighted in red.
Advanced. A dialog box for setting access time on specified dates opens.
To set up access on specific dates in the desktop application:
Click the Edit button below the Periods list.
Click the Advanced button on setting up access by days of the week.
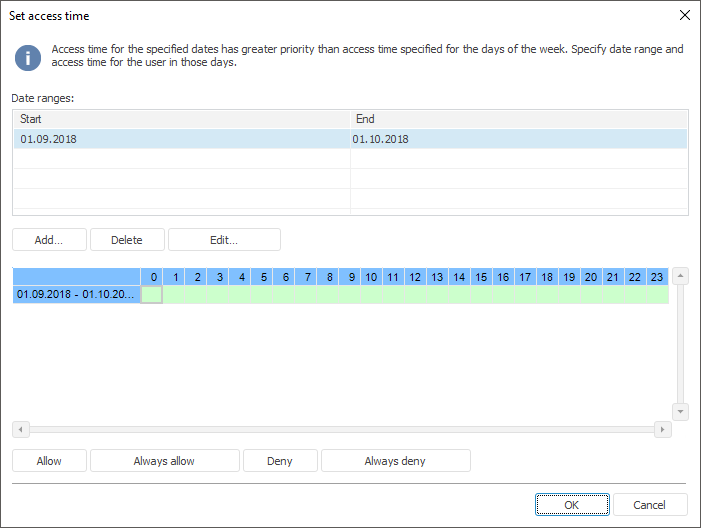
To set up access by specific dates in the web application:
Click the Edit button below the Access Denied list.
Click the Exceptions button in the Deny Access by Schedule dialog box:
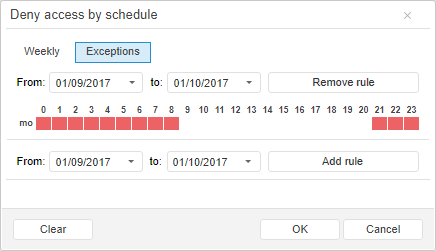
To add a range of dates:
In the desktop application:
Click the Add button. In the dialog box that opens specify the period start date and the period end date:
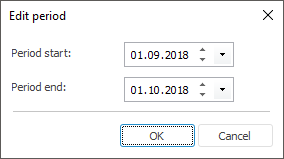
The added period is displayed at the bottom of the window in the table containing the times of day.
In the web application:
Start and end dates are set in the Deny Access by Schedule dialog box.
After the period is set, add a rule by clicking the Add Rule button to set up access.
NOTE. Access is set up identically to access setup by days of the week.
To edit the selected date range in the desktop application, click the Edit button, after which the Edit Period dialog box opens.
To remove the selected date range, click the Remove or Remove Rule button in the Set Access Time or Deny Access by Schedule dialog box.
To delete the whole list of access prohibitions in the web applications, click the Clear button below the Access Denied list.
The created date ranges will be displayed on the Access Management tab in the Periods or Access Denied list.
NOTE. In the web application, the list of date ranges and days of week is contained in the Access Denied general list.
IMPORTANT. Denying access by specific dates has a higher priority than denying access by days of the week.
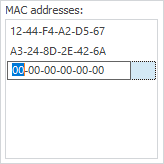
In the desktop application, a list of workstations, IP addresses, and MAC addresses is generated for the user, from which he is allowed to log in to the system, in the Allowed Workstations group. By default, access is allowed from any workstations, IP and MAC addresses:
Workstations. This list contains workstations, which allow the user to access.
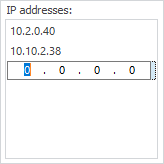
IP Addresses. This list contains IP addresses, from which the user is allowed to access. IP address consists of four groups of decimal numbers separated by points. The first group must include a number between 1 and 223, other groups must include numbers between 0 and 255.
MAC Addresses. This list contains MAC addresses, from which the user is allowed to access. MAC address consists of six groups of hexadecimal numbers separated by "-" (dash). It is possible to enter only numeric values and the following characters: "A", "B", "C", "D", "E", "F".
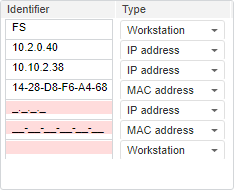
In the web application, workstations, IP addresses, MAC addresses are set in the Access to Workstation list:

 Work with lists of allowed workstations
To add a workstation, IP address or MAC address:
In the desktop application:
Click the Add button below the list.
Select the Add context menu item.
Set focus on a list element and press the INSERT key.
To add a workstation, use the Select Workstations dialog box. In this dialog box select the workstations, from which the access must be allowed. When an IP address or a MAC address is added, a new item with a mask for entering an address is added to the list. After the address has been entered, press the ENTER key or move the cursor to another component. Press the ESC key to cancel entering address.
In the web application:
Click the Add button below the list.
A new element is added to enter a workstation/with mask to enter IP address or MAC address. After the address has been entered, press the ENTER key or move the cursor to another component. To cancel entering address, click the Delete button.
To edit IP address or MAC address selected in the list:
In the desktop application:
Select the Edit context menu item.
Press the ENTER key to confirm changes or to transfer input focus to another component, or press the ESC key to cancel changes.
In the web application:
Click the address bar and make necessary changes.
To confirm changes or to move focus to the other component, press the ENTER key.
To delete the selected workstation, IP address or MAC address from the list, execute one of the following operations:
In the desktop application:
Click the Delete button.
Select the Delete context menu item in the list.
Press the DELETE key.
After executing one of the operations an operation confirmation dialog box opens.
In the web application:
Click the Delete button.
To delete all workstations, IP addresses or MAC addresses from the list, select the Clear context menu item in the desktop application. An operation confirmation dialog box opens.
Multiple list elements can be selected by holding down the CTRL key.
To select all list elements in the desktop application:
Use the Select All context menu item.
Press CTRL+A.
The Limit Number of Sessions or Maximum Number of Sessions checkbox enables the user to determine the maximum number of user repository connections. The checkbox is deselected by default, and the number of sessions is unlimited. When the checkbox is selected, specify the number of sessions. To check the current number of user sessions, open the Connected Users dialog box in the desktop application.
NOTE. To enable session limit on Microsoft SQL Server, the user needs to be granted the VIEW SERVER STATE permission.
See also:
Creating and Editing User Account | Adding Values to User Attributes